
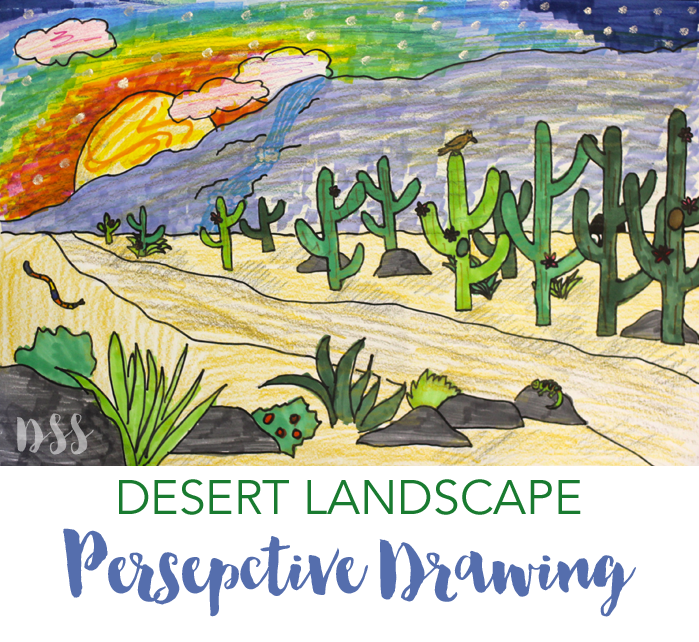
Learning how to draw perspective is one of those art techniques that gets kids to sit up and take notice. Part of the excitement is realizing that art has rules. Kids are aware of the basic meaning of perspective, but when you actually show them what the vanishing point is and how it relates to the size of objects, its truly an aha moment. That’s why I created this perspective landscape to help implement the understanding of perspective.
 Drawing perspective can be applied to most any type of landscape project but I think it works best when there is a road featured in the drawing. Roads are familiar and many kids know that they appear smaller as it moves away from the viewer. In this lesson, on perspective landscape, roads were placed in the center of the picture. If this is your first time teaching a lesson on perspective, I would start with this one.
DRAWING A DESERT PERSPECTIVE LANDSCAPE
For this perspective lesson I thought it would be interesting to have a different view point. Instead of placing the vanishing point on the (horizontal) horizon line like the lesson referenced above, I placed it off to the edge of one side of the paper. It is still located on the horizon line, just not in the middle of the paper.
- You’ll need rulers or some type of straight edge, a pencil and an eraser and a piece of white 12″ x 18″ paper to start.
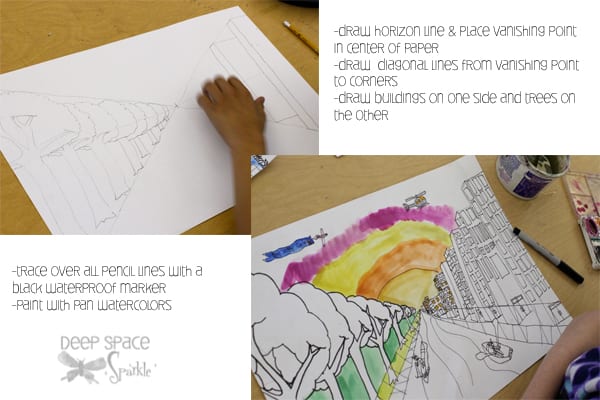
- Draw horizontal line in the center of the paper. Or, you can do what I did and folded the paper in half horizontally. This way, the crease can act as the horizon line. Then, place ruler on one side of the line at the paper’s edge. Trace an angle line to the opposite edge of the paper.
- Do again but this time above the horizon line. The angle lines don’t have to touch the corners as this might be too steep of an angle.
- The drawing of the cacti and the road will occur on the angle lines and NOT the horizon line. Erase any horizon line marks so this rule doesn’t confuse the kids.
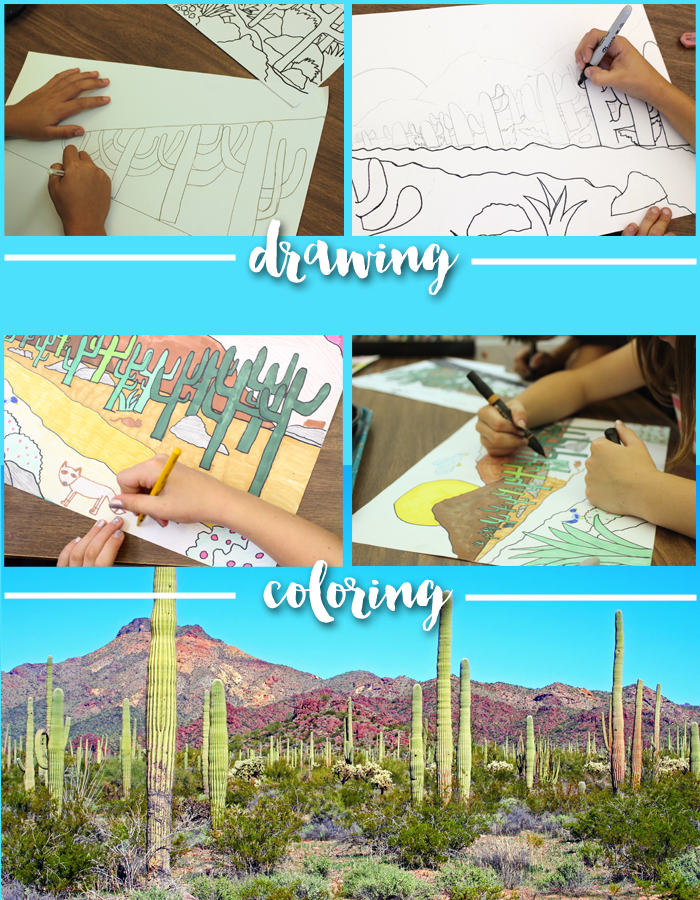
- We chose to draw saguaro cactus and a dirt road to demonstrate the perspective.
- To do this, start on one side of the paper and draw a large cactus that extends from the two angle lines. Continue to draw the cactus towards the left side of the paper. The cactus will get smaller if the student keeps the tip and base of the cactus within the two angle lines. Many will forget the rule and start drawing random cactuses. I had some fun with the kids at this point because I would make them erase their cactus and follow the rules. If you know me, you would know that I love when kids break the (art) rules, so this was just a fun way to reinforce the rules of perspective.
- The road is drawn next. It’s not as precise as the cactus. The two road lines follow the bottom angle line, starting small or close together at the left hand side of the paper (vanishing point) and growing larger as it nears the right hand side of the paper.
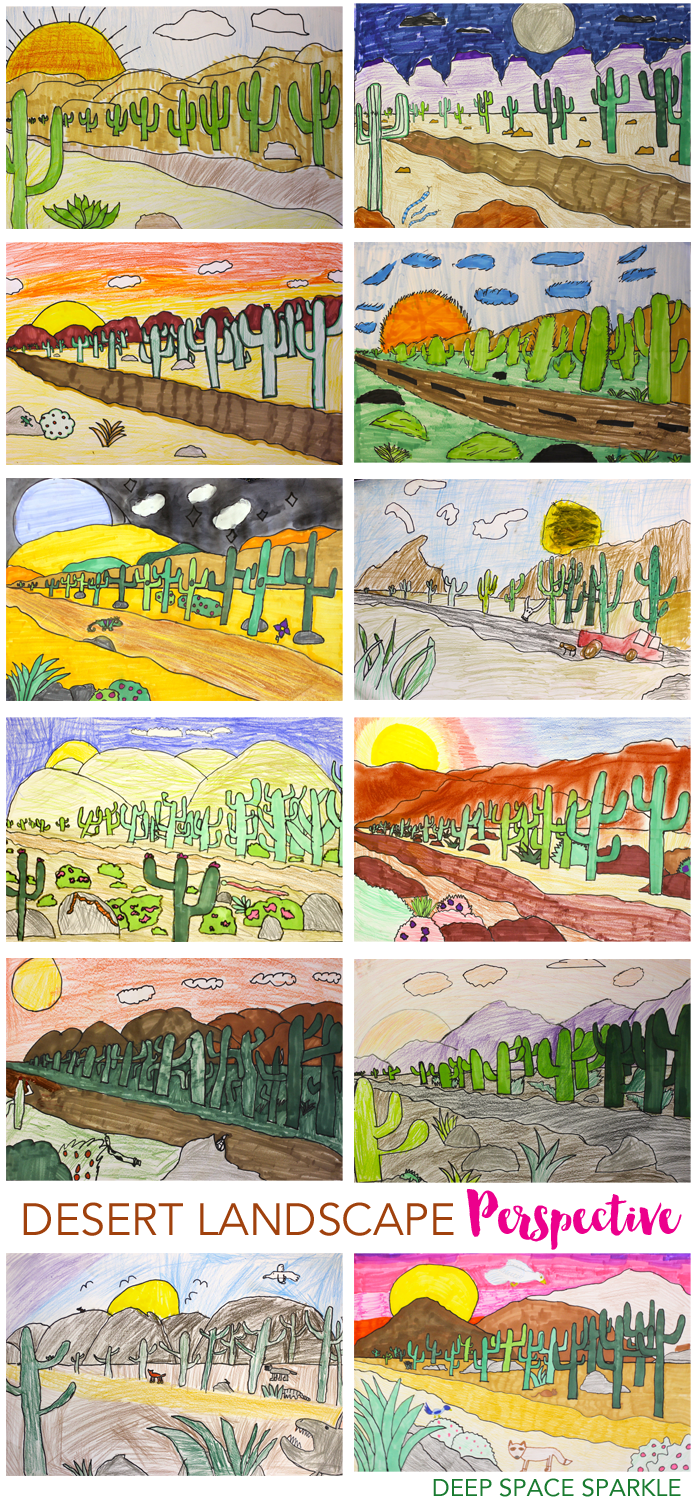
- To finish up, the students created a background, foreground and desert details. The traced over their pencil lines with a black marker and used a combination of colored pencils and markers to color.
These amazing desert perspective landscapes took my 5th grade students between 3-5, 45-minutes sessions to finish.
Follow Us
i must have a go at this landscape, but really need to Australianise it. We don’t have cacti growing in our deserts.
Wonderful lesson tips, thank you so much!
I have been wanting to do a lesson on perspective. So I purchased the pdf lesson! I can hardly wait!
I like this lesson. It does make the concept simpler for the students to grasp.
Thank you so much for this idea! We used it in our desert unit and I wrote about it on my blog. Thanks again!!
https://homewiththethreebears.wordpress.com/2016/03/31/africa-unit-desert/
Awesome little teaching!!! What lovely drawings!!! Thank-you for your insight!
One of the “TIPS” I give my students is, “Vertical is ALWAYS vertical”! This seems to help them avoid making things “lay down” to make the angle work between what they KNOW and what we SEE.
Another tip is to teach how to show Close Up and Far Away first. I make a T-Chart, with CLOSE on one side and FAR on the other. Then we take a ‘field trip’ outside, and stand at the end of a sidewalk to see how the sides converge as they move away from us. First entry: Close – wide, Far – narrow for parallel lines.
Next, I send students to spread out on the length of the sidewalk. From any point, they can now see someone who is farther away than someone else. We look at FEET. The bottom of items seems LOWER Close up, gets HIGHER as it moves away.
Things look BIGGER close up, and SMALLER far away. They are also OVERLAPPING others if closest, and OVERLAPPED as they get farther away.
Finally, we look at a close tree. We note the colors and textures in the bark and leaves, the shapes in the leaves, etc. Then we look at a tree that is as far away as we can spot. Can you see the textures, colors and shapes? CLOSE has more detail, FAR has much less.
CLOSE colors are brighter, and FAR colors seem dimmed (Dust and water in the air to see through!). While we are there, we look at the color of the sky and notice that it seems to darken as our eyes go up. Again, dust and water in the air! I show them a ball, and with a ruler, we see a shorter distance straight up than to the horizon to get outside the ‘atmosphere layer’.
NOW, when you start to draw whatever you choose in one point perspective, you have additional “fresh” background knowledge to draw from – pun intended!
Sue Anderson, I love the integration of math and science into your field trip!
I love how you include math and science
Your instructions look very aspiring.
the way technique is explained, it´s excellent!!
Hey! That’s very useful , could you please help me in making lesson plan for teaching a picture to grade 1 , step by step.
The art was fun to do at home and it was east to do on computer
One of the “TIPS” I give my students is, “Vertical is ALWAYS vertical”! This seems to help them avoid making things “lay down” to make the angle work between what they KNOW and what we SEE.
I’m looking forward to trying this with my class tomorrow, to tie in with our work on North America and whilst reading Holes!
Awesome lesson!
Can I get the instructions with sample drawing for my students?
This looks like a great beginner lesson for one point perspective. I really like how you put the vanishing point off to the side, instead of in the middle. Change is good! Thank you!