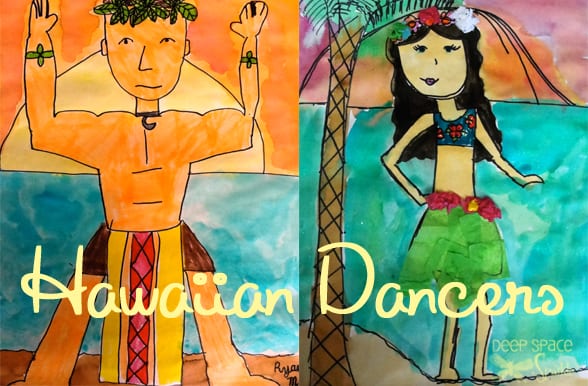


What you’ll need:
– 12″ x 18″ white drawing paper (or watercolor paper if you have it)
– Black waterproof marker (I use Sharpie brand)
– Watercolor paints (I use liquid watercolors but pan watercolors are fine)
– Colored markers
– Tissue paper
– Optional: small silk flowers, leaves or decorations
Drawing the Dancers

The steps for drawing the dancers are varied, depending on how you like to draw. For me starting with a letter “U” about a hands length down from the top of the paper works best. Some kids will draw this letter large and some will draw it small. The resulting figures will be based on whatever size created, so make sure you reinforce the notion that all sizes are just fine.
I leave the face for now and go directly to the neck.
After the neck, draw shoulders. I emphasize that the male dancers have broad shoulders and the female dancers have small shoulders.
Next comes a trick I learned as a fashion illustrator. It brought about a few laughs but basically it gets the job done. Just below the shoulders, add two dots (one below the left shoulder and one below the right). So you can see why the giggles, but these dots are guidelines for the torso. From those two “dots”, draw a line, slanting inwards, to create the waist.
For the female the slant is more exaggerated, for the male, not so much.
Now that we have shoulders and a torso, its safe to draw arms. I give a few options here, so you might want to do the same.
After the arms, draw a skirt or in the case of the male, a sash. Draw the legs and then go back and draw a head piece first then the hair. Facial features are next and then the background. I put up a few Tropical scenes to give the children ideas, but basically they knew what they wanted.
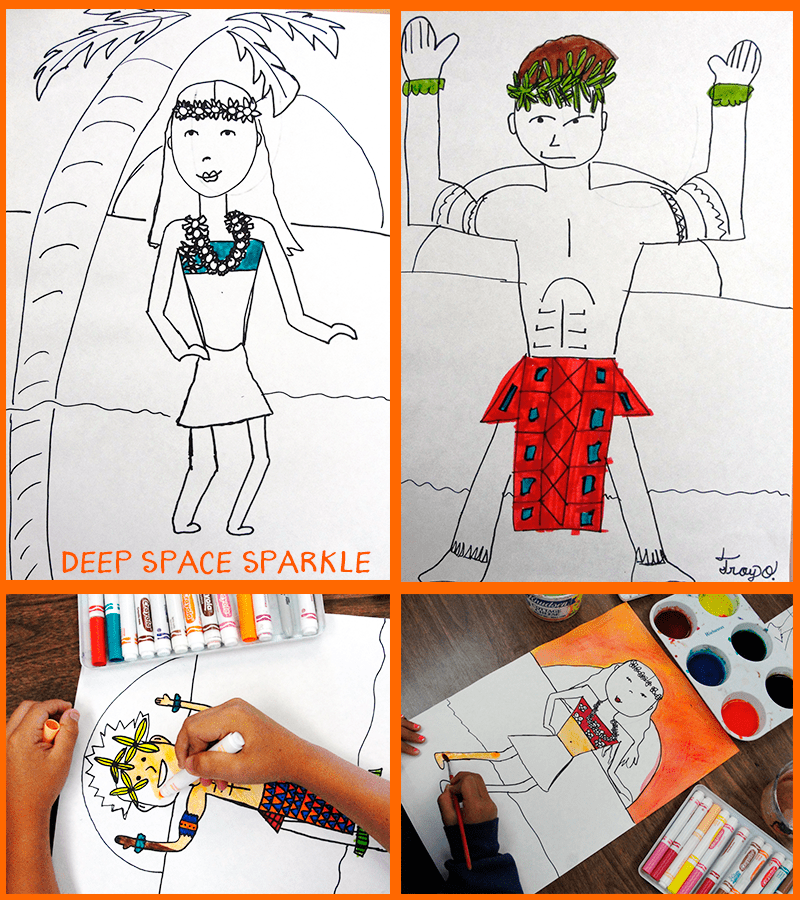
After the drawings are complete, use markers to color in any small areas. It doesn’t make sense to color in large areas with markers, as painting with watercolors is much faster.
Hand out pans of watercolor paint. I had a few bottles of glitter watercolor paint and it worked really well with this lesson. The sparkling yellow made the sunset glimmer and the sparkly blue was perfect for the ocean.
The final step is to add embellishments such as tissue paper to the skirts, beads or flowers to the hair, etc. Some kids chose not to add anything, which was fine.
Fourth Grade Gallery
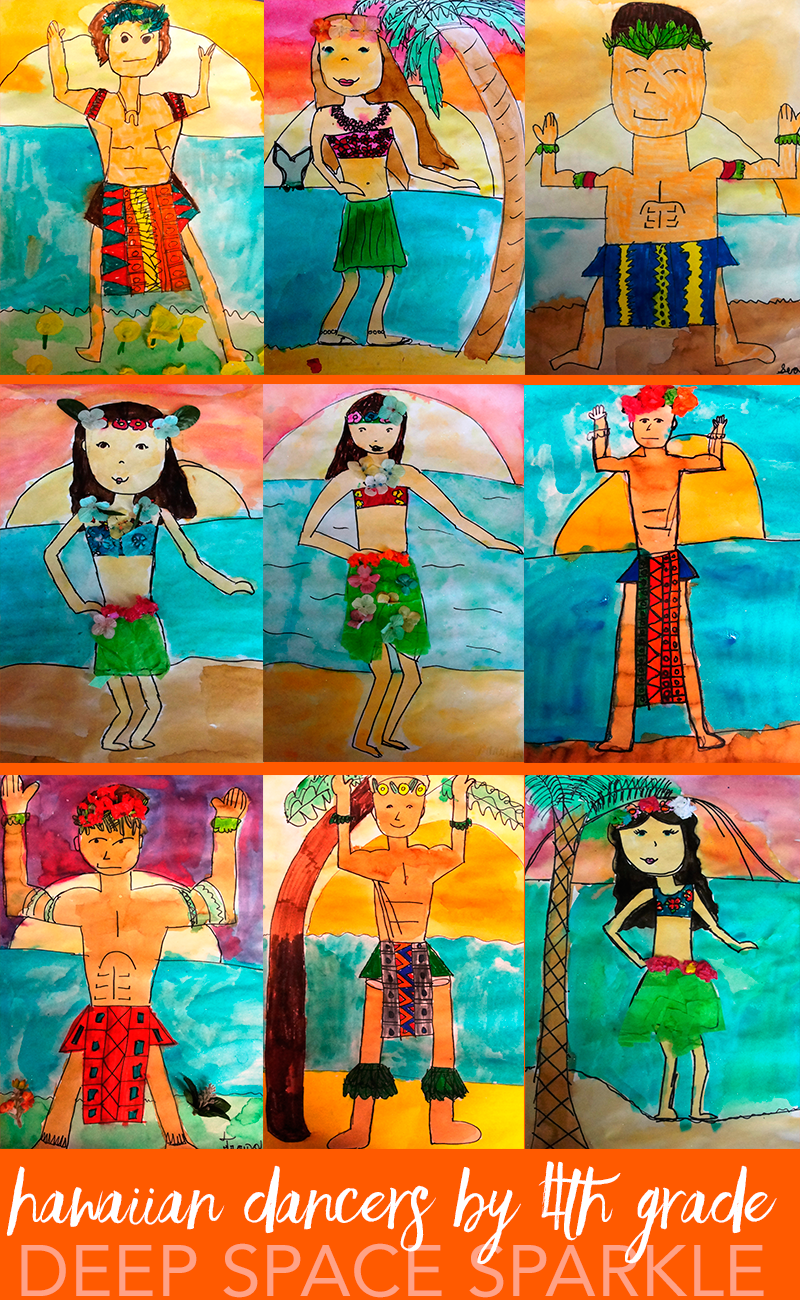


I just love these! Many of my students have been to Hawaii (as fellow Southern Californians) and would really have fun with this project(As would their parents)!
Thanks so much for sharing!
Looks so fun! Will try it out for our summer camp art project. Maybe will have Hawaiian party play in the background as the kids have their lab time.
this is the best
I LOVE THIS ART