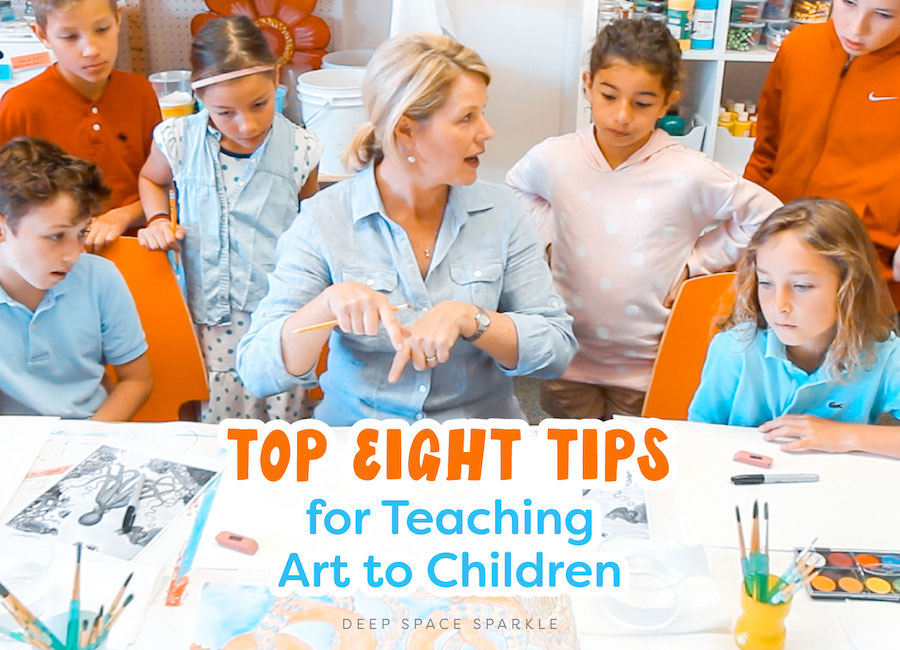


I love teaching art to children and my philosophy is quite simple: to engage, inspire and teach art with age-appropriate techniques and subjects.
I’ve only been teaching art to children for eight years but it feels like I’ve been teaching my whole life. I remember what I was attracted to as an artistic child: how-to-draw books, colorful illustrations and art supplies (especially the jumbo pack of Crayola Crayons with the built-in sharpener). I keep these things in mind when I’m front and center amongst thirty kids. Over the years, I have tried many techniques and found some more effective than others.
Here is my life of top eight tips for teaching art to children:

#1 Ban Pencils and Erasers
Sounds harsh, right? I rarely use pencils and erasers in my classrooms with the exception of a few lessons for upper grades. The reason is purely practical: small pencil leads encourage small drawings. If a kinder is drawing a portrait and then is required to paint that very portrait, using a pencil will surely lead to frustration. It’s hard to paint tiny eyes! There is another reason: pencil markings can be erased, which leads to second guessing, which leads to lots of eraser action, which leads to class being over before the child has anything on his paper. Using oil pastels and/or markers allows the artist to move quickly, commit to the drawing and forgive their “mistakes”. This is a big part of art for me; giving into the process and not worrying about the details.
#2 Mix Paint onto Paper, and not in Paint Palettes
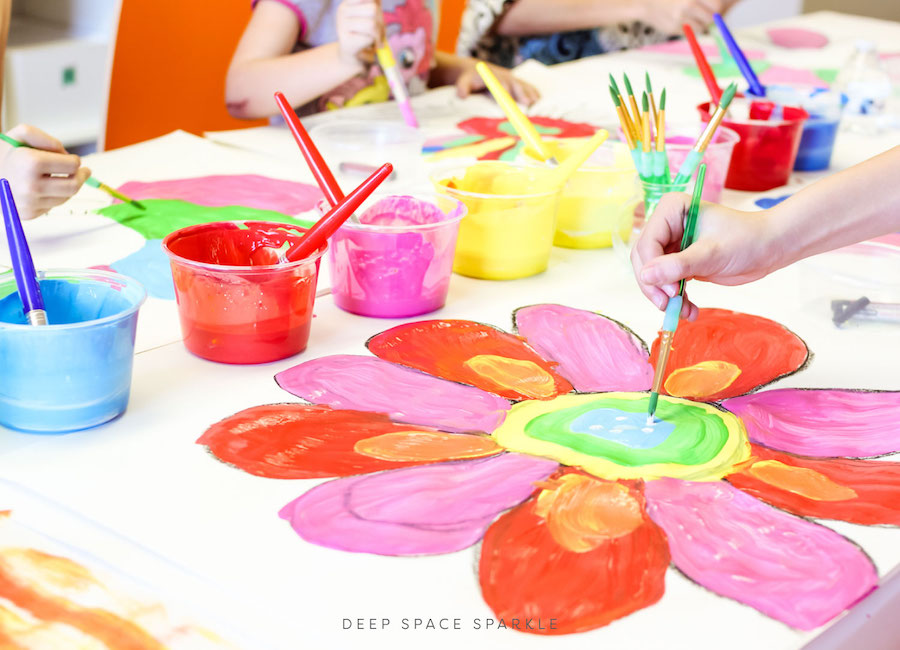
Give a child paint and an individual palette and they can spend hours mixing paints to find the perfect color. If you have all the time in the world, then by all means do so! But if you are in a classroom setting, with 30 kids and a short amount of time, encourage the children to mix paints on their paper. Use the double-loading technique when you can. It produces very cool results and clean-up is much easier!
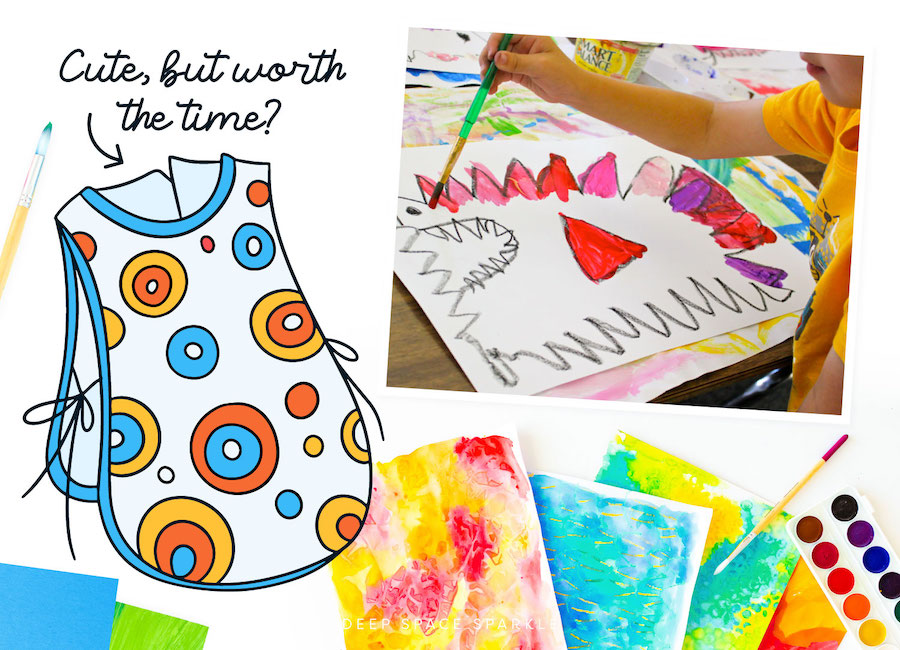
#3 Forgo Art Smocks and Aprons
Gathering art smocks, getting them on, storing them, organizing them, etc. takes time. Sometimes by the time the children get their smocks on and get seated, 5-7 minutes of a 30-minute art class is gone. Get ’em in, get ’em settled and begin the fun stuff. I swear by Oxiclean, too. A good soaking in this powerful stuff can wipe out most stains.
#4 The Ten-Minute Quiet Time
After instructions are given, the paper handed out and the children are engaged in their project, begin a ten-minute quiet time. This is their time; the chance to reflect on their work, the opportunity to lose themselves in their art, and perhaps the most important of all, the permission notto speak to their best friend. This quiet-time method only works if there is no transition involved. If the children are on day 3 of a project, I can expect that they will finish up at different times. Helping them transition to a new project or free-choice activity is not going to work during quiet-time.
#5 Learn how to Draw well and make Mistakes
This is a fun one. I love to draw and demonstrating simple drawings for my students really helps them engage with the lesson when teaching art. I give lots of examples so if we are doing a lesson on chameleons, I draw a few different ones; some realistic, some silly, some animated. In the process of drawing on the white board, I always incorporate mistakes. Always. I laugh at my “mistakes”, tell the kids to expect them and then I show them how to turn mistakes into something else.
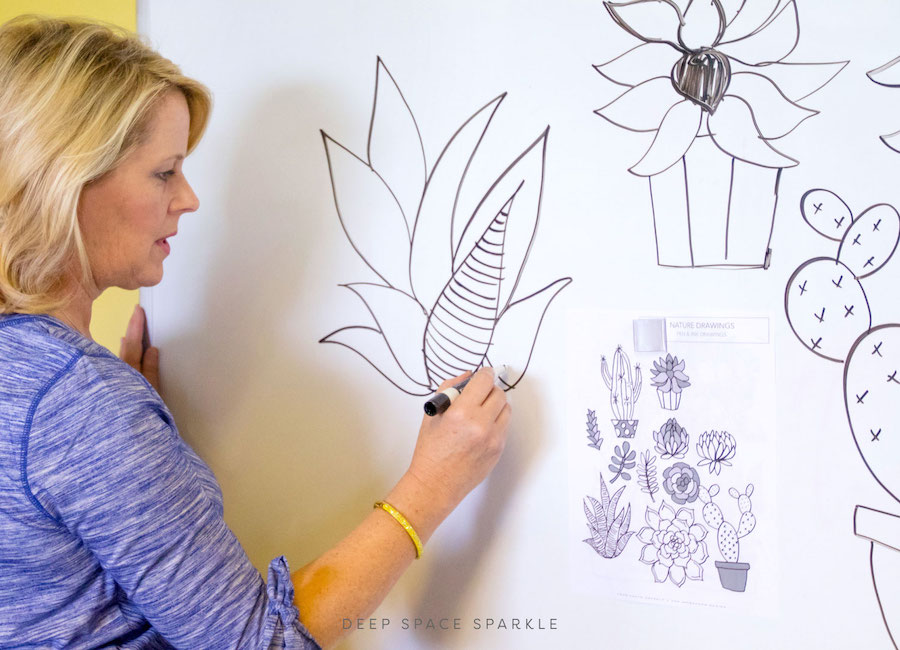
I include many how-to-draw sheets in my PDF art lesson plan booklets. These are mostly for the teachers (not necessarily for the kids). I think it’s critical that you show your artistic side, no matter what you think of it, and inspire your students. You can do it!
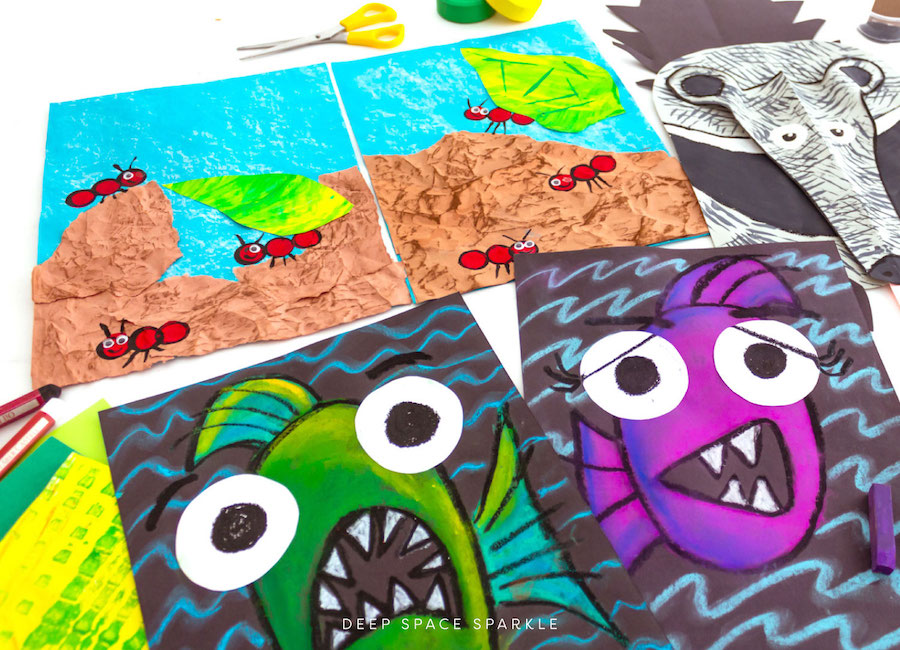
#6 Pick Fun Subjects
You probably know this by now, but I think its imperative that you chose the subject of your art lessons carefully. I want my students charging into the art room anticipating a fun lesson and bearing a can-do attitude. I love watching their faces as they look at my white board to catch a glimpse of the next art lesson. Often, kids will smile and say, “Oh, that looks hard!” but I know from their expressions that they know they will be able to do it. They have confidence! And if they have that, you have an eager and engaged crowd.
#7 Use 1/2 Sheets to Save Time
I use the standard 12″ x 18″ drawing paper for most projects but if you cut that paper in half, children can complete the project in much less time. Not only does it save time, but it saves on supplies as well. All my projects can be done on smaller sheets, so don’t feel by using a smaller paper size you are compromising.
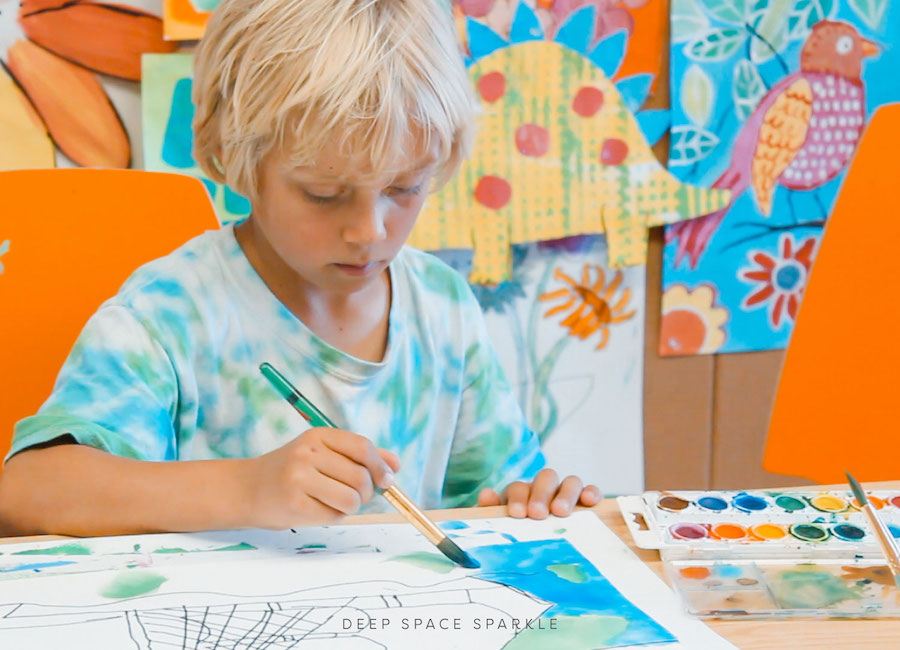
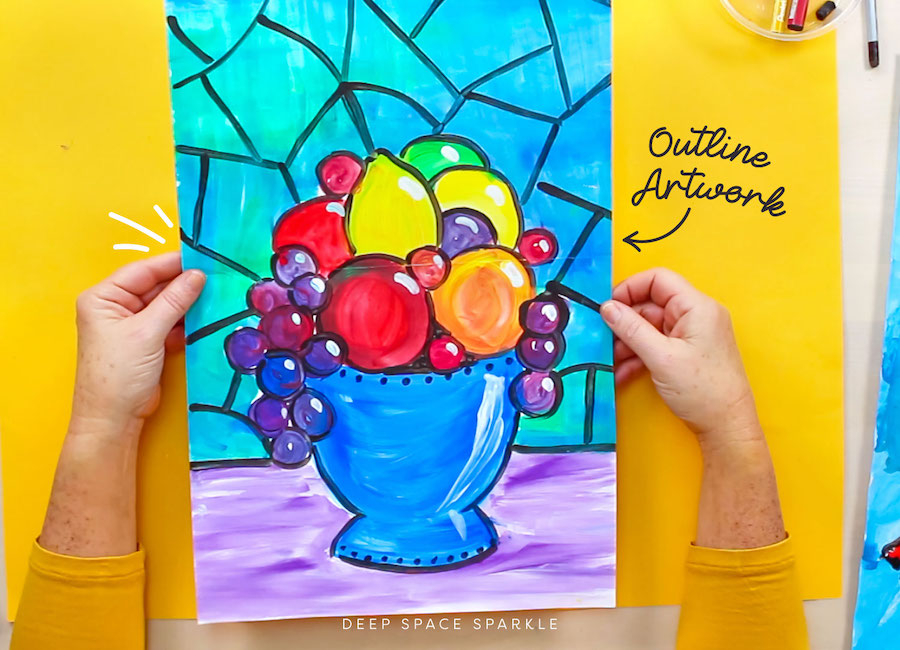
#8 Outline, Outline, Outline
The trick to making an art project looking complete is to teach how to outline and add contrast to children. I’ve talked about outlining before and it’s because it really makes the art pop. Think of how often Matisse outlined his work. If you are doing a drawing in pencil and then decide to paint with watercolors, it’s really hard to keep the contrast unless there is a dark line in there somewhere. Use a sharpie waterproof black marker, oil pastel or even black paint and a small brush. It really makes a difference. And it doesn’t always have to be black…try a blue or even a red. Cool.
Now it’s your turn… what are your best tried and true tips?
Download the Art Teacher’s Toolkit Guide for success in selecting lessons, planing your curriculum, finding the best art supplies and more!


thanks for these tips…..i teach kindergarten and we do a lot of art in class. I love your ideas…..your blog is helping me have more art and not just crafts.
Sue 🙂
i am a first time reader and freelance artist loving the honesty in children’s artwork.As an art instructor for an after school program, it’s frustrating to have a large group of kg thru 5th graders together. I found your tips very helpful and will return.
I loved the outlining and losing the pencil bit. I too have been trying to encourage the children to rethink their opinion of mistakes.
Thank you for your great tips.
I teach K-4 art to 850 students weekly. One of my best tips is to go small. Children have a hard time filling up a 9×12″ paper, so it helps to cut it in half. Many projects can be reduced in size and are easier to complete in a 45 minute period. The children are happier and I am happier.
Best tip I was given was never waste paint or paper. So if you have left over paint in palettes or lids tops etc paint onto scrap paper and let dry. Keep this collection and when you want some free activity children use the variety of spare painted paper to cut up into shapes and place onto other spare painted paper. Makes some great artwork. Lots of other things you could do with it too eg. Wrapping paper etc.
Thanks for your tips.
Never thought about doing this but it makes sense. Lots of easy collage paper! thanks
I love this idea! Kind of like Eric Carle’s work, isn’t it?
Great idea, I started an art class today and felt bad about throwing away all the leftovers.
I too hate to waste supplies. I have a role of butcher paper that is white paper with a waxy back side . When I have acrylic paint leftover I paint on this paper knowing the paint will not sink through and I use it for wrapping paper. Often times it is the hit of the present and peps have framed it. Ha . Glade to know you do tis too. With my oils I put the left over colors in separate jars with terpenoid and use them as stains on wood.
What a great idea! Thank you for sharing!
Thank you for your techniques.
I love the NOPENCIL technique I spend too much time erasing with my firstgraders. They tend to draw very small. I’m going to use it on my next proyect!!!
My favourite tip is outlining. It really makes a difference. But I always used black markers. I will try the black paint too.
What I do when we finish a project with oilpastels is aply some “shine” on it with oilpastel-fixer or hairspray(cheaper and quicker). So it shines a little and doesn’t get ruined when touched. You can see the results in my classroom blog.
Thank you for your tips again!
I don’t have to worry about putting on smocks with my kiddies as they are stored in their homerooms and come with them on. Although, I found the most time saving tool is the use of the ELMO- and electronic teaching tool. It’s a camera that is attached to a projector so the kids can see me easily create their project live on the big screen. It’s eliminated me having to repeat the how to steps throughout class and promoted more confident artists.
Part of my top ten would have to include the use of leaders. I find the more involved the kids are in the management of the room the more respectful they are of the rules, the materials, and the easier the flow. I wrote about my leader jobs in my blog actually.
Outlining is a must! I agree! As are the fun topics! Also promoting that “There are no Mistakes in art, just new opportunities!” helps!
High quality paper! Buy the best, then you get the best results!
Excellent tips….and the ELMO camera is on my wish list!
Patty,
I had a Kinder teacher who sent her students to art everyday with a white t-shirt (their name was on the front) their parents supplied. Not only did I learn names (this was terrific for classroom management) it did keep them from being messy and I didn’t have to deal with the apron/smock/”Mrs. D, can you tie me?” that started every paint class. This is one of the best tips I could pass on!
On the ELMO, my school could not afford that wonderful piece of equipment AND the projector to utilize it. I did a fundraiser and bought the projector and a local education foundation granted me a IPEVO document camera. This little gem was only $69. It does not have all the cool features of the ELMO or other doc cameras out there, but I didn’t want to wait another year or two before getting one. I’ve adjusted to the slow refresh rate (I don’t move under the camera as fast as I might normally would) and the kids LOVE it. They are more engaged with what ever lesson I am showing just because of the ‘cool’ factor. They really thought it was cool when all I had was the classroom television to view it on.
So 2 tips, white shirt with their name on it and doc camera + projector. Don’t wait, ask for one soon!
Kellie
Lori, what is your blog? I absolutely love your concept of having leaders, and I’d love to read your thoughts!!
My biggest hint is to keep them laughing and keep encouraging.
I love my kids, I teach over 1,000 students at two different schools , so there is no way I can learn all their names. But I DO try to find something special about each child. I try to find something positive to point out. I give lots of hugs and high fives and comment on their fun shoes they are wearing or a bow in their hair or a color that looks nice on them. Sometimes I feel like I am the only positive word those kids get all day.
I also tell funny stories about my mistakes I have made in art or in life. It helps the students to feel more comfortable about making them themselves. When drawing on the white board as my example, I try to purposely make a mistake and then point it out to them and ask how I can fix it without erasing it. That gets the whole class involved as they are calling out answers.
My favorite trick to get them laughing and relaxed is to draw something purposely wrong but very exaggerated. For instance we were drawing reindeers and I said,”Now don’t draw the head TOO big or you will end up with teeny tiny antlers”. Which of course I just HAD to draw a Giant head that filled the whole paper and then preceded to make little mini antlers. The whole class laughs but they also get the message by seeing my mistake.
Couldn’t agree more Robin. Laughing, relaxing and enjoying art is the ultimate goal!
I love all these great tips! As a brand new teacher this year, a blog like this can really save me some time trying to figure things out on my own. What a wonderful community to join.
I would only add one critique to Robin’s tip. Although complimentary words to students can brighten their day and make them feel special, I would avoid compliments that have to do with clothing/accessories. As a student who grew up in a low-income family, I remember other students with nicer clothes getting compliments, and feeling embarassed about my own attire. Character/behavior/artistic compliments seem to be more meaningful, anyway.
Thanks again for the great discussion, and have a great school year!
am going to start teaching art for kids this friday and i have to say i loved ur tips cuz it cares about having fun and learning both in same time
This is great, thank you!
Seriously can not get enough of your site!!!!
aMaZiNg~*~
I too have a “Silent Time” when students get involved and focused on their artwork! It is so peaceful and you can see by their facial expressions that they are really into the project!
Sometimes during the demonstration if the project is simple enough (like if I do a guided drawing) I will be completly silent. I hold up my black crayon (or whatever medium I’m using) and wait until all the students are holding up their black crayon and it’s completly quiet. When I do a silent demonstration I exagerate my actions and my facial emotions. They get a kick out of it! This leads us up to a well focused work time later in the class!! And it really has brought less headache to me as an art teacher because they are into their work they will “stop look and listen” quicker for their clean up instructions.
Keep it real, Patty!
Your site rocks!
I was just reassigned from high school art to elementary. I love my kids, but they also seriously stress me out because I have to spend so much more time managing and so much less time teaching. I have 500+ kids I see only once a week for 45 minutes at a time, give or take. I would love to get an idea of how other teachers manage their time (especially clean-up) and/ or any tips they have for keeping 40 kinders under control while their 80 hands are being watched at one sink. I am also seriously stressed over only having 5 minutes between grades (non-sequential grades, I might add). Does anyone try to use the same materials or projects for different grade levels to cut down on set-up time? Any advice offered would be very much appreciated!
Love your site, btw! You have been a lifesaver!
You should read everything in Inside the Artroom (menu bar), especially Art Room Organization. You are not alone in your struggles. My readers have posted great comments that you’ll be able to relate to.
On the hand washing thing, I don’t let my little guys wash their hands in that type of scenario. Here’s how I do it:
I have two sponge buckets-one labeled “Clean Sponges” and the other labeled “Dirty Sponges” (they’re just plastic dish washing pans). I have enough sponges for all my students to have one. I start the day with a pan of clean damp sponges which I’ve squeezed all the extra water out of. Students can get a clean sponge to clean up their area when they’re done painting, and put it in the dirty sponge bucket once their table is clean. But before they do, I have them wipe the extra paint off their hands with the sponge. (Remember, their classroom teachers have them wash their hands before lunch, they get bathroom breaks, and a little paint residue never hurt anybody!)
As they’re lining up I fill the dirty sponge pan with hot water, squeeze out the paint, squeeze out all the water I can, and toss them back in the clean sponge bucket by the handful. (I do like 8 sponges at once, it seriously takes me 30 seconds to wash all of them.) Now they’re ready for the next class.
Every so often I soak them with some cleanser and microwave them damp for a few minutes to disinfect them. I also dry them spread out on the counter every night.
The benefits are: they don’t need to dry their tables (the sponges are just damp, so they air dry very quickly). They don’t drip water on the floor from soggy sponges. Your sink area is not a disaster zone. You don’t have 40 kids trying to wash their hands at one time. And you don’t need to wash the tables. Huzzah!
If they’re doing something supremely messy (more than just painting), have them use a sponge at the sink to scrub their hands. Kinders can take 5 minutes to let the water gently run over their fingers–if they use a sponge, they are a lot faster.
Elizabeth, I am sure after a year you have figured a lot out on your own. I was also a high school teacher and now am teaching elem. I actually love it, but do not love that transitions bring conversations up and listening down. I hate how hard it is to get all kids to hear directions so I don’t have to repeat them 10000x’s yet, I feel like I am doing it anyway. It just wasn’t this hard in a HS setting to get kids to listen to directions.
If you still have 5 mins between classes, then you are doing better than me. I have no mins and I used to think that was crazy, but now it is normal.
I think it’s all about timing clean up. Assigning table leaders and utilizing table folders. If it’s especially messy, assigning random people to do jobs when you know table leaders aren’t doing a great job.
There are so many great tips to do things better, but also so many ways to make things worst. I would love to discuss noise levels further. How hard do people come down on the non-hand raisers, the constant non-listeners? How do you deal when you feel (and sometimes do) snap?
Also, I am moving to circle tables and I am not sure how to deal with assigning table leaders. I am considering just going to have a table be my helpers for the day…rather than table leaders. I am looking forward to my new tables, but also know clean up might not go as smoothly.
Great points you bring up. I’m listening and have written down a few to inspire a few future posts!
I have one table be helpers for the day. That way only 4 kids are up moving about rather than 7 or 8 depending on the number of tables you have. I also strive for a traffic flow around the room so we don’t have people going in all directions. My favorite thing is my color coded drying rack…red table sitters place their work above the red coded section, and so forth. That way, handing back artwork is chunked by table which is so much quicker AND if a kiddo did not put their name on the work (and there’s always at least one!) it’s easier to narrow down who it belongs to. I do use t-shirts for paint shirts that they grab on their way in the room and put on as they are getting settled. I have a basketball backboard over the bucket, so putting away paint shirts is a fun shot into the goal. As for clean up, I have a rag bucket with enough small washcloths that have been soaked in a disinfectant and squeezed out that kids use to both clean their hands and their tables. We avoid the sinks because of the time, noise, and propensity for horseplay. Also no time between classes for me and 5 different grade levels per day. I don’t plan according to materials to be used for grade levels, I just plan according to what materials, artists, periods etc. I want kids to use/learn based on our curriculum and their classroom curricula. Studying China in second grade? Then we are doing symmetrical Ming vases with complex patterns which meets my criteria and ties nicely to their classroom.
Elementary is hard work, yes! But it is so rewarding. There is beauty from the chaos. Keep looking for it and know that you are doing a great service to children by providing them hands on opportunities to create and walk away with an experience, a process, or a product that they can use long into their future.
Hi
I made the switch from middle/high school to elementary
And one lesson plan per week for all grade levels
I adapt the lesson so that it meets the criteria for each grade level by how it is presented
With kindergarten and grade one we do motor memory movements for each name of artists
So that by certain gestures they remember week to week
Could you give more info on this? Like an example lesson? Thanks 🙂
My 7 year old grandson is reading 5th grade and thinking Algeria? He told me he loves to draw , “what should I draw grandma “? Lol so here Iam
A great tip for clean up is to use wet paper towels for hands and tables instead of having kids visit the sink to wash up (you get a loooong line, kids taking forever to wash hands, and a VERY messy sink later on). I individually criss cross the brown paper towels the school provides for us into an “X.” I then toss them into the sink, run water over them until they are completely soaked through, and wring out the excess. The criss-crossing helps you be able to peel them apart easier! I hand each child a wet paper towel as they are bringing a painting to the drying rack and tell them to use it on their hands first, then wipe their spot. If its washable paint, water is all you need. I also find it easier to just have kids drop their brushes into the sink and I clean them myself later. I pick one or two kids to pick up water bowls and empty them, and pick up paint containers and take them to their designated spot in the room. My kids pretty much have the clean up routine down: drop your brush in the sink, take painting to drying rack, and wipe up!
I also wanted to add that I tell kids that I will only pick students who are following clean up directions to do water bowls and paint containers. That is a good motivator for kids to stop what they’re doing and make the transition into clean up!
This is a great system….I think this will work for me. Love the simple instructions. Thanks!
I’ve used the wet paper towel method before and loved it because it was free and easy! However my current school doesn’t supply the “c-fold” towels – ours are dispensed in a roll & it doesn’t work quite the same! I asked our PTO for a donation of baby wipes and so far they are working pretty well! I don’t like the idea of using so many wipes, but they really do get those little hands clean!
I have only 25 minutes with grades K – 4 so clean up after painting can feel rushed! I have the students bring their papers to the drying rack one table at a time and then stand in line. (I have 1 table clean up the water cups, ect. which changes every week.) When the students are standing quietly in line, I hand them a wet-wipe (or half of one if their hands aren’t too messy 🙂 They stand in line and wipe their hands until their teacher arrives & drop the wipe in the trash on their way out the door!
I know wipes can get expensive, but as long as they are donated to the art room I will continue to use them!
Priscilla, just use an utility knife to slice through the roll then turn it over and slice on the opposite side. It is much easier than trying to pull off pieces and is very fast. When the roll get small than only one slice is needed.
I’m a 2nd year teacher at a K-8 school and just recently discovered how handy baby wipes are! Last year, I painted with K/1 only one time, and it was a disaster! On top of the mess, waiting for them to wash their hands just about killed me! Luckily, my school is very small with only 2 classes per grade level, so I bought a case of baby wipes at Sam’s Club for about $13 and had several boxes donated from an oversupplied K teacher. Now when I do “messy” projects (which isn’t really that often), the kids line up at the door to leave & I just go down the line with the box, then they toss them in the can on their way out. Wipes also work great when the older kids use chalk pastels; they each get one at the beginning of class to wipe their fingers on, and then use them to wipe up their table at the end.
Also– thanks for saving my butt more than once! I know it’s terrible to say, but with teaching 9 grade levels, I sometimes forget one of them. Your site is one of my “night-before panic” go-to sites. THANKS!
Wow! Thanks for the website… I teach primary children in New Zealand, and your website has soooo many great ideas!!
I teach k-5 to about 500 kids, once a week for 60 minutes. I find the best way to wash is to line the kids up in the hall sitting against the wall playing a quiet hallway game and send them a few at a time to use the bathroom sinks. Four sinks is better than one sink!
My favorite drawing tip is one I picked up as a student teacher. Draw with erasers first!! Pink erasers will leave a pink trail on the paper. This helps with the “draw big” problem because the erasers make big lines. If they’re not happy with the line they drew, they just brush it away and try again. No frustration! Then just trace over the eraser line with a pencil.
Staci…the eraser tip just might be the most ingenious art tip ever! I just posted your tip on the DSS Facebook wall.
Wow! Everyone has some fabulous ideas! I have been an elem. art teache for 3 years now, i was in a first grade classroom before that.
to Elizabeth: love your name first off! that is my daughters name:) On cleanup, I have found that we need to start 5-7 min. before class ends. It depends on what we are doing and what grade level. My classes are not in sequential order either and i also have 5 min. in between. I try to plan my lessons so that the grades that come after one another are using the same supplies. However, this doesn’t always work. Also, I assign 2 helpers for the day, they are in charge of putting up supplies if needed. One of my BIGGEST helps are my “assistants”. I have a third grade class (i chose them because it works in their schedule best) that sends me 2 helpers each day to assist with kindergarten. 30 kindergartners and 1 teacher makes for a very stressful 45 min! my helpers don’t stay long, usually they come in a few min. after class starts and leave about 10-15 min. later. Their teacher uses this as a big incentive for them and I have others walking around to help with writing names at the beginnng of the year or sharpen pencils. Sometimes they clean up from the previous class if we ran out of time. It gets easier every year. My first year was a definate learning experience!
To everyone else: I love your ideas, thank you for sharing! I hadn’t thought of the no pencils. I will have to try that since my little ones will spend the whole class sharpening pencils or erasing if you’d let them!
I use 20oz clear plastic containers with lids for tempera paint and store them on a cart. When color gets brownish, I let it air dry and then crumble it into the trash and fill it with new paint. We live on an island, and I hate the thought of pouring paint down the drain, plus it reduces clean up time and waste by storing paint.
Hi :). Thanks a lot for these great tips. They help a lot. Just I am not sure what you ment by “Double-loading technique”. If you could tell me would be grateful. Lara
Hi Lara,
Great question. Here’s a link that will show you what I mean: https://www.deepspacesparkle.com/2013/01/02/double-loading-painting-technique/
Thanks for asking!
I am a part-time art teacher. Thanks for the tips.
This website was very helpful, and I enjoyed the video on double loading of paint. Thanks for the great tips.
I have always broken down the art project to its base, if Drawing a particular image is key to the students vocabulary, then,we “work” lines. Not setting a particular formula, but suggesting that line evolves into shape, and when one breaks down the basic shapes into the parts that best fits their subject then the construction lines become the parallel to the transformer.
The outlining principle for me is tricky. The “light” source,I use to encourage the tone of the ‘edge’ line. Kinder to grade 6 could be encouraged to match their outline to their colour of choice of the area to help the ‘finish’.
Very good tips you have presented.
Thanks Larry
Hi Patty,
I have recently tried banning pencils for some of my kids’ lessons. I did this for a first grade class and third grade class. Both times it was extremely stressful. I tried to let them know that it’s okay to make a mistake and they can always work with it and turn it into another shape. One third grader said I was a mean teacher to her friend, and mean is something I definitely am not! Many students complained. A first grader burst into tears working on a portrait of his mom. Have you dealt with this fear and resistance in your experience and if so, how did you work through it?
I love your site so much — it has been a life saver to me as a second year teacher!
It’s really about baby steps and how you present it. If you have conditioned your students to use pencils, then they may not be receptive to switching. But, if you approach it with a project that is more forgivable (not portraits) then it might work out to be less stressful. Let me know how it goes.
Brilliant I teach art to adults and doing a child course very informative .thanks would love other tips please
I’ve been doing a free video series…lots of teaching tips! …check out the home page https://www.deepspacesparkle.com
Hi! As I am setting out to plan an after school art class for a small group, I am experiencing difficulty in deciding how to approach my planning. I struggle with rigid lesson plans (we are all painting a flower!) and I wonder whether children should be allowed to express their own thoughts much as they do when they write, for example. If art is the creation of symbols with certain mediums, should I not let children create their own instead of dictating the topic and all the steps? I was horrified after a guided drawing activity that nobody recognized which piece was theirs although all the birds looked pretty great from a grownup perspective.
I love all your projects but I have to figure out their purpose, as opposed to letting the children explore the materials and asking them to think about something that means a lot to them and let that be the subject of their art. I keep going back and forth between the two approaches.
There is no wrong way to teach art.You have a great curiosity of how children interpret their art, so bring that into your teaching. You’ll do great. Just get started and let the children be your barometer.
im about to be considered to teach art to children up to highschool, in Shanghai
can you give me some advice?
Love the tips. Thanks for reminding me to have fun with my kinders.
Hi There,
What would you recommend as an appropriate time period for classes held after school time?
Good teaching steps
I’m a high school Art teacher. This list is great, especially #1 and #2. However, I was horrified when I read number 8 lol. I have just spent 3 weeks breaking my new group of grade 9s’ elementary habit or understanding that everything has a “colouring book” outline. Nothing in the real world has an outline! Please teach them to create crisp, clean, sharp edges with darks and lights instead. Outlines hinder creativity and make works of art look the same, like anime, so Elementary, in fact!
Thanks for your comments. DSS focuses on Elementary school art so I’m pleased you think the art looks elementary! But I do know where you are coming from. I encourage you to look for the possibilities in every style of art. I love Matisse’s bold outlines 🙂
Today I have to teach art to a group of children, I appreciate very much this ideas on what to do as I’ve not teach before this age range 🙂
Thanks for the wonderful tips.
Hi… I am Jamie …I realy enjoyed from your post.
i like to know how can i be teacher ..do I need certification for teaching paint to kids.?
thank you.
Thanks so much for those tips ! Really educative . am artist by talent in future I would like to make small class for art in children. So that will make me a lot and management, if you still have more I like it or especially advise I welcome it.
Am yours Richard L. M.
Wonderful stuff
Gracias por este documento muy interesante y me gustaría tener mas para poder trabajar con los niños y niñas.
Thank you so much for all the helpful free content! I am a first time teacher and I honestly don’t have the pockets at the moment to get all the materials or take classes I might need but this has helped tremendously and I am truly grateful to be able to participate better at my school thanks to all your suggestions. Thank you, thank you, thank you!`
Happy to help!
So much great info! I will be teaching 2nd grade to HS seniors in one class weekly in a community area that has no sink and has to be left pristine. I teach acrylic painting classes to adults, but 30 kids will be more of a challenge.. Perfect baby wipe/papertowel clean up and class leader info. I have been thinking about it, but no concrete ideas until I read your article. Love the input on allowing mistakes to work out as if we planned it and seeing we all make mistakes with class input so they learn critical thinking as well. T-shirts with names is also a brilliant idea, and planning classroom flow.
Love your tips. I work with preschoolers and this tips comes very handy.
You are WONderful! I teach art too, and the kids know that the first rule in my class is that there are no rules about how they make their art. Artists throughout time have strived to break rules and invent new ways to make art. They love that no-rule rule! My principle guideline is to avoid criticism and embrace critiquing of their work instead, noting what they like and what they’d like to change.
thank you! great tips.
My grandbaby is 7 years old he loves art he loves to draw he wants to get into it more I need a fine a teacher it can help him
Am so happy I found your page. I’m a first time teacher and your tips give me a lot of comfort since I’ve never taught art before. I’ll certainly let you know how it goes 🙂 Thanks.
Like these ideas very nice thank you
Thank you! I’m starting to teach a class soon and am in the gearing up stage. Thanks for sharing!
I am a former art teacher at the HS level. I taught special ed and art for 20 years. I have been out of the loop for the past 7 years as I have been a Corrections Officer at the Utah State Pen…..Long story, but not relevant.
Anyway. There is an opening for an Elementary Art Specialist for 3 small elementary schools that I want to apply for. I miss the kids an love to teach. I am a bit intimidated by elementary art but would love the challenge. I am looking for as many ideas as possible. I would love to chat with you and pick your brain sometime.
Sincerely
Troy
Exciting opportunity Troy! If you haven’t already, I would scroll through our library of podcast episodes. I know there are many you would find applicable.
https://www.deepspacesparkle.com/art-made-easy-podcasts/
This site has been very helpful to our parent group. We have lost art as a special and advocate for it back to the weekly schedule. In the meantime, we are working with teachers in each grade to bring help/supplies and a session once a month in class with parent help. We have collaborated together a bit and have several lessons. Our website is horizonartsmart.com We plan to continue to learn from you and your site, and really appreciate this information. We are doing our best while we advocate for art class in every way. Thank you!
i think this a good idea because me and my class mates have to teach each other 1 thing and im teaching my class mates
art
Great, practical tips!!
These recommendations for teaching art to children are very helpful. Thank you.
Thank you. I am am art teacher in primary school. It is much difficult to teach art to smaller kids. Ired your tips They are really useful. In my class 40-45 kids are there. By your method or steps it will really help me
Hey,
I’m an artist of the painting. Although I didn’t know it at the time, I had chosen a teacher who was more concerned with encouraging students’ creativity than actually teaching us how to paint. From that class, I learned not to waste my time with cheap supplies, and to paint from light to dark as a rule, but I was still pretty much uninstructed where actual techniques were concerned. I read your tips these are very much helpful.
Visit my website for painting…
http://www.fatvillagecenterforthearts.com/
Thanks for writing this blog post…
Appreciate that Anthony!
i find this very useful
What about pre-school? What about ginger painting for this age? I’m working with a 2yr old. So far we have learned primary colors and not to eat the paint. Whats a source of info for these young children.
Hi Linda, This is Hannah from Team Sparkle thank you for reading our blog. Deep Space Sparkle is mostly a resource for grades K-6, but you can apply a lot of these blogs to your Pre-K class with a little extra guidance. We have other blogs for younger ages that can help you here:
https://www.deepspacesparkle.com/category/art-lessons/prek-art-lessons/
Hey ,Teaching kids with their connect is very important . Kids follows what they see and hear . Thanks for the tips.
Superb tips
I have been teaching art to young adult students and I can imagine that these tips and methods would be very helpful for adult students as well.
Great ideas
Iam planning to start art classes at my residence…so i wanted to know what all topics should i pick for 3rd, 4th and 5th grader children.
These are great tips! You seem very student oriented! Great! Thank you
Hi.I am an architect and recently I’ve started to learn how teach painting to kids.but yet I haven’t had chance to teach kids.I am a little nervous and I want to be a good teacher for kids.your tips was so useful for me.thank you 🙂
Always praise the children of their art work no matter what it looks like. We don’t know what level they are at and we don’t want to discourage them. The more you praise them for their accomplishments, the more they will try to do better. It brings the creativity out of them. Be prepared for a mess sometimes but, create a game for the clean-up. Enjoy the little ones, they are a remarkable asset to your life.
Best tips ever! Love all of them 🙂
Quite educative and helpful in nurturing and aiding raw talents to maturity, it is indeed fantastic
What APP would you suggest I use to make my own Drawing Tutorials? Now that we all are teaching our classes from home, I need to make some drawing videos that the kids can do at home.
Good I also teach kids what u said on your tips it’s very exciting and it’s what face I’m impressed
want to help my nephew with his 4 year old boy. would like to paint with him on zoom..
thank-you
Thanks a lot dear, I am a secondary teacher trainee for art and design and I think your tips are of great meaning to me.
Need support from you especially in mural painting to enhance my experience.
hi there
im a new art school teacher i have been teaching in after school “classic” drawing and painting for 3 years
and i was employed in the middle of last year in school as an art teacher
the topic up top is amazing and as soon as we return to school ill be using all of them and i love them
but ive been struggling with the topic of each class that i give
can you please help me or direct me to the way that can help me
Thank you for giving me the idea to look for some fun subjects and ways how I can teach art to my child to prevent her from getting too bored with our lessons. Their classes are currently suspended because of the pandemic, but I want to make use of our time together to teach her some things that can’t be taught at school. It might also be a good idea to let her read some children’s books that can positively improve her character development.
https://characterblossoms.com
THANK YOU SO MUCH FOR MAKING THE JOB OF TEACHING KIDS FUN
I AM AN ARTIST/GRANDMOTHER WHO HAS BEEN ASKED TO DO ZOOM LESSONS FOR MY GRANDCHILDREN IN DIFFERENT STATES.
I AM SEARCHING FOR SIMPLE THINGS, YET STIMULATING FOR THEM DO DO. I HOPE TO SEE ALL OF THEM ON ZOOM ( 6year old, 1 nine year old, 1 ten year olds). I plan on sending each a kit of stuff to use before the lessons so they will be able to all have what they need. Thank YOU!!
This is great but since i am a teacher , i think you should add topics like one point perspective etc
Yeah, your 8tips are helping me to think back and make sense of it all. Thanks!
I would advise praising their work, not being critical. Obviously some advice is useful. I remember helping five-year-olds, who had been told to paint their Mum. One child painted a circle and well-painted eyes. I said well done, another assistant said, hasn’t your mother got a nose and mouth, said in a critical manner. The child looked deflated.
this is a very good site love this
Great
Outlining is a HORRIBLE idea!! And compromises the work – which should be about the child’s aesthetic decisions, not the teachers’s. Please please please drop this “tip”!
I agree! It would be a horrible idea if the teacher did it. I encourage little ones to consider this. It really helps them re-define their drawing should they paint over their original work. And artists use this tip all the time!
Love you ideas. Thank you
The year before last I was the aid for the art class grades Pre-k thru 2nd grade. Since we will be returning to the classroom this year and the art teacher moved onto a diffrent position, I have been asked to take the teaching role. Pre-k thru 3rd grade. I am both excited and nervous. I found your sight and have been encouraged even more. I really like your top eight tips to teaching art to children. I’m a believer in letting the child’s imagination flow, there are no mistakes and you will probably get dirty 😁
HEY, Hope you are doing good.
I am an art teacher but I don’t know how to teach art step by step, my students do not get my points. i just want to know all syllabus or art, how to teach step by step to small children’s
Thanks. I only teach occasionally nowadays at an art centre, and have to squeeze a class into 2 hours with a mixed age group. Some great tips. Thanks
I teach homeschoolers one day a week for one hour so I need quick but effective lessons. Thanks!
I was interested to see your down load but it couldn’t be found. Can you email the correct link please.
Hi Irene, we just updated the link so it should work for you now! Let us know if there are any issues 🙂
Really helpful, My granddaughter wants to learn to paint and draw, but gets exasperated with me trying to help, these few tips may help. I like to draw and paint myself . Would love to find out more of your ideas.
Thank you very much. I was a bit unsure about the outlining of the art works.
Awesome tips!!! Thanks a ton for this
I am loving the transparency while we are dealing with mistakes..
I focus on teaching them concepts and skills. For example during a recent art lesson we experimented with colour wheels. At other times we have tried other fun techniques like wildflower pressing, potato printing and beadwork.
You can either buy a useful resource that is called teaching art to children online or look at free art books instead. Your local library will have a selection of books to take out and you can find different art videos on YouTube.
Alternatively purchase cheap art supplies from popular local stores like the works etc. Plenty of educational type resources that are freely and readily available online.
Good
I am a 75 yr old non-teacher; I have had little contact with children, always felt I would bore them. Tomorrow I beginning as a volunteer for our church’s Christian school to help with remedial reading…it fits me well because of my lifetime love of reading. The other thing I would like to try to do is teach art to the little ones. I am an artist but had no idea how to begin teaching it but I just read through your tips and have gained confidence already. Thank you so much!!
First off BRAVO for doing what you enjoy . I had dreamed of being a teacher however because of learning disabilities it was extremely challenging. I used my creative talents doing artistic visual merchandising for unique storefronts as well as museums and show rooms. I was looking for ideas and ran across this post and it truly inspired me. I had been approached I feel this mom’s about teaching their young children the basic techniques of art, so of course I started reading articles to see if it would be doable and I found your posting I had to stop and absorb it fully which made me cry and realize what I had given up. I wanted to stop and tell you how important it is what you do if it had not been for people like you I don’t think I would have been able to use my creative challenge if I had not been encouraged by my art teachers. I think my favorite part of this article is the fact I don’t feel any negativity it’s encouraging and positive to the growth of small minds and sometimes these mines don’t function like others it takes a special person with patience and kindness and empathy to encourage teach and help them grow . If no one hasn’t told you lately thank you for what you do it’s important to the world and if anything else it’s important to me
Heya.
There are lots of effective ways in order to teach art. One way to do this is to demonstrate the skill. You can find useful books on art which are worth buying. Take the children to a art museum or art gallery in question. Have them make drawings of animals they find. Teach them also to sketch trees and plants in the school garden.
Help them to learn more about artists. Create fact files or mini information sheets on artists. Experiment with colour in lessons. Try to show them paintings that are well known as well.
Make a set of brief summary notes too. In a art shop in town ask them to decide what to buy. Discuss different types of art. Art should be fun to teach. Never forget that. Seriously.
Best of luck. Attend a couple of school art exhibitions and order books on art. Art literally is all around you. Demonstrate various new techniques.
An excellent help
Really cool..I have been looking at how to enhance creativity through art in my kid…I live in India…… I wish you could take a few classes
That was so useful and make good feeling for start teaching .Could you do me a favor and help me by showing other and more supplementary methods .
Best Regards
I really enjoyed it so much because I don’t know how to do art so I want to read more about art💖
I am an art teacher at a Preschool, and I need some ideas.
excellent . thank you
https://doctorlocation.ir/
hello
I hope this email finds you well. I an art teacher and I am so interested to get a PDF copy from your art teacher toolkit books, can you tell me please and guide me how I can get them.
thank you
Hi Rawan! You can send us an email at support@deepspacesparkle.com and we’ll send that PDF over to you. I’ll keep an eye out for your email.
Thank U Im wanting to try to teach art in Our church ,to the childern. If U know any classes or any more ideas I would really love any help anyone would give Me.
Hi Heidi! You can access plenty of free lesson plans and ideas on our blog. We also offer a membership program called the Sparklers’ Club that you may be interested in! You can always reach us at support@deepspacesparkle.com to chat about our resources.
i love it
Thank you! I found many ideas here for my programming
Oh my goodness! This is soooo helpful! I have taught kindergarten for 5 years but will be the art teacher next school year! I’m so excited but nervous to get it right. I’m so glad I found this blog!
Love this – I am teaching art to kids at the Y – this reinforces that I am on the right track and gives me guidance to move on – thank you
Kind of new to teaching children. But I am a professional mural artist, I am moving in with my 7 grand kids, Yes from my only son !,
I know I will make some mistakes to start but I’m thinking of having them invite some of there friends in participating hoping it is a good idea…? I have done two seasons with my grand kids and went well so I’ll do a few more then ask them to invite there friends to see if it works out.
I am beginning to do the art portion of homeschool the art portion of the classes for my 3 grandsons….6 year old twins and a 9 year old….I have been involved with art my whole life…just really interested in anything to help presenting the material to the boys. Thank you so much
Thank you sooo much for so much for so much helpful information.
Thank you for this information. I’m nit an artist but have been asked to teach an introduction to art class for the first thru third grade. This gives me how.
Love the ideas here; thank you so much!…I am not an artist nor a teacher. I am a youth counsellor and a grandmother…the latter is the reason I want to learn how to make art fun for my 3 and 5 yr old grandchildren.
I am a per diem Substitite Teacher and volunteer for Coach Art
I want to begin a child’s class
I liker your ideas.
Interesting ideas. I have just been “volunteered” to teach a group of senior citizens how to draw and paint. First and foremost, I am not a teacher! Technically, I am not an artist.
I have painted and drawn many things over the years and have even sold some of my scribblings.Some friends have deemed/insisted my art is sufficient enough to warrant this foray into the unknown. I have not had any education with regard to art or art instruction. It was merely something I could do. So, being unable to say no to friends, I am now scheduled to “teach” art. Teaching senior citizens.
Sooo…in an effort to not disappoint I’ve sought anything which may assist. And your site came up. Thank you! I will be adopting this information and hopefully I will neither confuse nor disgrace in this new adventure.
Again, thank you for sharing. I do wish I express fully how much this information helps!!!
Well, I believe I’ve whined enough for now. Wish me luck.
Be well and satisfied!
Thanks! We will have fun.
« Outlining with black make a project look more finished! » So true! True in my hobby as a rughooker and would also be true with Gr.3/4 Art. Thanks for the reminder and tip.