


One of my favorite art lessons for kids involves a simple kitchen sponge and tempera paints to create a beautiful poinsettia. If you haven’t tried this lesson before, gather up some kitchen sponges and cut into petal shapes. I promise the prep you do now will last for years. The last time I did this project was in 2010 and I still have the sponges.

This lesson takes one, forty-minute class time. In my class of 21 first grade students, all but 2 finished the project and it’s worth saying that they were very, very close. It’s not meant to be a race, but I know how valuable a one-session lesson can be. This particular one is perfect for the week before Christmas holidays as it is so engaging.
Here’s what to do:
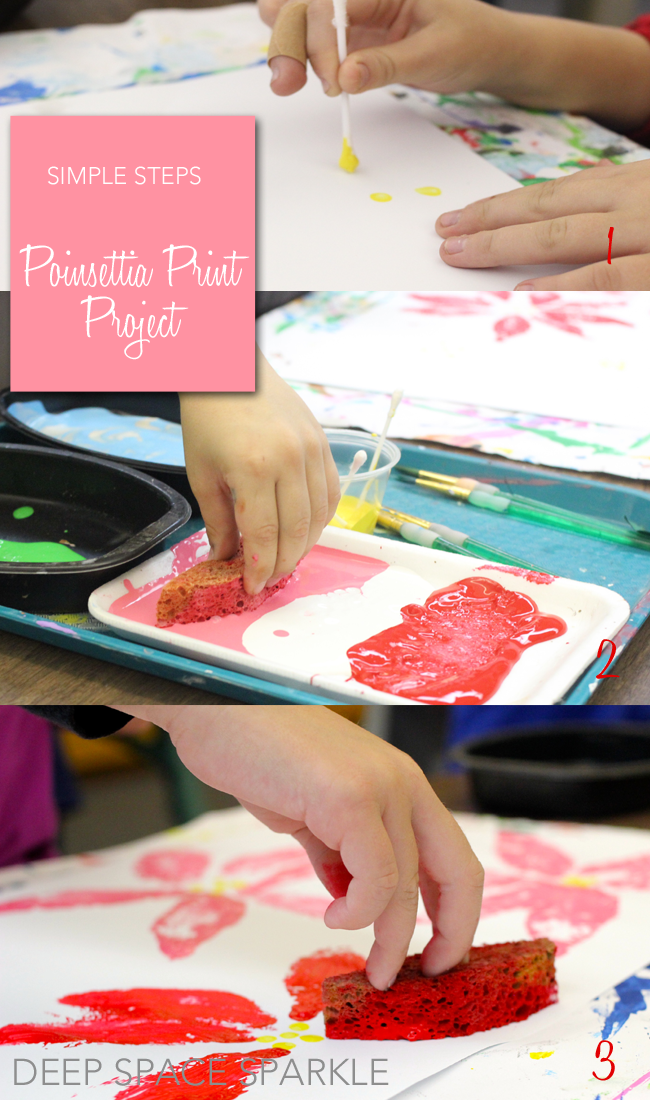
Place some yellow paint in small containers with a few Q-tips. Make the center of the poinsettia plants first using 5 or 6 dots gathered in groups around the paper. I asked my kids to do at least 4 groups of dots. Little math tie-in for those who need it!
Then, using a petal shaped sponge, I dipped into the paint. I squeeze some liquid tempera paint onto a few trays and allowed the colors to just sit there. For instance, on one tray, I squeezed red, white and some pink. The kids can use one or all colors. Feel free to change the colors up or to place different colors at each table group for variety.
Dip sponge into more paint and stamped around the next cluster. Older children will do this step with far more concentration and thus the flower shapes will be more precise. My little first graders did an amazing job even though their small motor skills aren’t as polished. But this proves that children of all ages will love this project.
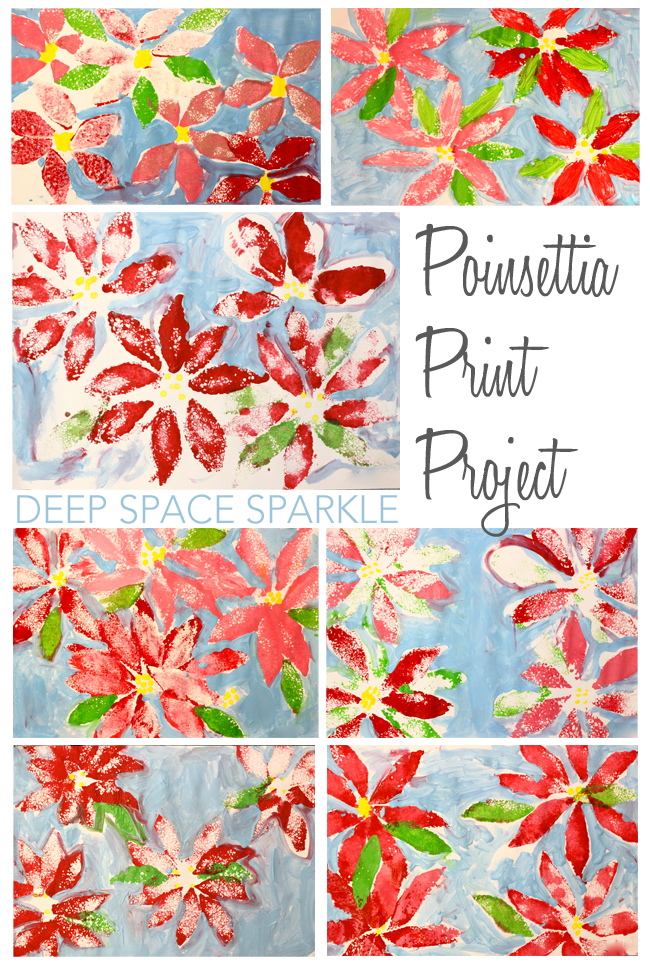
The final step involves using another color to paint the background. The trick here is to outline the flowers with the paint, then paint the spaces between the flowers in with the background color.
It’s a good idea to stick with one background color as the flowers need to be the star of the show.
Aren’t these first grade paintings beautiful? They did so well. Proud of my little artists…
Enjoy experimenting with complimentary colors too!


Want more lesson ideas for the holidays? Download this free lesson guide by clicking the yellow button below and I’ll send you my 5 Non-Religious Projects for the Holidays! Click HERE for more lesson posts on winter and holiday lessons.


I made these a few years ago with my children…for friends and grandparents….we framed them and gave them as gifts and everyone loved them! I still smile when I see them displayed each year!
I work with those with Alzheimer’s – so I need to use lesson plans geared down for simplicity. This is perfect. Adult like subject and will allow them success in the project. Many of my members have arthritis in their hands as well as one is legally blind – this creates many challenges! Thank you for this project idea!
These are so gorgeous! I am sharing on my fb page:).
I teach Art K-5. This project looks like it will be great for all classes! I’m looking forward to having the students do this!
Want to try these with my 5th graders..simple, yet beautiful. Now if I can only get them to complete the project in 40 minutes….
Actually shouldn’t be too hard with 5th grade. Use larger sponges and a smaller piece of paper to ensure completion.
I love these! Any ideas for taking them to the next level if I’m teaching to 4-6th graders?
I’m thinking of trying this with my older students too. Maybe have them do a tissue collage of various shades of greens for the background one period, letting that dry then the following week print over top of the collage. A water color wash would be nice too as background. I think the tempera poinsettias will be opaque enough to work well.
I love this and am hoping it will work for my kinders who did your 3 apples project for the fall. That was a fantastic art!
I just downloaded your non-religious holiday projects and am wondering if you have an religious projects?
Thanks so much for what you do! Your projects are the best and make me look like a great teacher!
Hi Linda…while I do lessons that have a definite Christmas flair, I try to stay away from direct correlations to specific religions. It may not always be this way…just a habit I got into when I was teaching art in a public school. So happy you had success with the Apples…the poinsettia prints are truly a CLASSIC holiday project. You’ll love it!
Did you stamp the leaves as well or did they paint them? Love this idea!
Yes. the leaves are stamped…same sponge, different color 🙂
aburnett@abhomes.org
awesome!
Luv the poinsettia print project , I would like to make wrapping paper for a friend.
It’s so exciting to see my project ‘Poinsettia Prefection’, originally published in Arts and Activities, lives on! I have been retired for 5 years now, but this still pops up on my Pinterest feed, and I love it! Ya’ll gotta try this one. The kids love it , and the results are stunning! Cheers!
Temple! I love this and so grateful that you inspired this! I’d love to add your name and perhaps a comment about the project in the post…care to share with me? Email me at patty.palmer@deepspacesparkle.com
Hope retirement is awesome!
Love your easy, clear and wonderfully executed results and all within 40 minute class period!
Excellent idea for incorporating holiday themes into public schools