


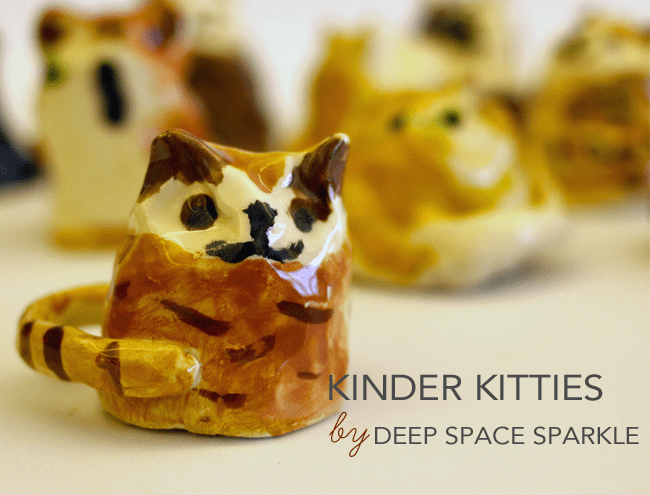
At the request of one of my Kinder teachers (who showed me a very cute ceramic cat and bird inspiration piece), I created a seemingly simple pinch pot animals lesson for my 3 Kinder Classes. My goal was to teach a basic clay pinch pot to my Kinders but create three different animals: a cat, a bird and a mouse.
Here are the two inspiration pieces…
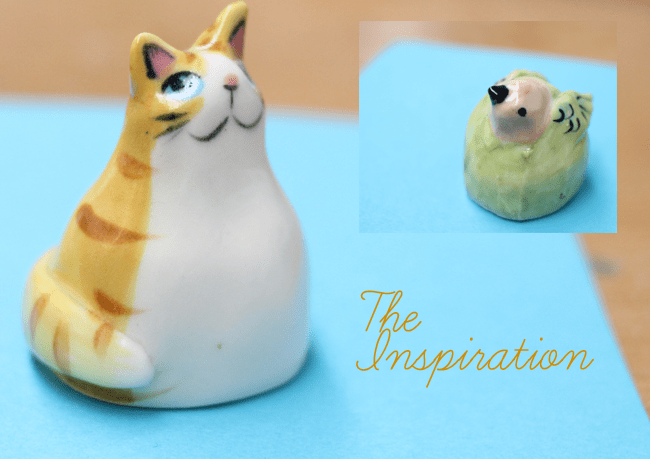
Pretty cute, right?
I thought so, too.
Basically, I figured that each child would need just a small amount of clay, form it into a pinch pot, pull two little ears and then scratch-attach a tail. Truth is, that’s a tall order for 5-year olds who have never worked with clay before. But I pressed on…
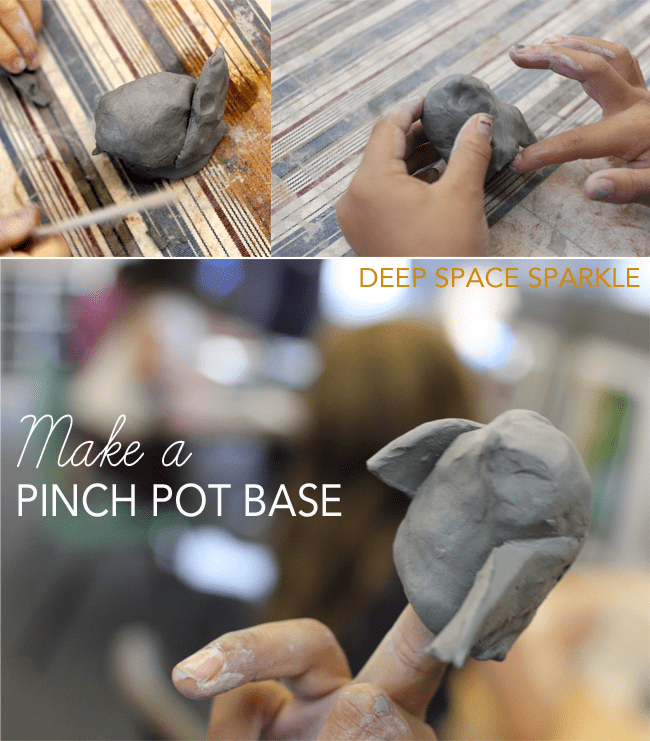
Step One: Pinch Pot Animals
Most every kids was able to successfully create a pinch pot. Make sure your clay is soft so their little hands can manipulate the clay easily.
I tell the children to smooth out the bumps and wrinkles by pretending to pet the kitty (or bird or mouse). This seem to work and the children were becoming quite emotionally attached to their pets.
Step Two: Pulling Ears and Beaks
Pulling clay to form tiny ears and beaks proved to be the most difficult part of the building process. It might be easier to actually scratch-attach the ears and beaks but breakage seemed likely. Most kids were able to form ears but beaks were slightly harder.
Step Three: Adding Tails, Wings and Mice Ears
To add a tail to the cat, my first group used a coil method to create a snake. I’m not going to lie. Most kids needed help guaging the size of the coil. We used the flat end of a wooden dowel to poke a hole in the cat’s behind and we stuck the tail inside. Moistening it with some water helped keep the tail from slipping out. Then the kids wrapped the tail around the cat’s body so it would break off.
For the bird, the little wings were created by rolling out a small amount of clay, flattening it into a small cookie (think Thin Mints) and cutting the flattened circle in half. By smoothing out the edges with a wet finger, the children were all able to create wings. They attached the wings to the body using the scratch-attach method.
After the pinch pot animals dried (about one week), I fired them to Cone 05.
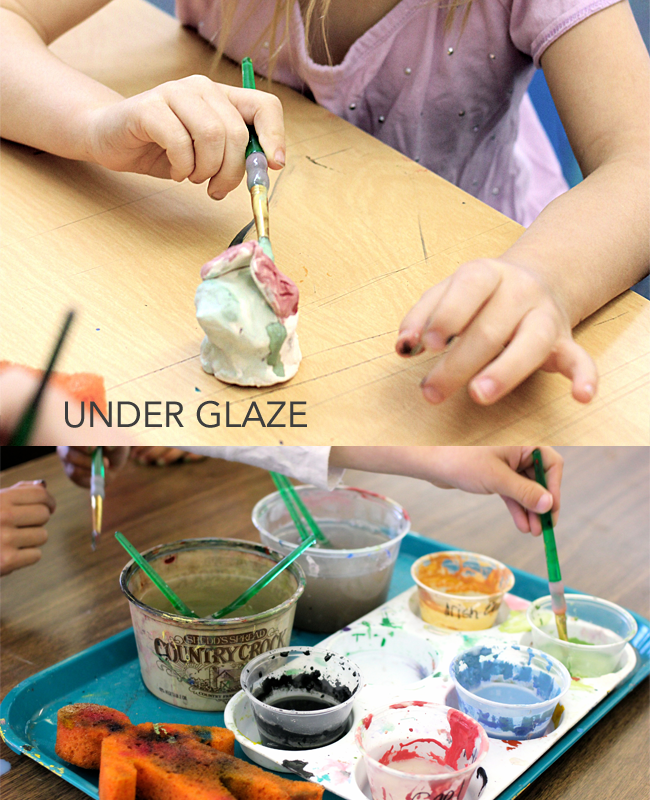
Step Four: Applying Underglaze
I was smart about selecting colors for the cats and the mouse. I kept it real simple and offered just black, brown and golden yellow for the cats and black, grey and pink for the mice.
I wasn’t so smart for the birds. I offered far too many choices for the birds and like most Kinders, then used every color. In the end, it was hard to distinguish the birds body, face and wings because they were so small and multi-colored!
It’s important to find the smallest brush in your art room so that whiskers can be added to the little noses. We used the back of our brushes dipped in black paint to make the eyes.
Step Five: Glaze
Applying the glaze is easy. I use Duncan Dipping glaze and usually do it myself after the kids leave for home.
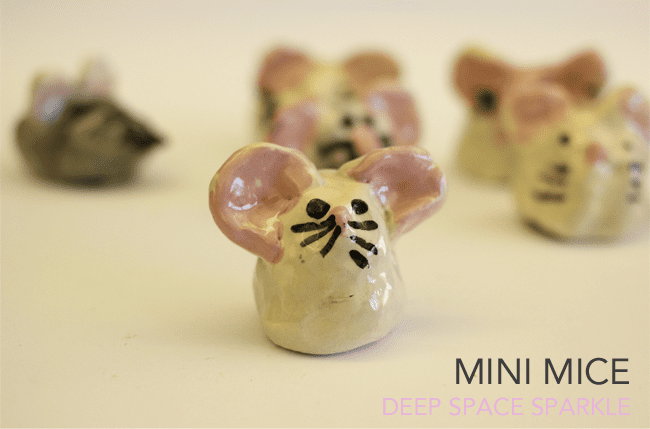
Here are the little mice and the colorful birds…cute, huh?
This lesson took 40 minutes to build the clay and 20 minutes to paint.

Want a free download to another Deep Space Sparkle ceramic lesson? Click the yellow download button below and we’ll send you a PDF lesson plan on how to make a ceramic snowman! Or click HERE to be taken to more clay art projects.


hi,
I saw these and thought of my kindergarten cat project I just did. We started out by looking at Laural Burch. Moved to drawing and painting cats, then to the clay pinch pot cats. I think that my kinder cats came out about as good as your birds look, but you know how that goes. It’s about the process and not the results all the time, in my opinion. Thanks for sharing.-Doug
I love how these turned out. I just tried making Kinder Creatures with my kiddos. Not really sure what happened. I think there must of been some air pockets in a few pieces. We glaze when we return from break. We shall see how they turn out. I may have left it too open for the kids. I showed them a few creatures as examples, then worked through the process with them. Definitely a free form open ended lesson. Not my usual style, but trying to branch out.
These are adorable. We homeschool any thoughts about options on firing etc?
Try Crayola air dry clay. I used it in my Beyond the Basics e-course as a substitute for clay and it worked pretty well (not great, but good enough). Also, if you want to spend a bit more time searching, try Laguna air dry clay.
thank you!!
Would sculpy work? Then we could just bake it.
Hi Michele,
I’m not familiar with Sculpty but just go ahead and experiment with any type of clay before teaching your kids. I give instructions based on kiln-fired clay so some steps are specific to that. Follow the instructions on the back of any clay product for best results.
Love the simplicity of this clay project! I just finished a clay animals unit with my first graders and could have used these tips for making it simple. Next year, for sure! Thanks for sharing!
Hi Patty,
I was curious about your firing and glazing process. Did you bisque fire before glazing? Is there a way to skip the bisque fire process and just glaze on the greenware and achieve a nice result? I have experimented with this a little but not that successfully. Why cone 05 and not 04?
Thank you,
Gaby
Hi Gaby,
Some people claim that you can paint certain underglaze on greenware (unfired clay) and have it shiny. I have my students paint on freeware all the time and I notice sometimes that after the piece comes out of the kiln, some underglazes fire a bit shiny. Not as much as glaze but a bit. I usually add a glaze over the bisque and fire a second time because I love the look and it’s not that much extra work. But, if you can only fire once, I would fire the piece to bisque then use acrylic paints for color. Make sense?
Hi Gaby,
You can use Mayco Stroke and Coat Wonderglaze that can be placed directly on greenware and comes out shiny with three layers. You have to fire at a cone 06. It tells you right on the bottle so use clay within that firing range. I usually do a bisque firing and then have my students use the glaze and do a second firing. If you want to skip firing twice another great alternative is to have your students paint on the bisqueware with tempera cakes or watercolors. They look nice if you layer the paint and they dry quickly so they can take them home the same day. The only downfall is that some color may rub off and they won’t be shiny. I have sprayed the final clay with a clear acrylic to add shine. Have Fun! -Dana
Thanks for being so honest in sharing what you did …that was not only reassuring but helpful.
Hi Patty,
Thank you for the info. I can fire twice but I would love to just fire once and still be able to glaze. I’ve tried it but it just doesn’t look that good.
Thank you!
Gaby
Hi Patty,
These cats are adorable! The faces look great on the cats and mice. It is hard to get such young kids to paint a face so clear. Nice job and Thanks for sharing. -Dana
Hi Patty and Ladies that left comments on this project.
Thank you all so much as I am a newer Elementary Art Teacher and will be starting off the Fall with a Ceramic Unit and I am so appreciative of your advice and experiences both good and bad. Patty you and your website are a wonderful resource for us all!
So glad you got the help and inspiration you need. You will do great!
We have just finished making Cherry Blossom bowls and are getting ready to paint with Nail polish! This was recommended by our potter friend that fires our pieces. I have never done it this way but we have a tiny class of 3-6th graders and I’m holding my breath. It sounds weird but the pieces she had done in a class looked amazing. Our K-2nd graders will use watercolors and I will add a coat of Mod Podge to make it shiny.
Paula, Hello! I would love to see how these bowls turned out. Do you have a website? Did you use anything like a fan to keep the nail polish odor down? -Dana
Patty,
Thanks so much for sharing! Wanted to ask………after the students put on the under glaze and you put on the glaze, do you have to fire the mini mice again? If so, what cone and for how long? This will be my first year teaching art!
Thanks so much!
Allyson
Yup. First firing is a bisque firing and the second firing is the glaze firing. Cone 06 but it depends on the glaze use select. Some might be cone 05.I have an old kiln with a kiln setter so it doesn’t so much matter whether it’s 05 0r 06.
What brand and type of clay did you buy? Is there a website I can purchase it from? I am kind of a beginner in the ceramics area and I want to try this project with my students. It looks so fun! Thank you for sharing. 🙂
I always use under glaze on wet clay with kids. Its quick and easy. A little mucky but works fine then bisque and glaze fire
Hi Patty,
I have a question regarding students that missed “clay day”. Do you make extras in case pieces broke or a child was sick and have them glaze and take home the extra?
Yes, you can do that, or they can start building that day and then paint using tempera or acrylic. If they miss they don’t get the full project because I only allocated 2 sessions. Another option is to have that child come with a later class (if that works for the teacher’s schedule). Th last resort is making a piece for them. That wasn’t something i did but you could totally do that.
Use a toothpick or bent paperclip for fine line drawing!
Love it
Would this be doable if you don’t have access to a kiln? Could I bake them in a regular oven?
Can you bake these in regular ovens? And what temp for how long
If you use clay meant for an oven, just follow the directions on the package. I personally have never used oven-baked clay. I would suggest an air dry clay or even model magic.
This is a perfect gift to give someone! You could customize it to be a pencil holder
This was very helpful