


For many of you, the end of the year is quickly approaching, leaving you with the question; what now? Should I forge forward with full fledged lessons or start paring down my instruction as the year winds down?
I learned this lesson the hard way; taking the easy way out at the end of the year often ends with an uptick in off task behaviors and more headaches for the teacher. Students crave engagement, even as summer draws nearer. Plus, at the end of the year, students are at their peak skill level for the year and are familiar with a wide range of materials and your procedures. Why not capitalize on that?
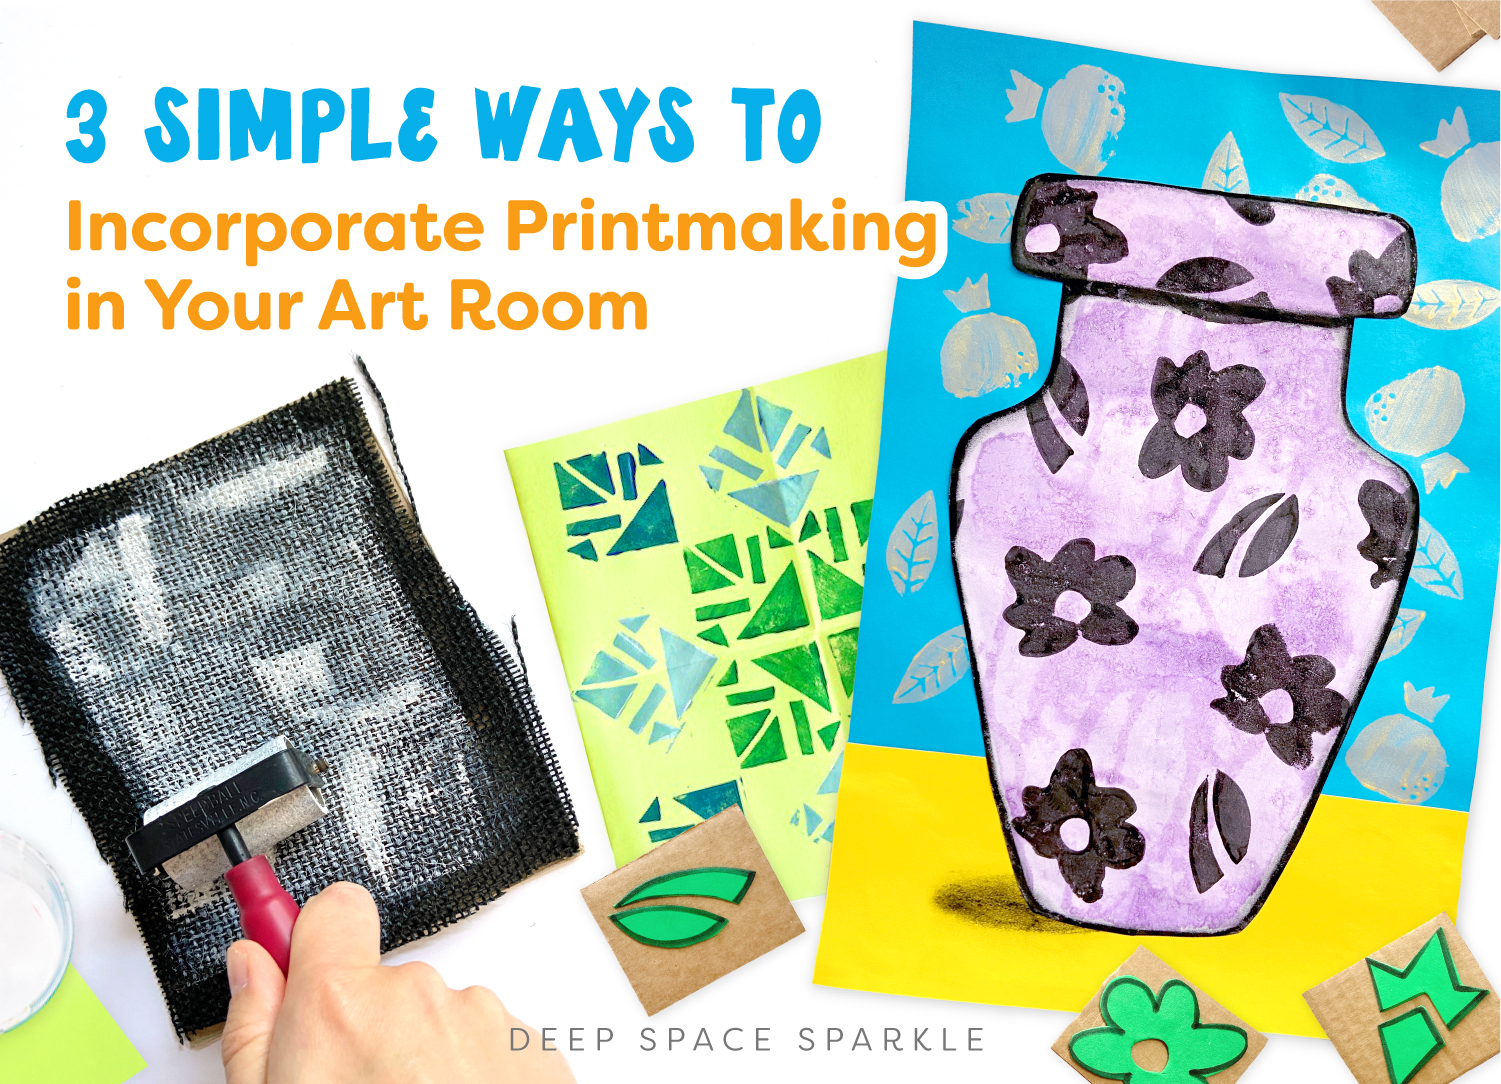
As a final farewell to the school year, I like to choose an activity that students might not have had the opportunity to experience, like printmaking. Printmaking is the perfect end of the year engagement tactic and as a bonus, the rich math connections that can be made with printmaking offer an added layer of interest and complexity.
Not sure how to get started? Our blog post Prepping for Printmaking is a great way to learn some great management tips before you begin.
Here are three simple ways to incorporate printmaking into the art room:
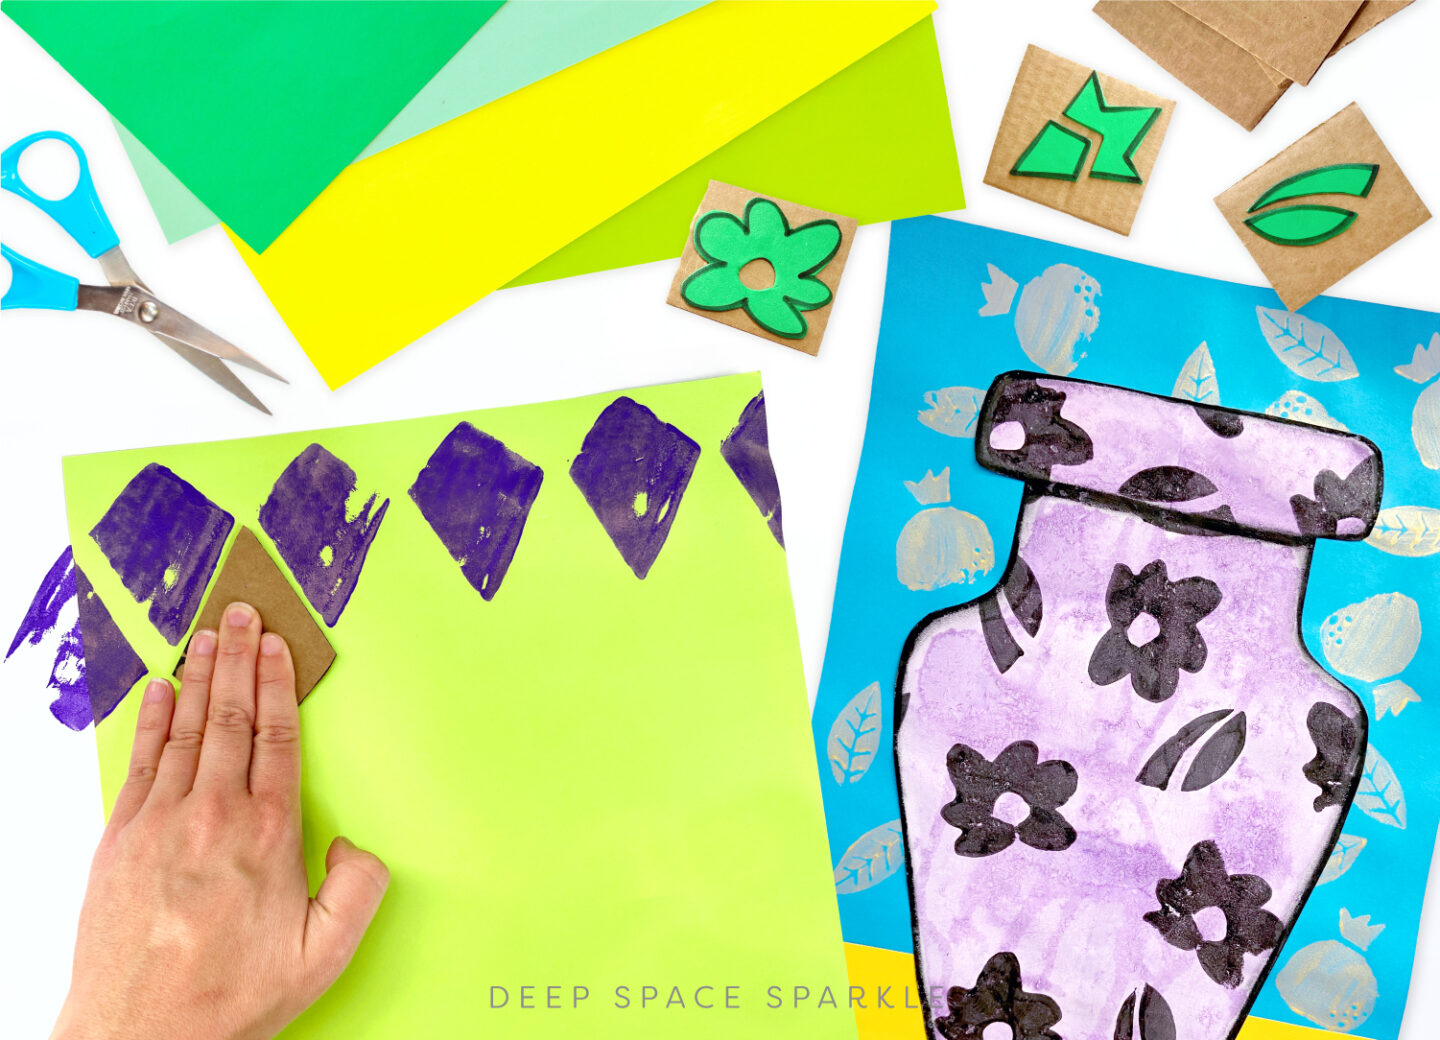
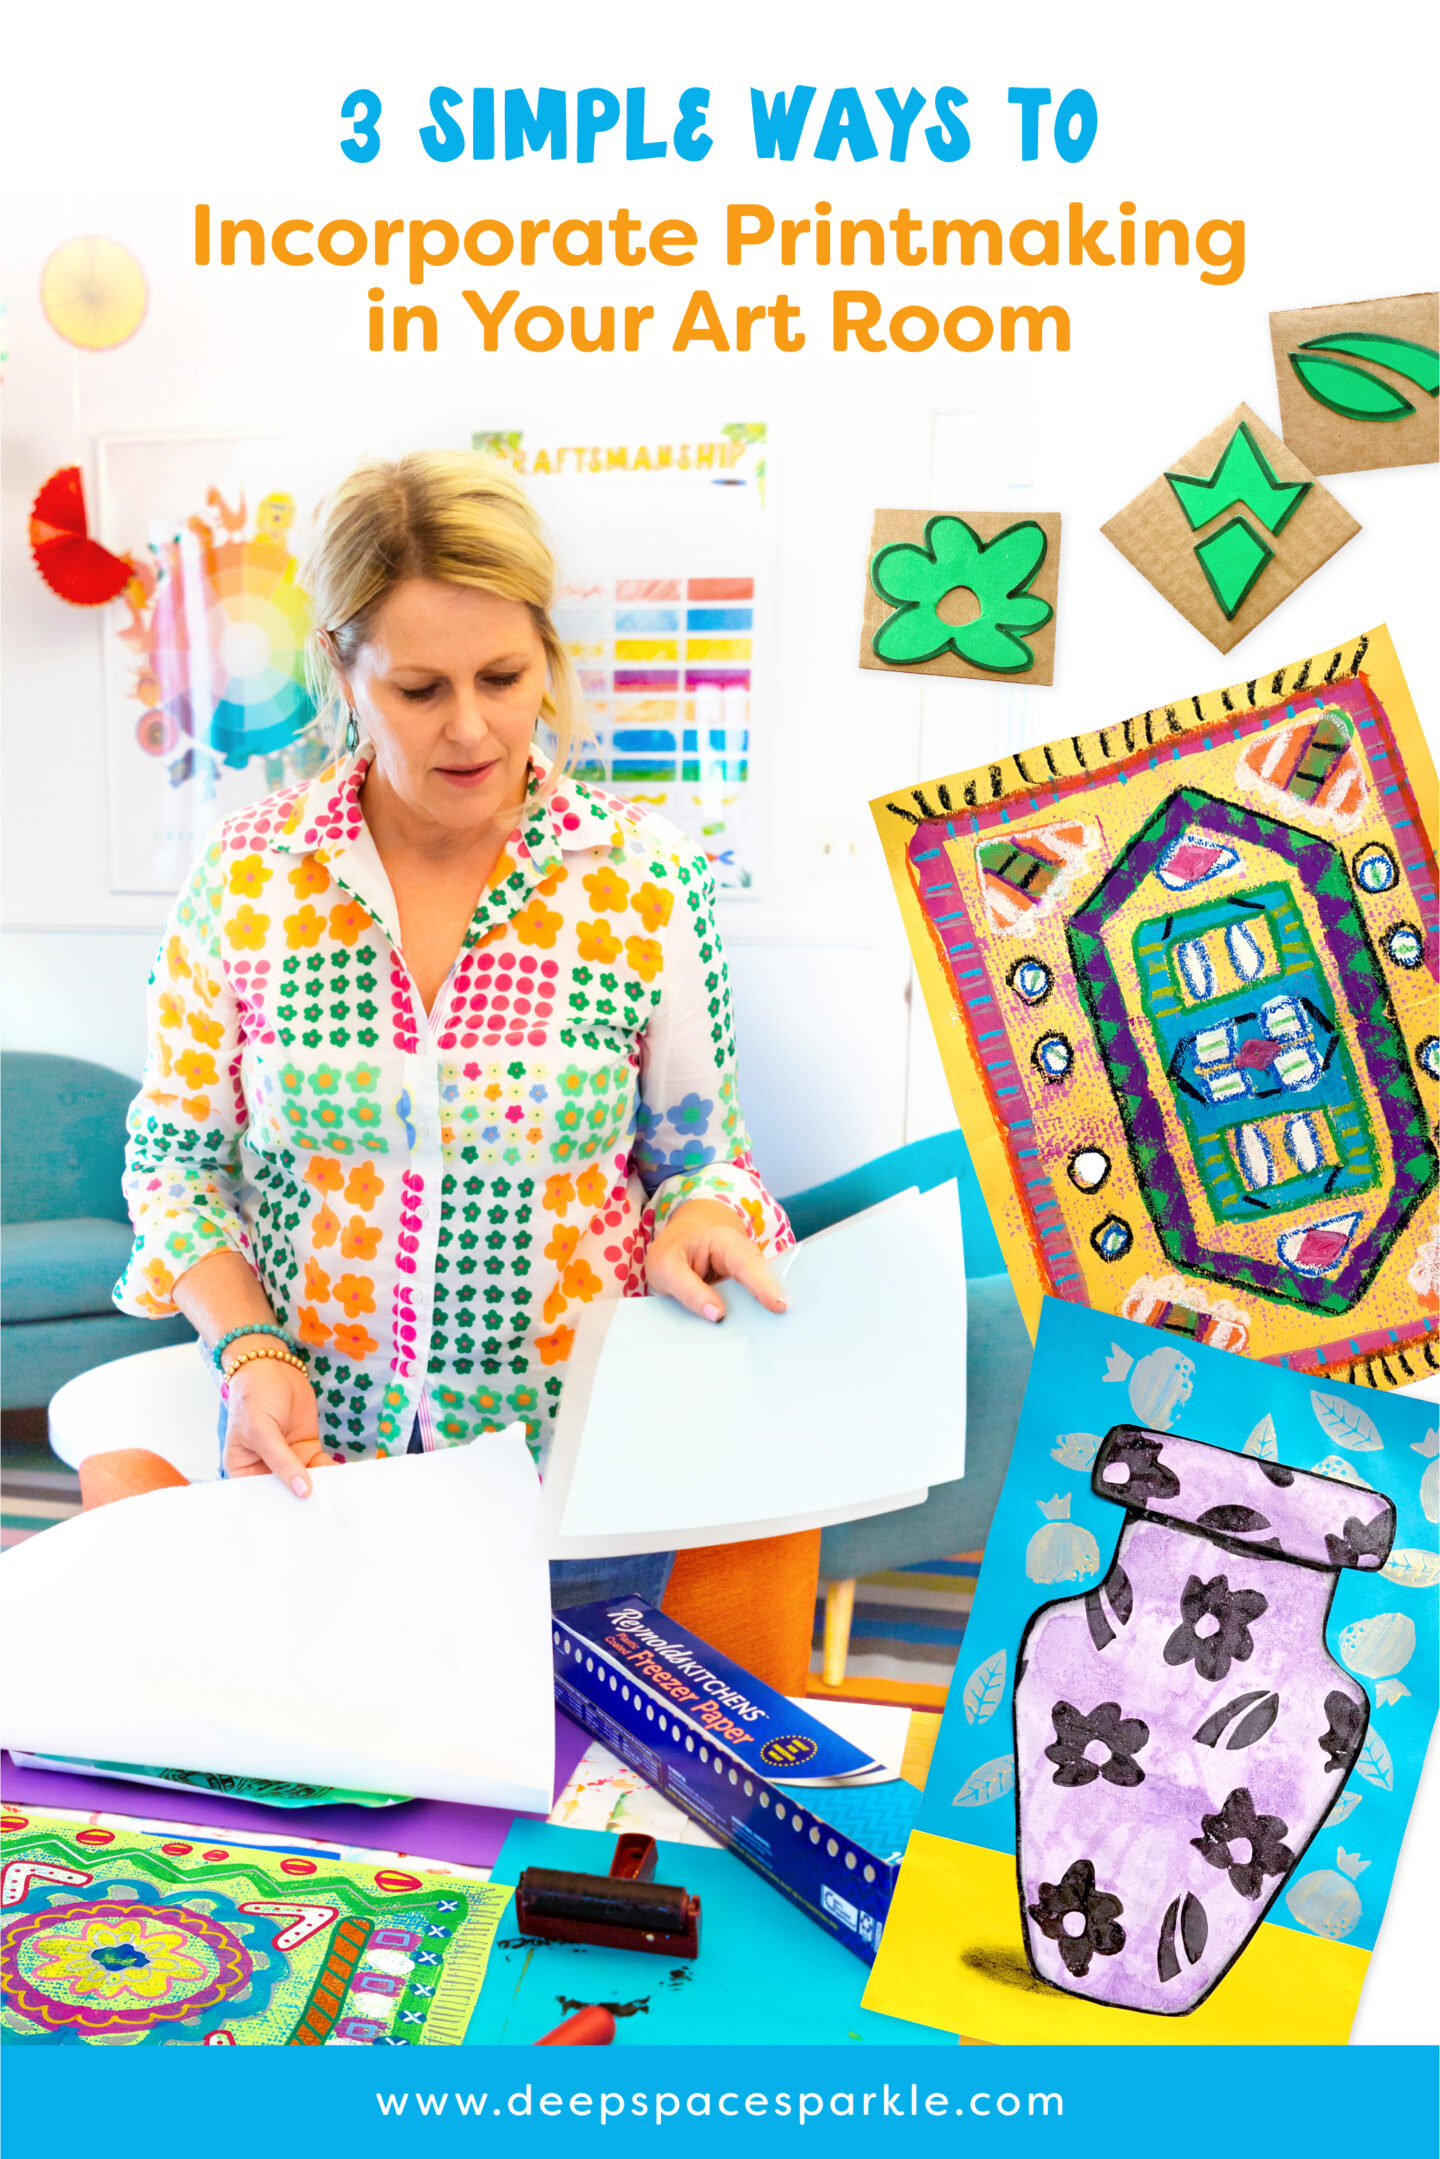
#1: Make stamps
When you hear printmaking you might shudder, thinking about the mess that it will create, but printmaking doesn’t always have to be material-heavy and complicated. Making stamps is a simple way to dip your toes into printmaking without too much fuss.
Give each student a square of cardboard and a piece of a foam sheet. Have them cut their own shapes out and glue onto the cardboard. When dry, brush with liquid tempera paint and turn over to stamp onto paper. This is a great way to reinforce the concepts of shape, pattern and repetition with your students.
TIP: for younger students, use sticky-back foam shapes instead of scissors and glue. They’ll still enjoy arranging their shapes and the stamping process.
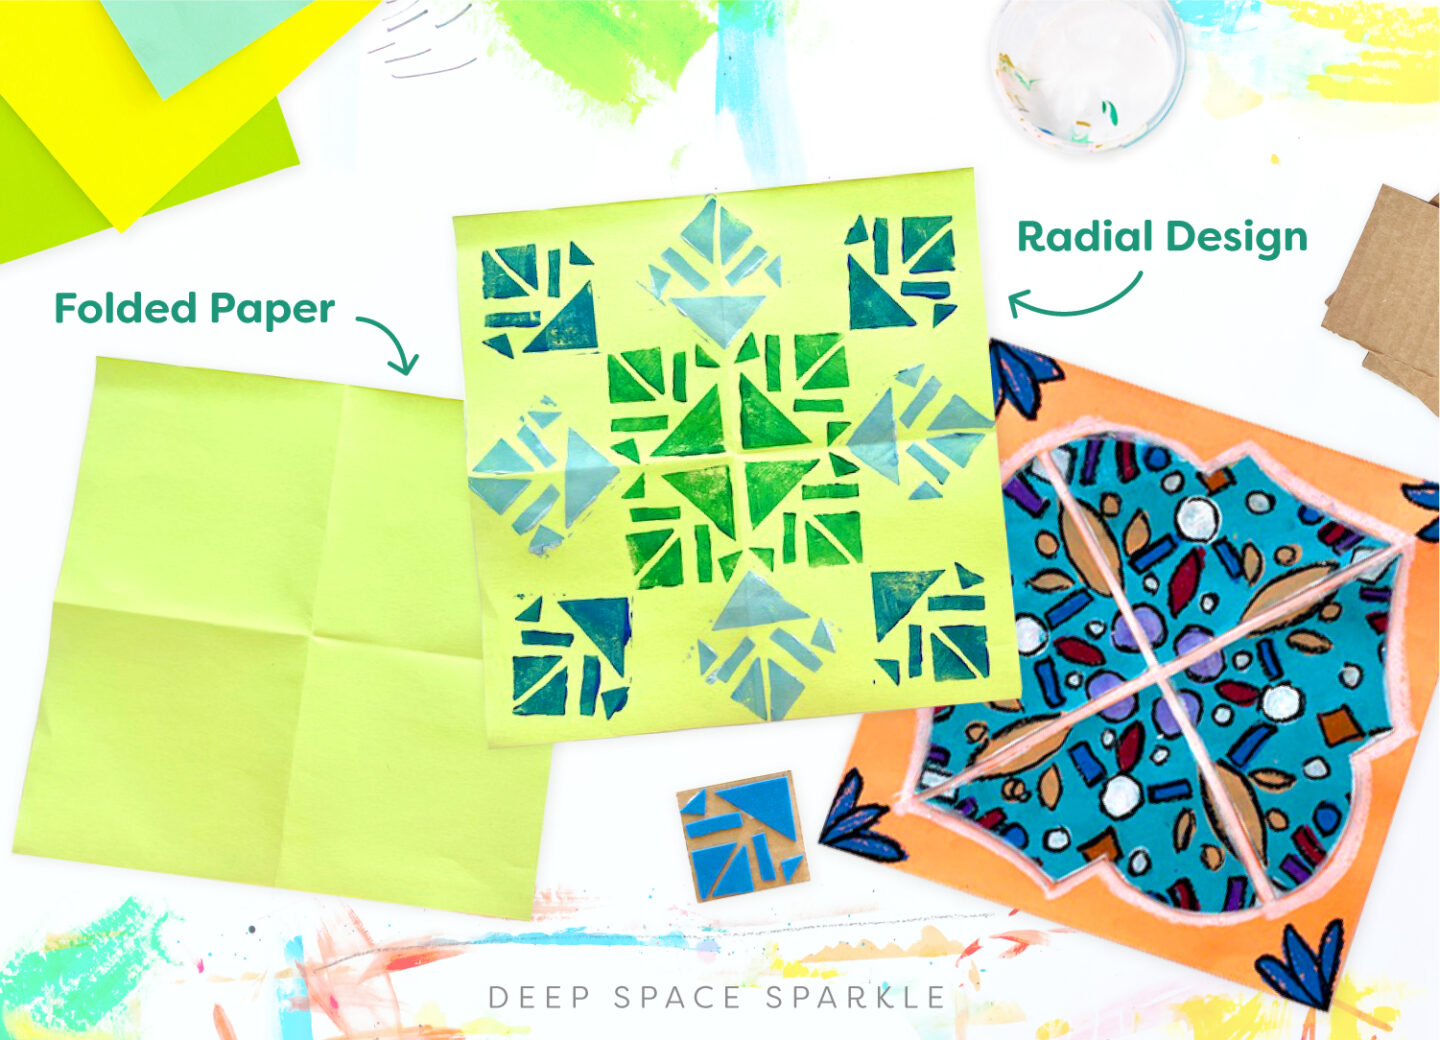
#2: Create radial symmetry
Once you’ve made a stamp, it’s easy to take the complexity up a notch and create a composition with radial symmetry.
Fold a square piece of paper into fourths. Unfold and use a stamp once in each section. To keep the prints oriented toward the center, draw an arrow on the back of the cardboard, facing one corner. As you stamp, make sure the arrow points toward the center each time. The end result will be a repeated design, oriented around a central point.
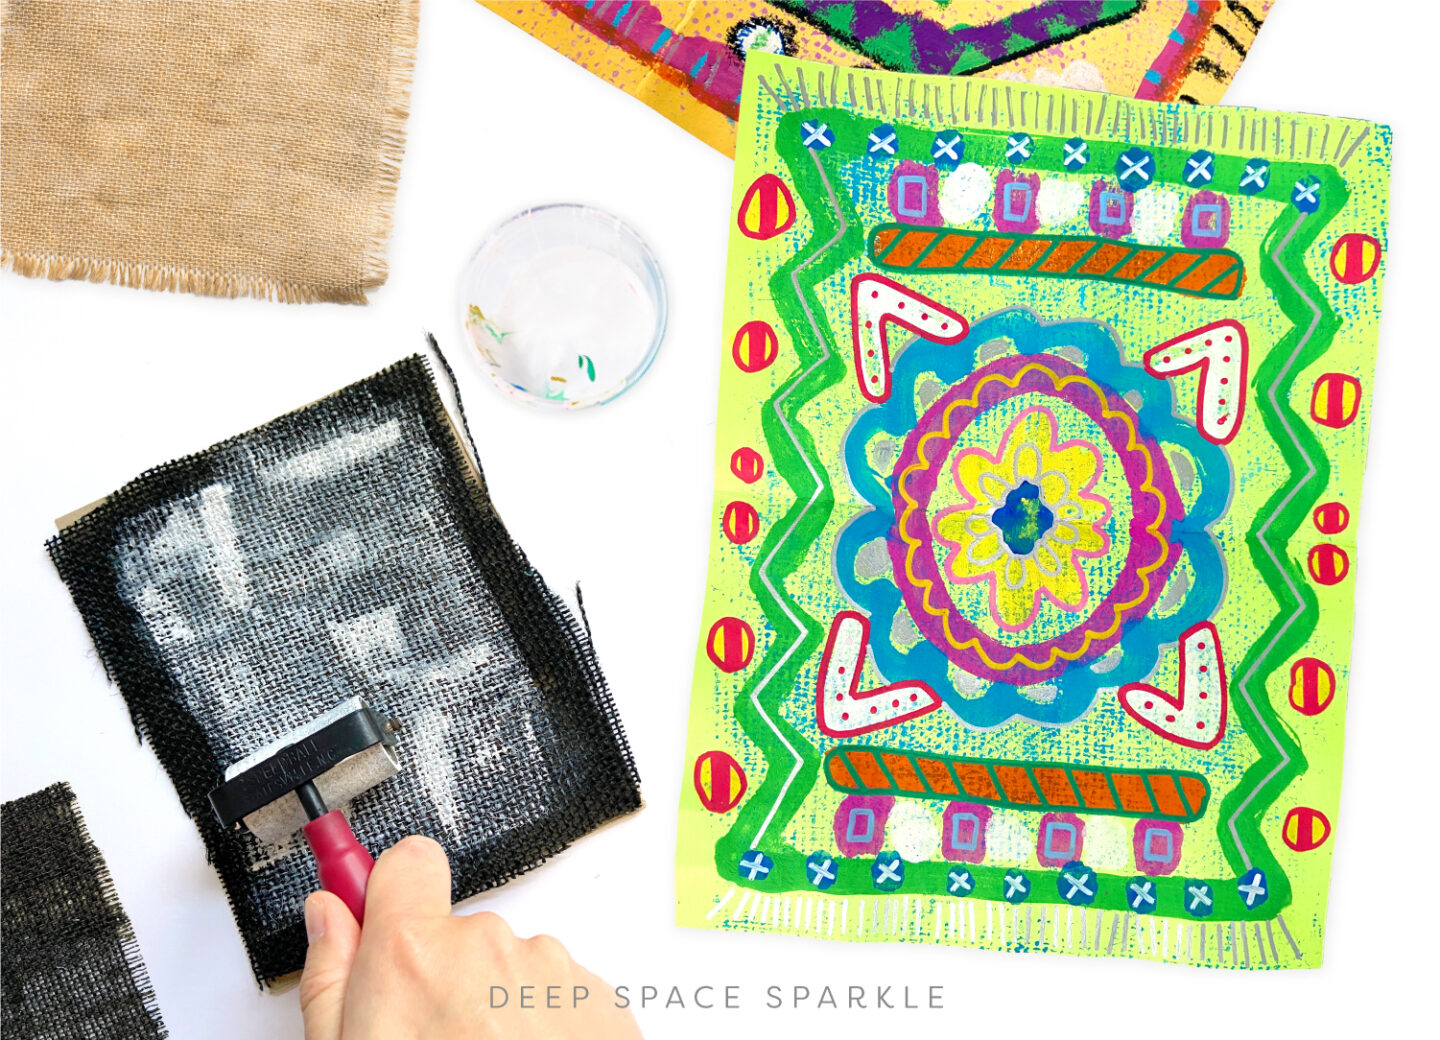
#3: Explore different textures
Printmaking doesn’t just have to be for the details. Creating large, textural stamps can be a fun way for students to explore everyday textures in a new way and create a fun background at the same time.
Use a larger piece of cardboard, about the size of an adult hand, and glue something textural to it. This could be a piece of burlap or lace, or loose items like rice, snad or leaves. Larger items might require hot glue to adhere, while smaller, loose items will stick with liquid glue.
Roll a braver over a layer of liquid tempera paint on a flat surface, then roll over the texture stamp. Press the texture stamp onto a piece of paper. Rub the back of the stamp, then peel up to reveal the texture. Continue the process until you fill the page with texture.
You can find printmaking lessons from simple to complex in the Art from the Middle East Bundle, complete with assessments and standards as well as STEAM connections and activities. Join the waitlist for the Sparklers Club HERE.


Realy nice!
Perfect!!
I was wonder if you have an art supply list with your favorite brands by chance?
Hi Sharon! We do 🎉. Please reach out to me at support@deepspacesparkle.com and I would be happy to help you out with that!
This sounds simple and easy to implement. I will try this with my 4th – 5th graders.
Looks great!
very good
VERY NICE!
I always try to recycle and reuse in my classroom. So this is a great post for that. But I would keep with inking plates that can be cleaned instead of your suggestion for disposable plastic bags.