


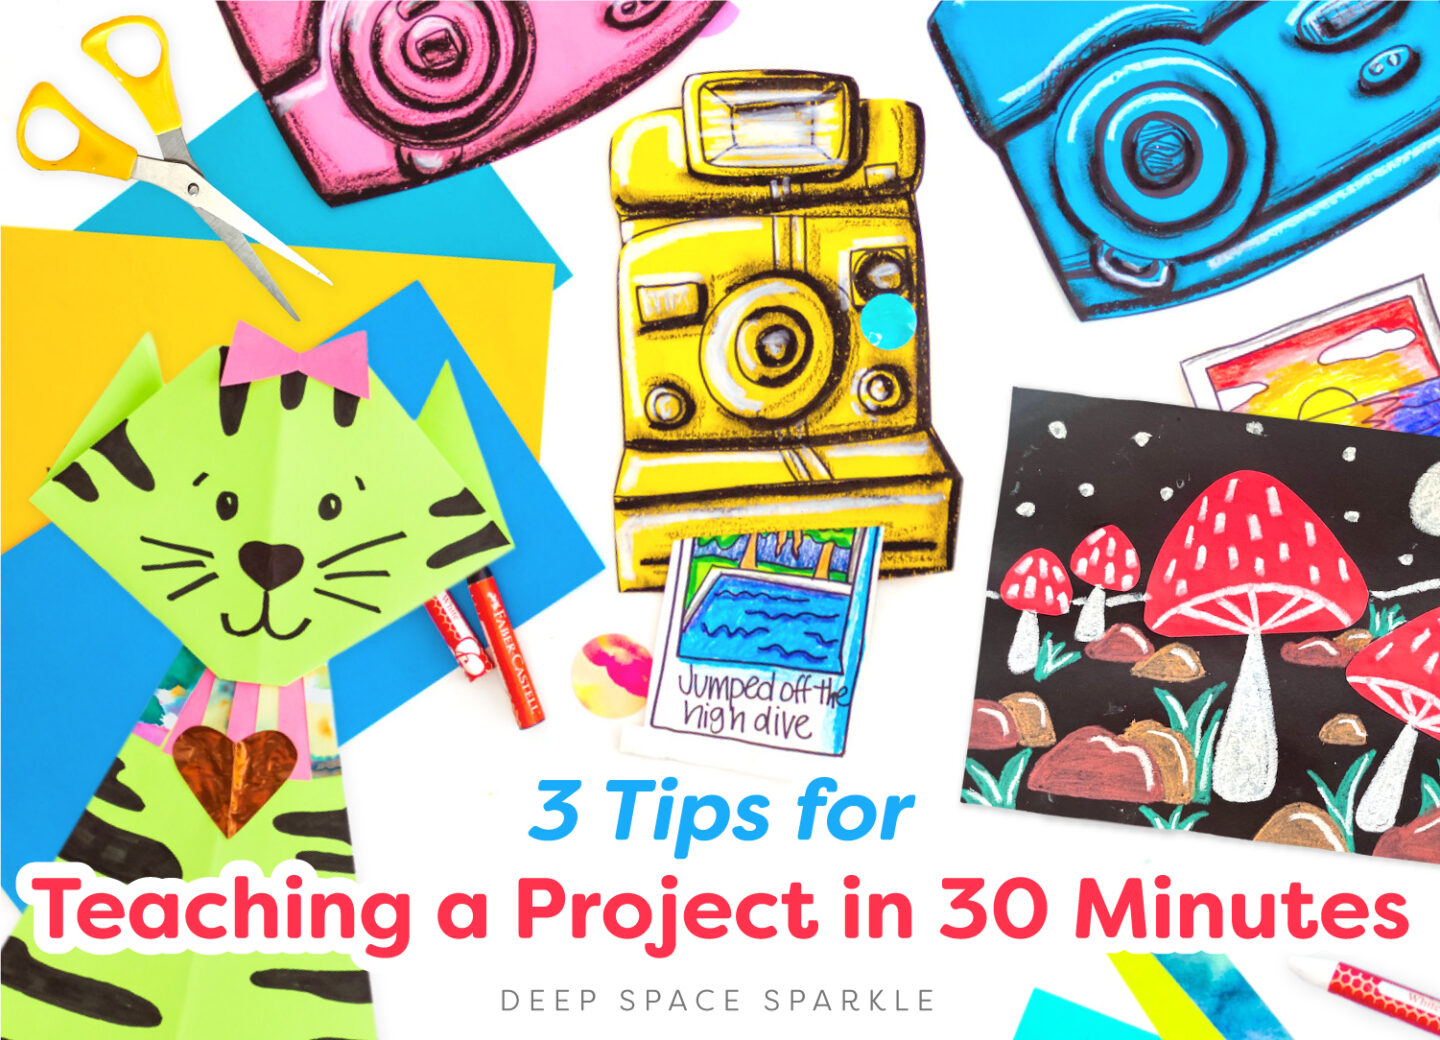
We’ve all been there. An assembly or fire drill shortens the school day and you are stuck with little pockets of time with each group of students. You search for a 30 minute art lesson to fill the time. Then, that colorful, detailed, nuanced lesson catches your attention and your eyes get big, you feel the creative juices flowing, and you ask yourself, “Can I make that lesson work?”
As a glass-half-full kind of gal, I’m going to tell you that you probably can. Here are some helpful tips to get you there:
Tip 1: Decide on the Focus
Again, think about that lesson that caught your eye.
What is it that you love about it? Is it the book connection? The subject matter? The material used?
Once you decide on the focus, make the lesson about that, not all the other stuff.
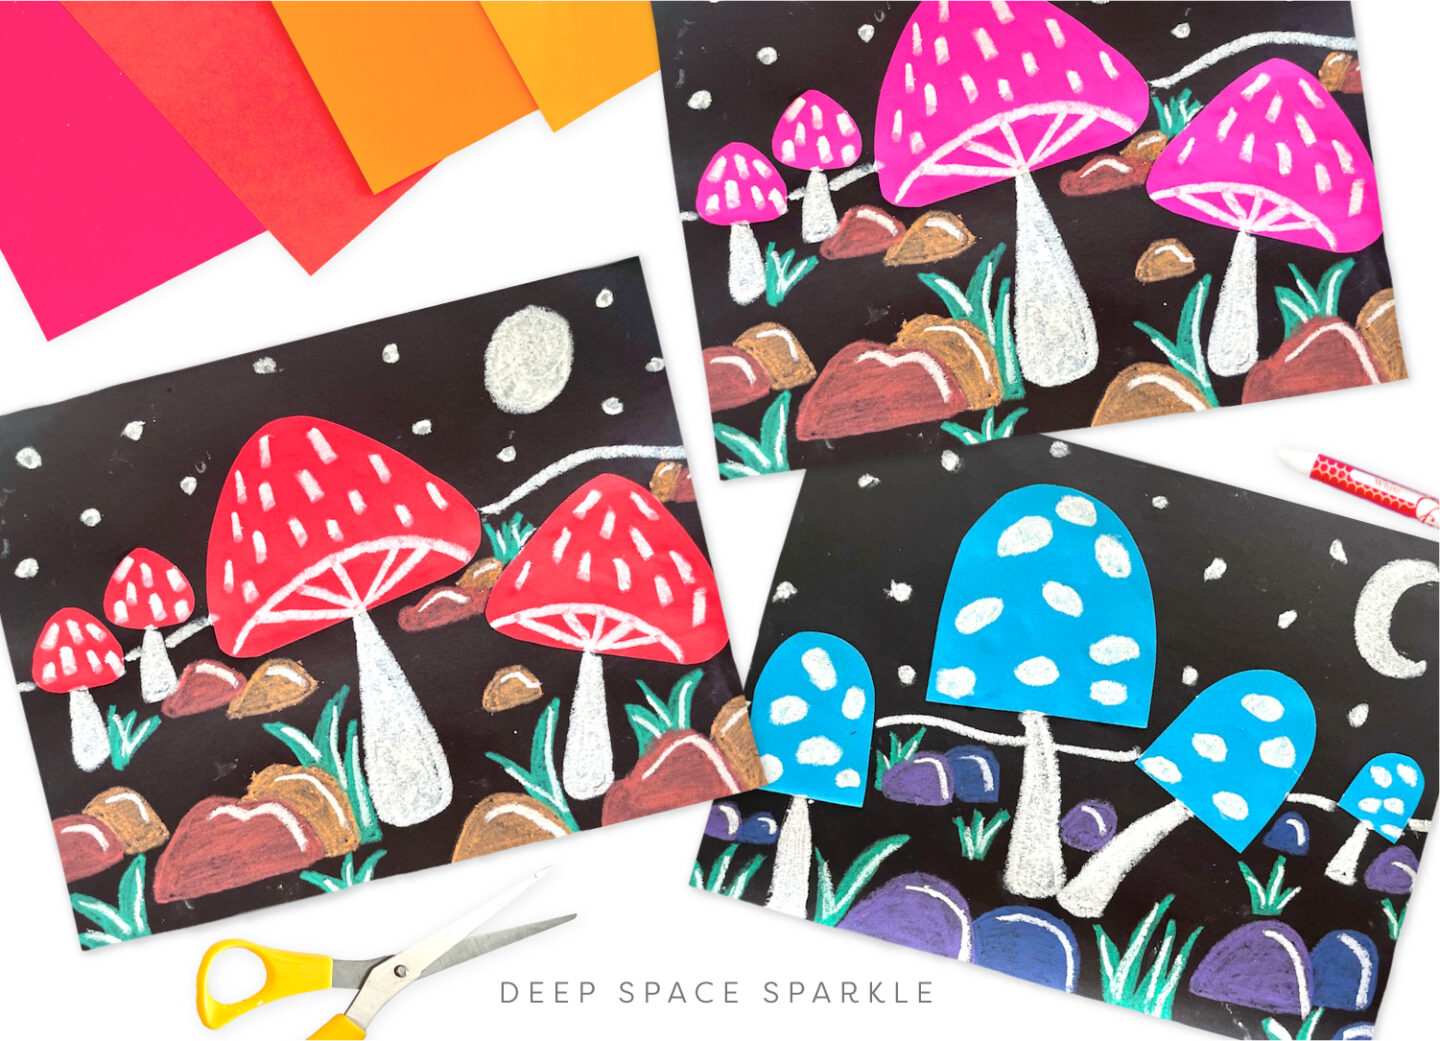
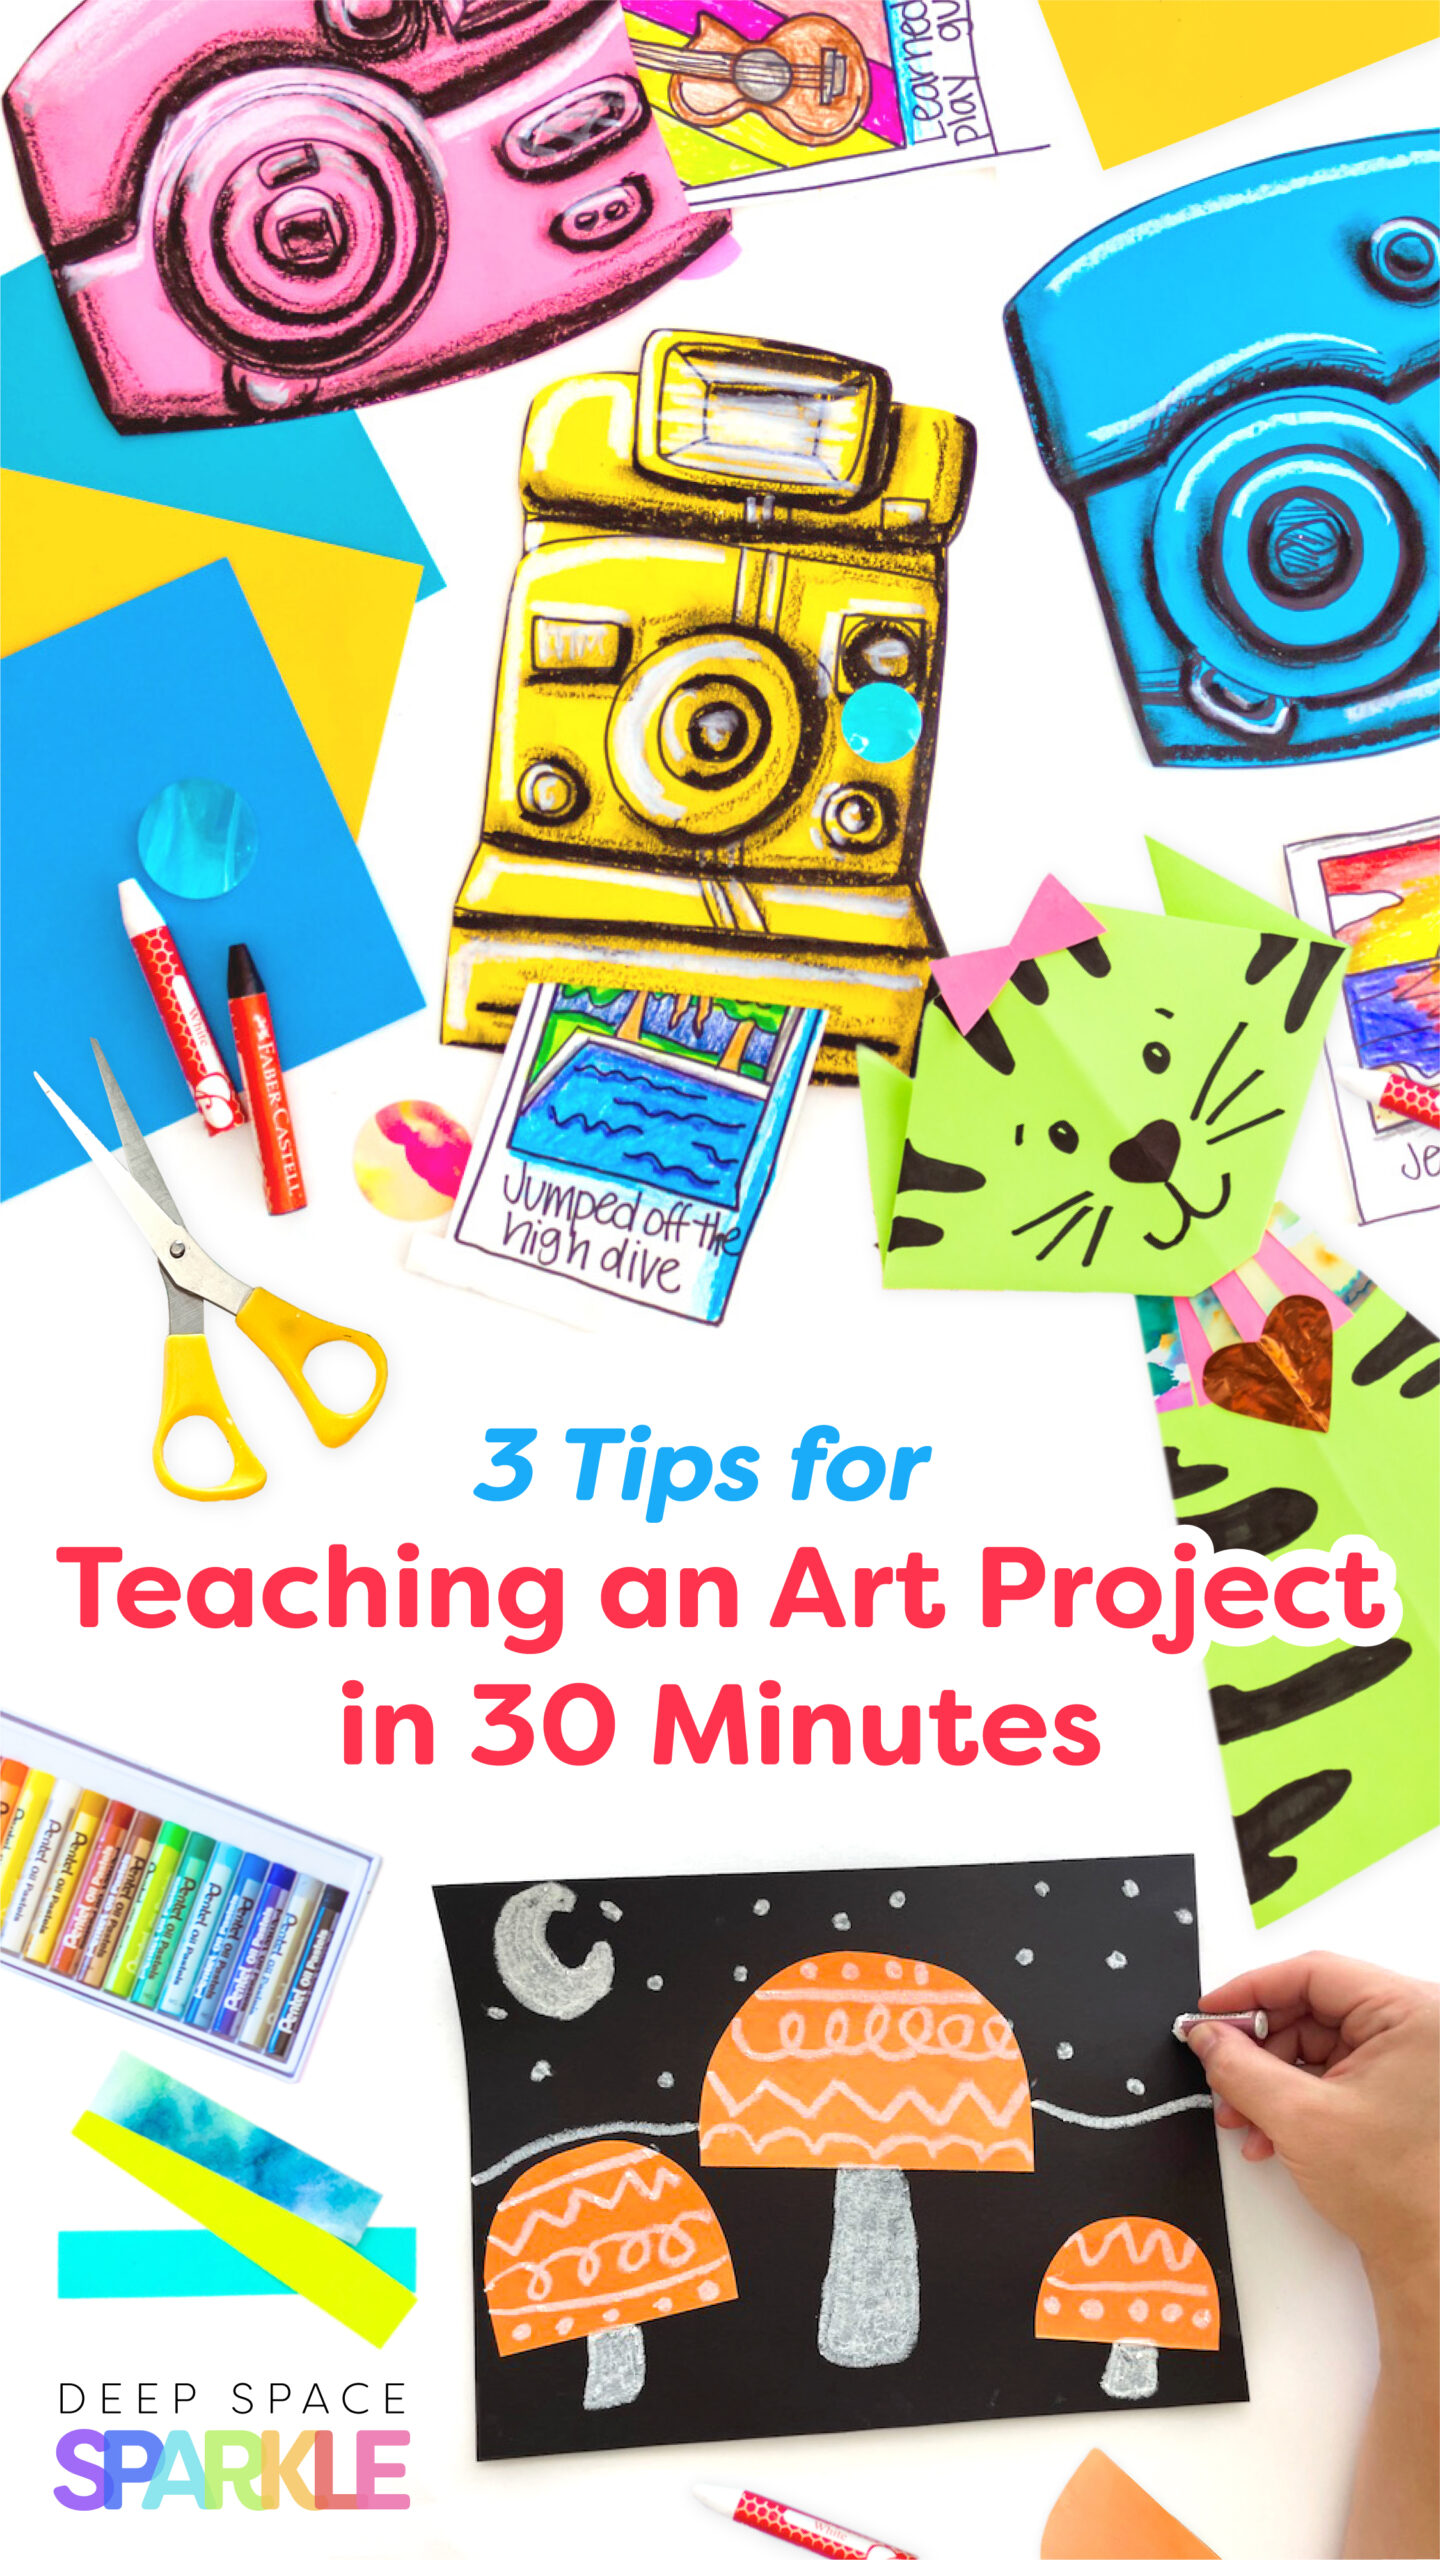
For example, the Midnight Mushrooms lesson in The Sparklers’ Club August 30-Minute Project Bundle was inspired by all the beautiful watercolor mushrooms in mossy forests that I’ve seen trending on Pinterest. However, having students draw detailed mushrooms, decide on a background, paint the mushrooms with watercolor, paint the background, sponge paint moss … is just far too much for a shortened class period.
The question then becomes….
Can you identify the focus so that you are still able to create a beautiful project?
Of course! It’s the mushrooms. The next step is deciding what can be stripped away to make the lesson stay on the focus.
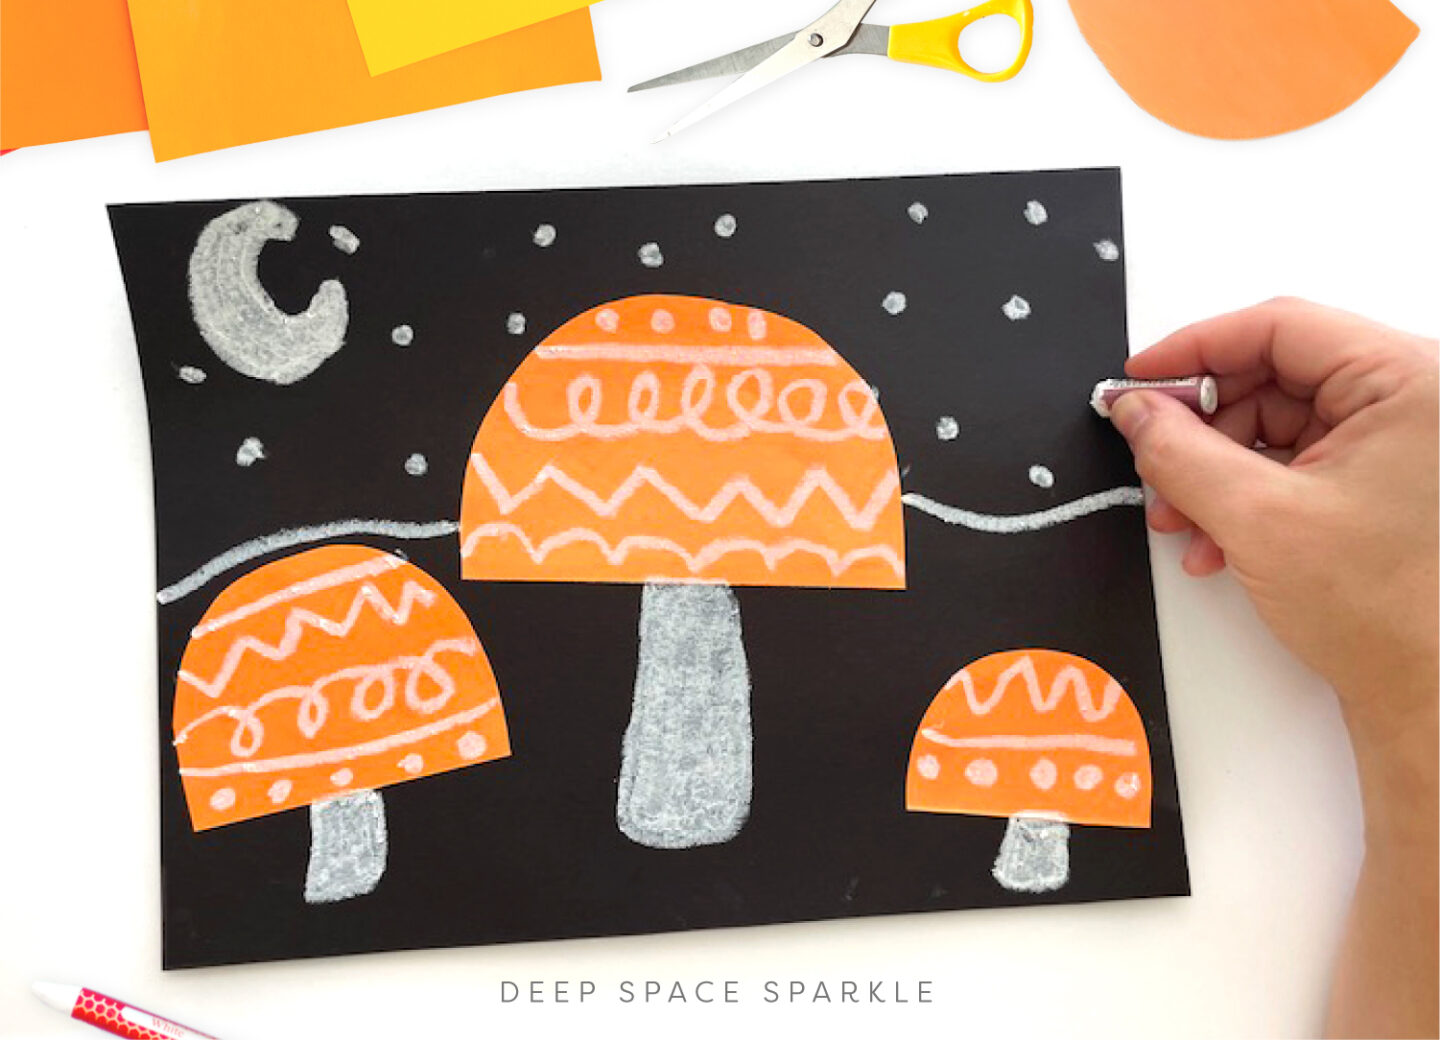
In place of drawing the mushrooms, simplify their shape and cut out the tops.
Rather than paint, use paper that is already colored.
Instead of a complicated background, create contrast by using dark paper and a few pops of color along with a white oil pastel.
Trade out sponge-painted moss for rocks and grass drawn with crayon.
In many ways I prefer this high-contrast, simplified version based on the original mushroom inspiration instead. It’s punchy, whimsical and keeps what matters as the focus.
Tip 2: Cut it Out
When working with standard 9” x 12” drawing paper, it’s easy to just keep a project a rectangle, but it doesn’t have to end that way. Though getting out scissors adds another supply to your students’ tables, it saves a lot of time towards the finish line.
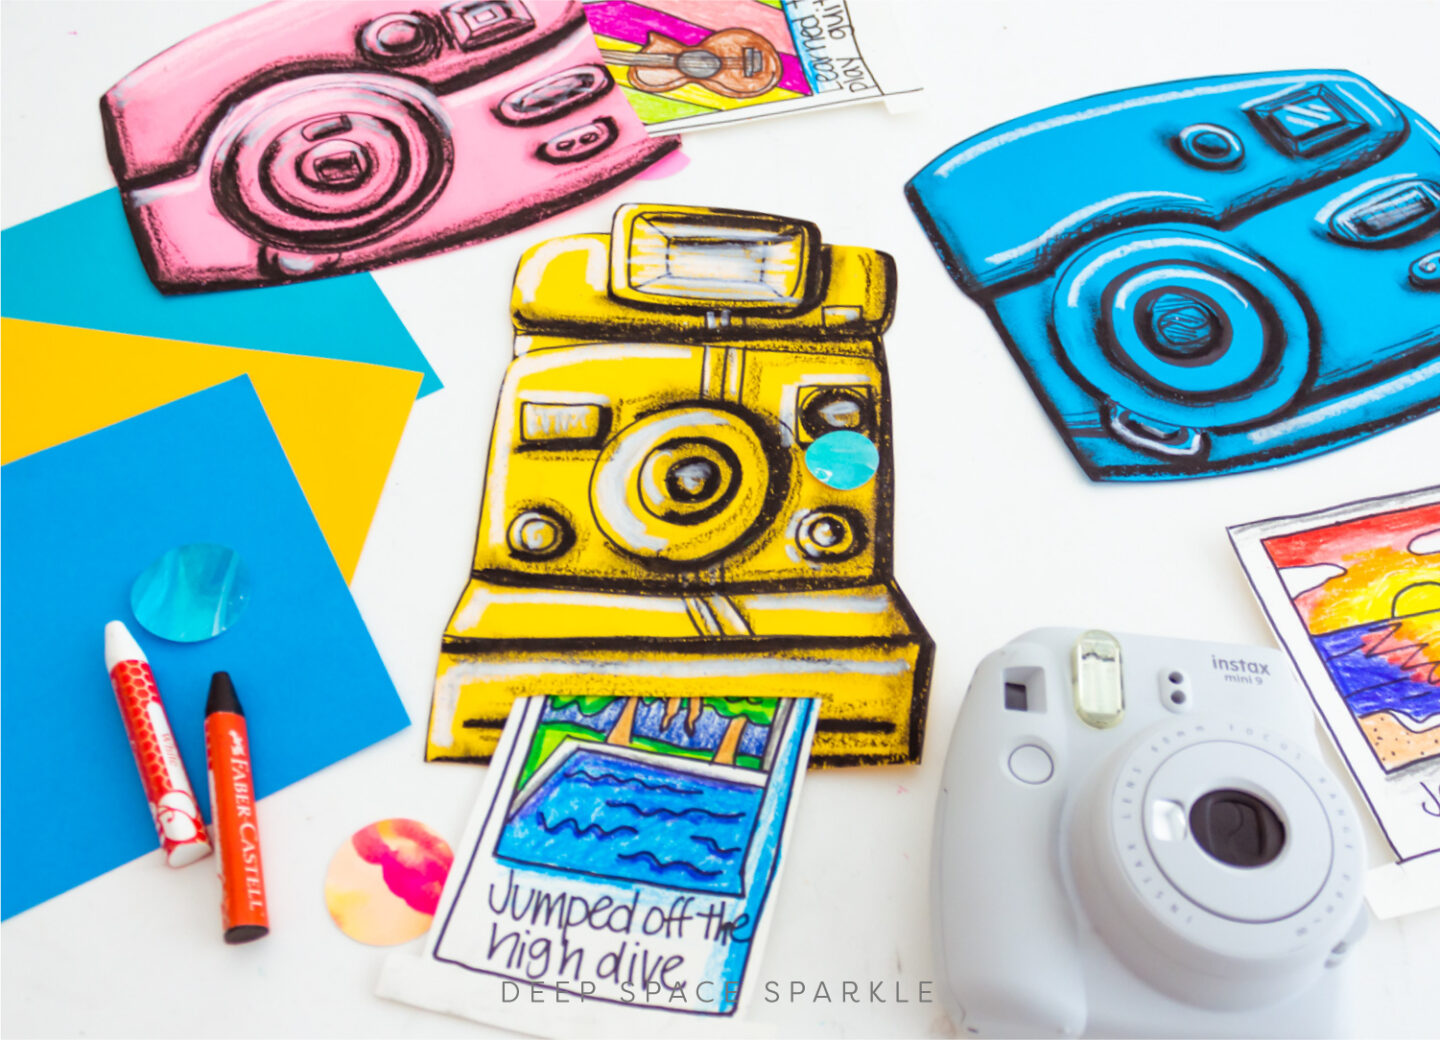
For example, in the fun Contrast Camera lesson from the same 30 Minute Projects Bundle, a drawing of an instant film camera is featured. Drawing the shapes and details needed to create the camera is the technique learned in the lesson, but it also takes up the most time. What should be done with the background?
The clock is ticking and the lesson looks unfinished.
Need a solution?
Cut it out!
Not only does this remove blank space that would otherwise take time to fill in, it gives the camera a lifelike effect. The cameras can become fun props to hold up or displayed on an expanse of colored paper to create a gorgeous hallway display. All it took was pulling out your bin of scissors.
Tip 3: Keep the Steps Moving Towards the Target
We all want to be “in the know” when working on something and it’s the same with your students. Be transparent about the end goal when presenting steps of a project to students. They will cooperate more if they can see what’s ahead of them. No one moves swiftly in the dark.
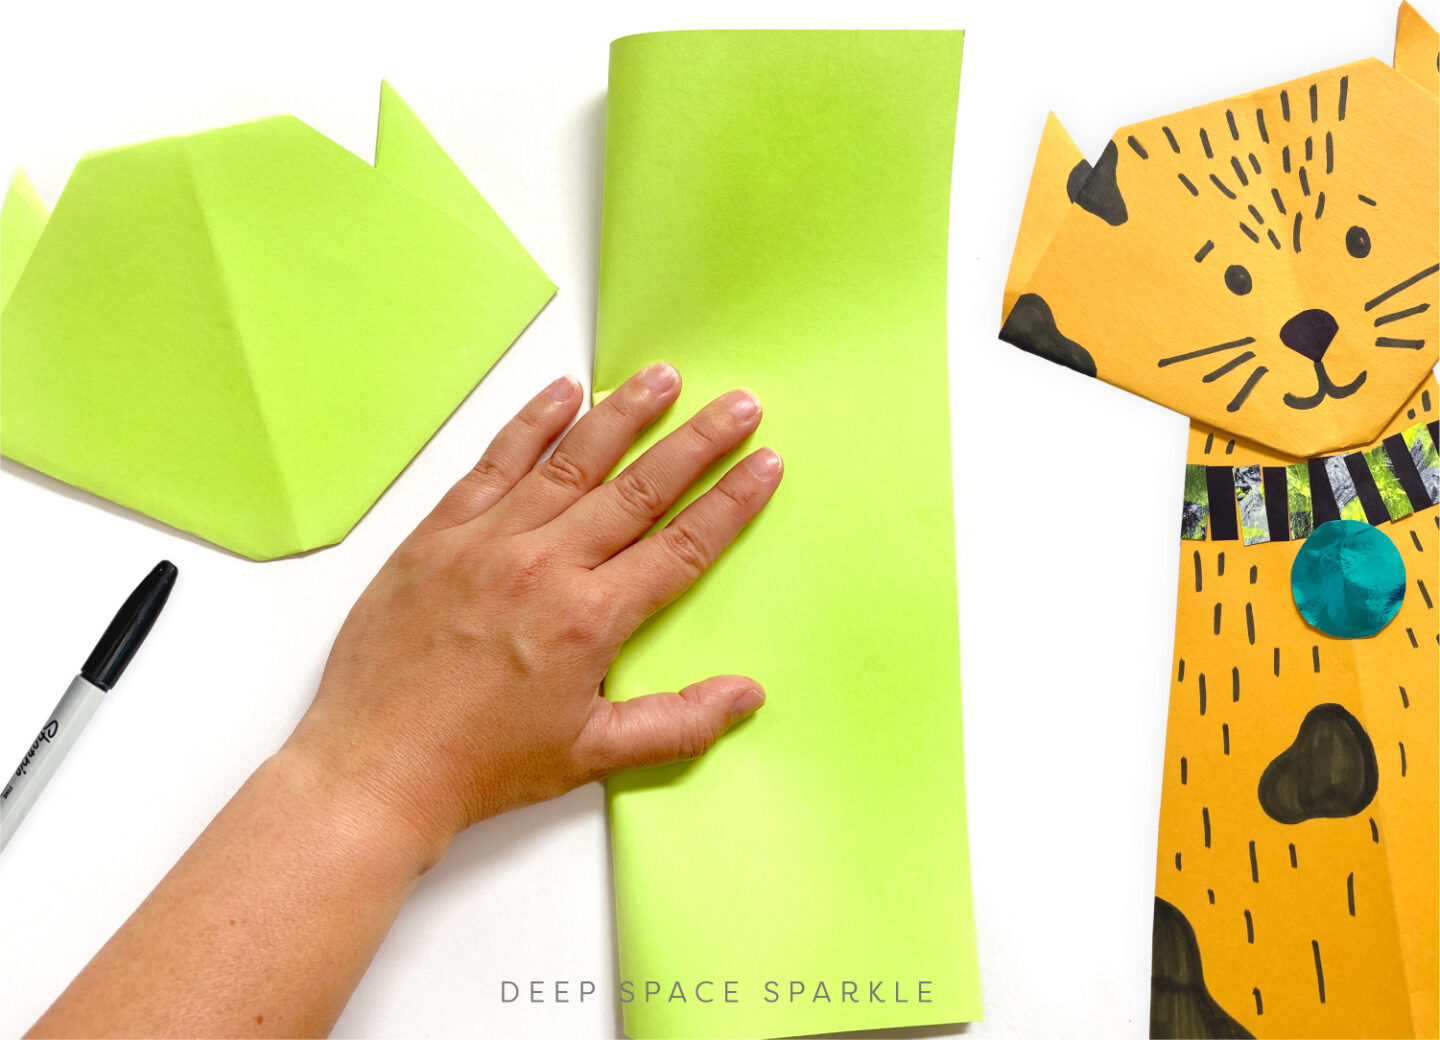
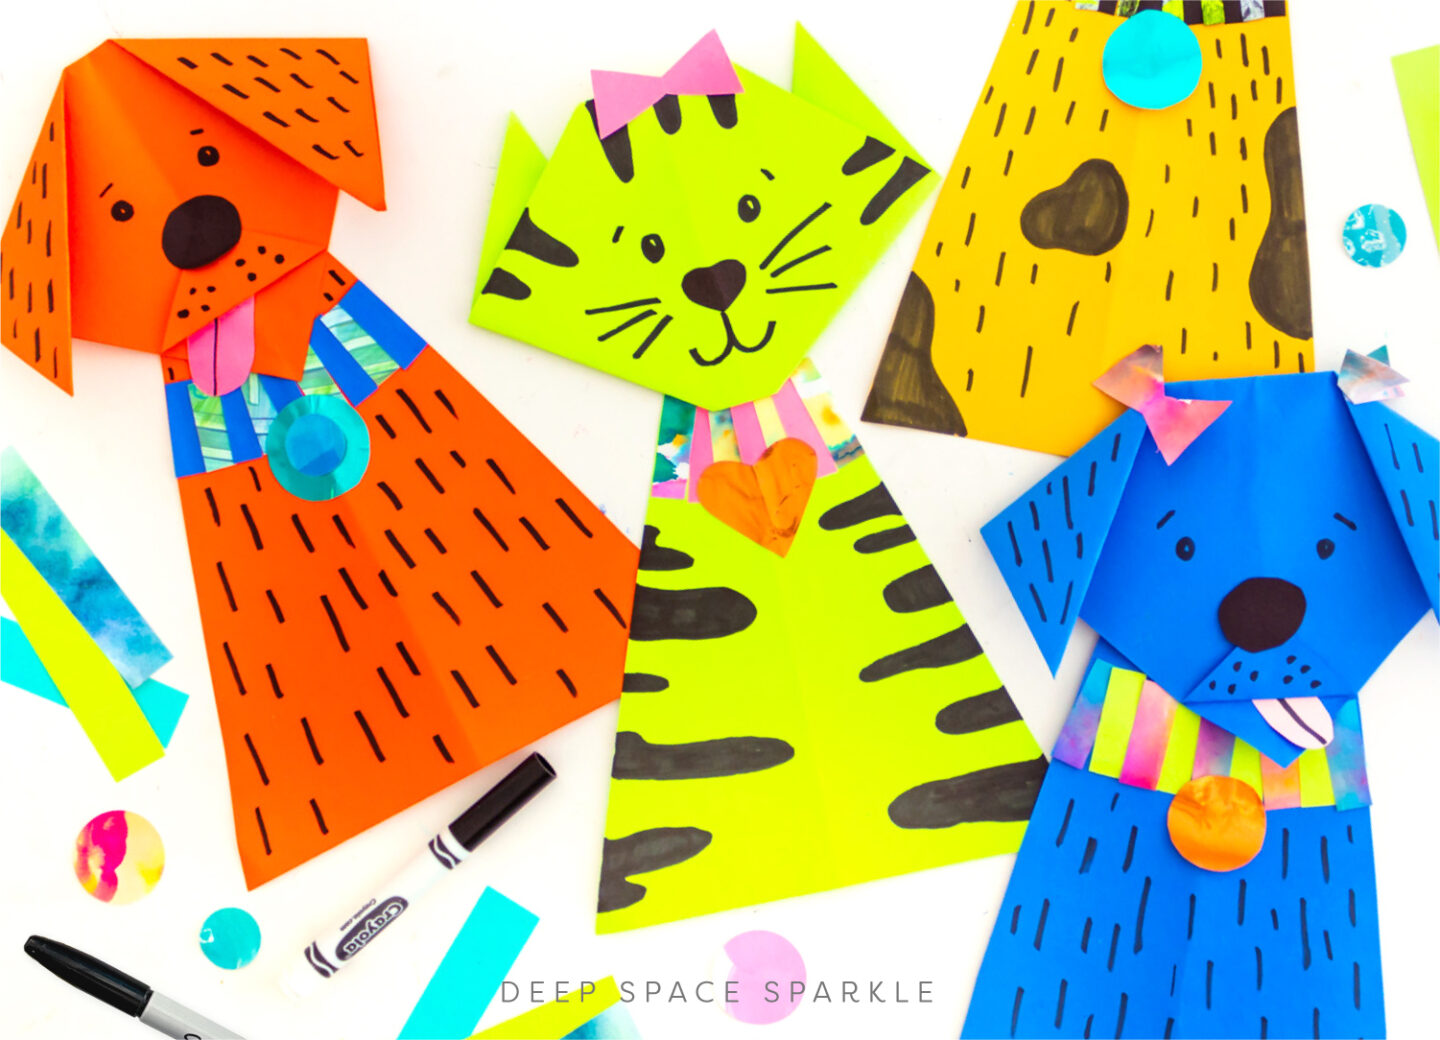
With the Origami Puppy & Kitten lesson, also found in the 30 Minute Projects Bundle, students should see a sample or two of what they are making when they begin. If they don’t, their motivation to fold paper will not be enough to produce a successful result. With a target sample project in mind, students will be keen to follow along and keep up with the steps that you present.
Speaking of steps, gauge how quickly you need to move through the steps in order to complete the project in 30 minutes.
Keep the energy high and the steps rolling towards the end result. It seems counterintuitive, but sometimes going too slow may actually lose students in the process and cause confusion.
You can always give early finishers a few embellishment ideas to add to their projects, which will allow you a little extra time to help the few who need to catch up.
By following these tips, teaching a project in 30 minutes will become a little easier.
To see examples and full lesson plans of other 30 minute lessons, make sure to check out the 30 Minute Projects Bundle in the Sparklers’ Club.
Not a member? Join the waitlist here.


Great ideas for short class periods, which all of mine are!
Great ideas for short class periods, which all of mine are!
I am new to teaching art and these ideas are wonderful. I can’t wait to try them. Thank you!
Great!
Thank you! Very good advices!
Would love to try these!