


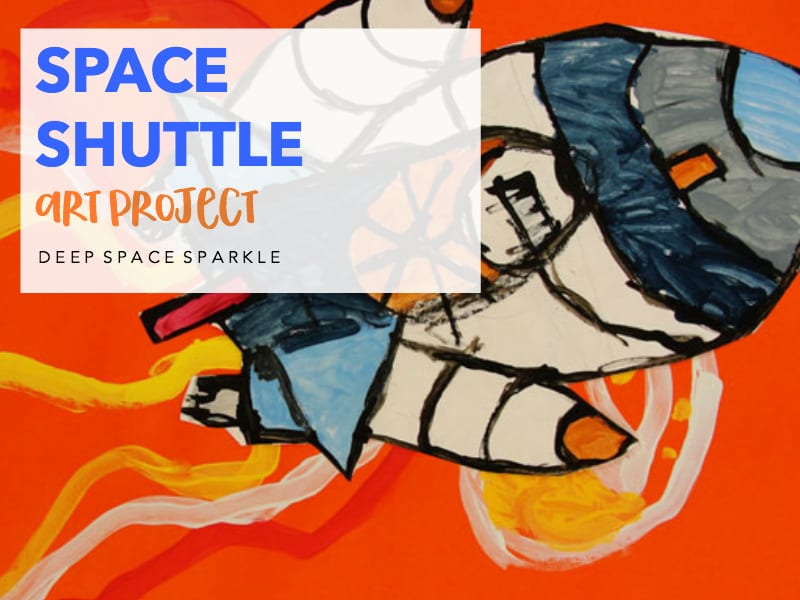
Wow! America! by Robert Neubecker is one of my favorite resources for art lessons. I love his dynamic illustrations. This picture book inspired this Space Shuttle art lesson. I created this lesson for my Kinder class but see how art teacher Hannah Millard from Highland Elementary adapted this lesson for fourth grade. I think the results are even more spectacular!
What you’ll need:
- 12″ x 18″ orange, blue, black or yellow construction paper
- 12″ x 18″ white drawing paper
- Pencil or crayon
- Tempera Paint (black, light blue, dark blue, gray, orange, white and yellow)
- Glue and scissors

The space shuttle is fun to draw. Watch the little boys’ faces when they walk into the art room and glance at the white board. You’ll have a captivated audience in no time! I like to put a few samples on the board. One drawing of the space shuttle by itself, one of the painted background and one finished project. I typically don’t put a finished project on the board, feeling that it intimidates and influences their art choices, but in this case I wanted to show how the project was two parts, not just one.
Drawing the Shuttle

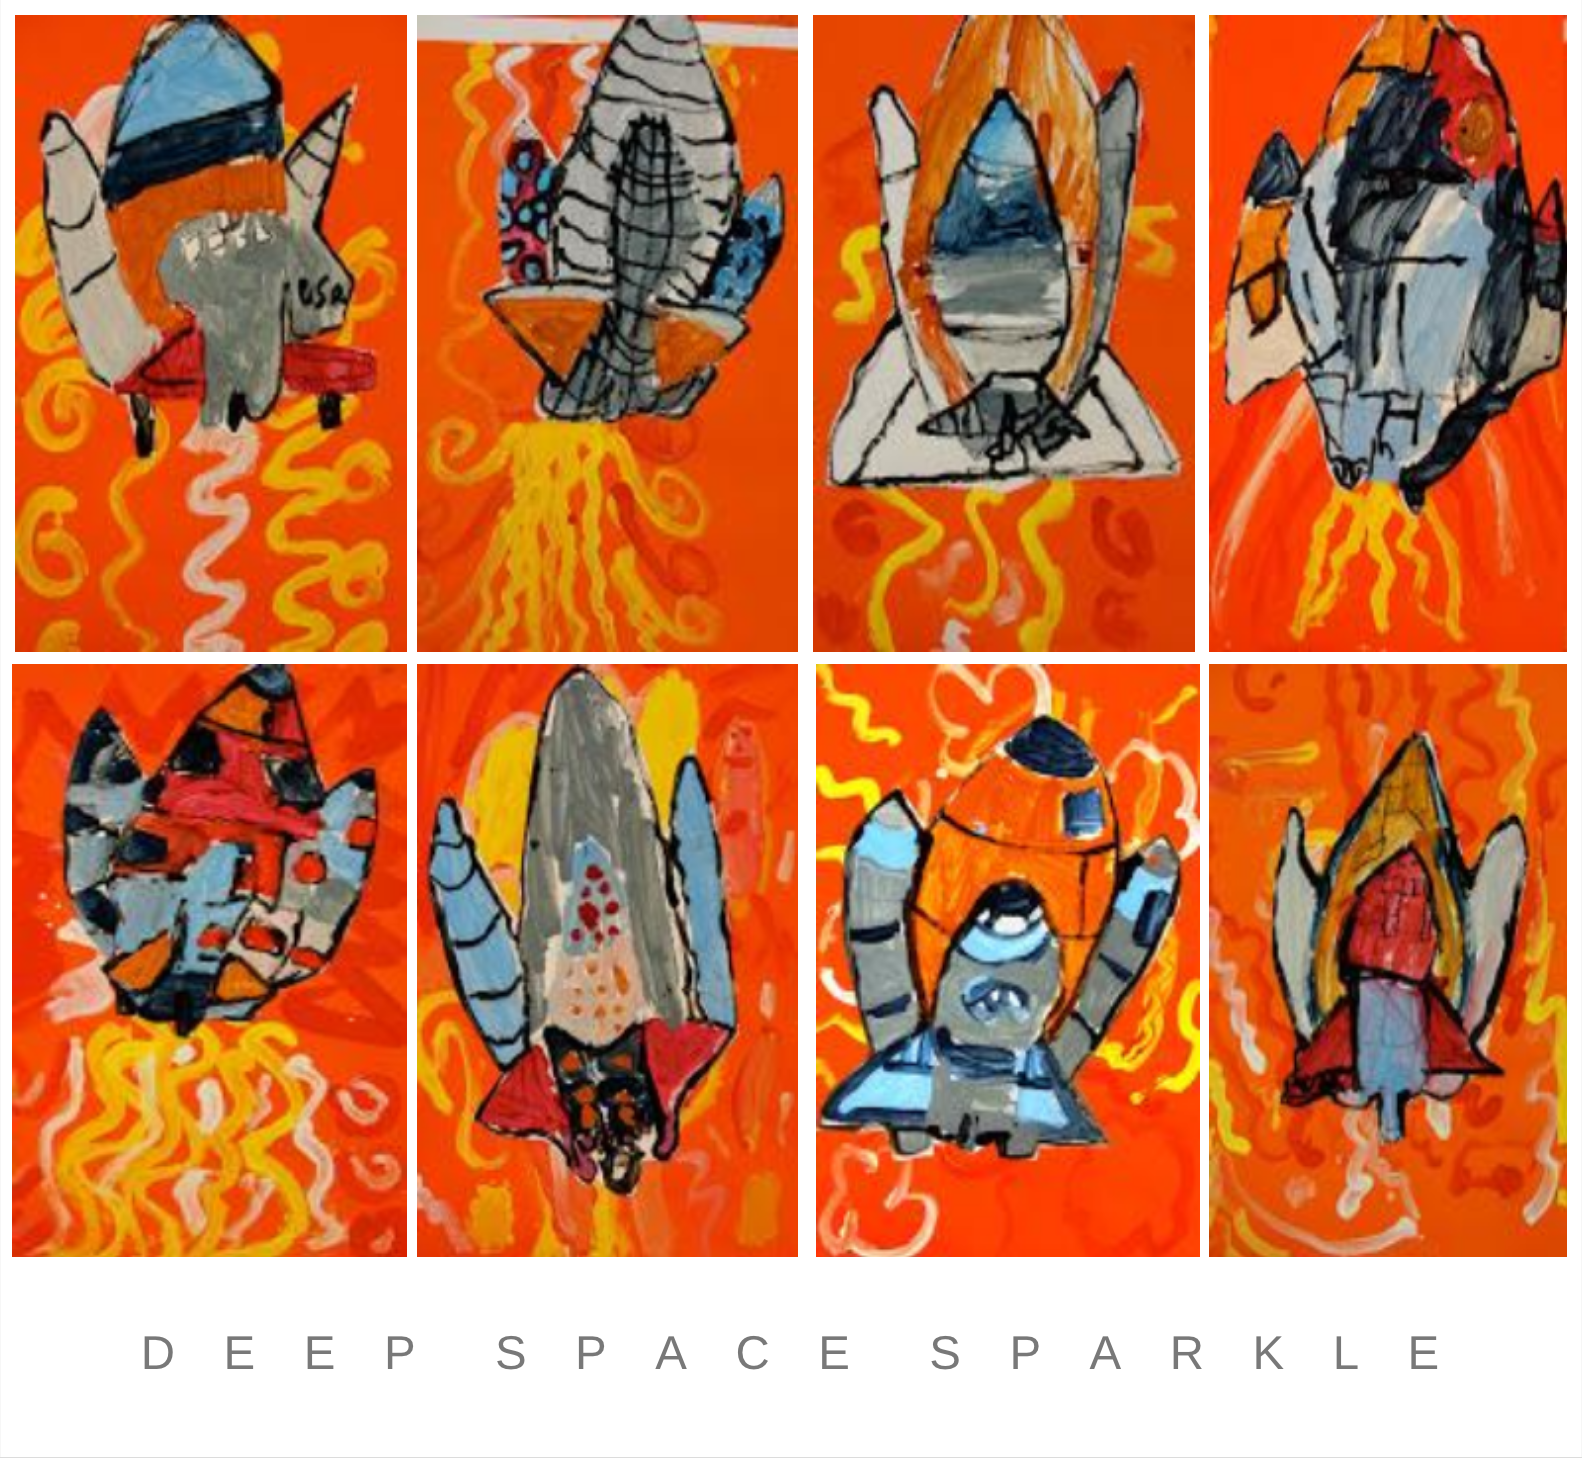
To draw the Shuttle, start with the white paper and a pencil. Put an outstretched hand on the top half on the paper (little finger touching the top edge). Where the thumb is, draw a dot. This will be the tip of the shuttle or the nosecone.
Draw a curved line down from the dot on one side and then the other. Connect the two curved lines with a straight line. Add a skinny rectangle vertically. To make the wings, draw triangles on either side of the engine body. Next, draw the big rocket thruster behind the shuttle then add the two booster rockets.
Vary this drawing to however it suits you.
I used Neubecker’s illustration to guide me, but other Space Shuttle images will give you different looks.
Once the drawing is done, paint the insides of the shuttle with the different paint colors.
Painting the Background
Again, I used Neubecker’s illustrations as my guideline. You might want to create a different background. Dip paint brushes into white, orange and yellow paint and create swirling motions with the arms. The kid’s loved this part of the project. I didn’t limit them to how vapor and steam should look. I just explained how hot it must be to propel the rocket so high up into the air.
Putting it all together
Set aside the background and cut out the space shuttle. Glue shuttle to background. Using a small brush dipped in black tempera paint, outline all lines. The pencil lines will be hidden underneath the paint, so explain to the kids that they are to re-draw the shuttle. Keep the teacher sample on the board so they can refer to it.
Kinder Space Shuttles blast off!
Want more free space themed lessons? Click the yellow download button below and you’ll receive our Space X Falcon Heavy Star Man PDF lesson!


These paintings are so dynamic, and it surprised me that they were done by kindergarten children! A space shuttle is a complex image, but they created some beautiful works! Nicely done!
Thanks Renee,
This is one of my favorite kinder art lessons so I’m glad you liked it!
This is a great project! Thanks for the great ideas (always!)
This is a great project! Thanks for the great ideas (always!)
LOVE IT! I did the Rocket and Space Collage with my kids this year, and I'm going to have some of the same kids next year, so I'll try this one for the culminating Art project for our Space Month! Thanks!!
All I can say is you are amazing! I am an elementary art teacher in MN and you are an inspiration! Thank you! I often visit your site as one of my main resources for information and new ideas!
THANKS KAREN!
Thank you so much I am an artist turned teacher and you have helped me to understand the levels for the grades. The projects help to figure where the kids are. thanks again
Wow this looks like a lot of fun. I'd love to steal this idea. 🙂 Our district wants us to post objectives and standards for every lesson now, though. What were yours?
Hi Katie,
I don't teach to standards. It's not necessary in my opinion. I mean, look at this project…directed drawing, shapes, cutting, pasting, composition, spatial relationships, warm color theory, science…what more could you want.
But on a educational note, if you need to add standards and objectives, look at the skills and thought process that goes into the lesson (kid's POV) and go from there. S & O are usually fairly basic.
Good luck!
I tried these rockets with my 6 year olds when we started our learning journey about Dr Who! It was the first art project we’d done together and I was amazed by the quality of the results. The children were pretty chuffed with themselves too! Mounted on a starry blue background they look incredible. Lots of other staff and parents have made favourable comments. Thanks for this.
I used this lesson with my third graders. I showed them the Figure 5 in Gold painting by Charles Demuth and William Carlos’ poem about the Fire Engine. We used that painting and poem as a jumping off for numbers in art. We then talked about the space shuttle count down. I showed them the count down clock on the NASA website and a video of a shuttle launch. We created this project using cut yellow and red construction paper for the smoke and flames. Using red and yellow construction paper, they drew, cut out and pasted the numbers in the countdown on the sides of the background. The students started with the smaller size 10 and continually made the numbers bigger until they got to 1. For the final step, the students drew and pasted their own shuttle in the middle of the project. They looked fabulous!
Hi Patty,
I teach art at a private school. I am at the kinderschool so my students range from pre-school thru kindergarten. I just wanted you to know how much I love your website and beautiful ideas. I love to see what others are doing so thanks for sharing.
Once again, you have a hit! What a great lesson! The kids [boys especially] love it! I’m working on a space shuttle with one 3rd grader and he is VERY into it! He will absolutely love this one and want the rest of the class to share it! Thanks for always having great ideas. (The finger placement technique is great! It will really help some of my students.)
Glad the project worked well…yes, the old finger placement. Really helps, huh?
I love this. Thank you for sharing. Girls love space too!
I would like to see the 4th graders’ designs but couldn’t find a link on your page for Hannah Millard from Highland Elementary.