


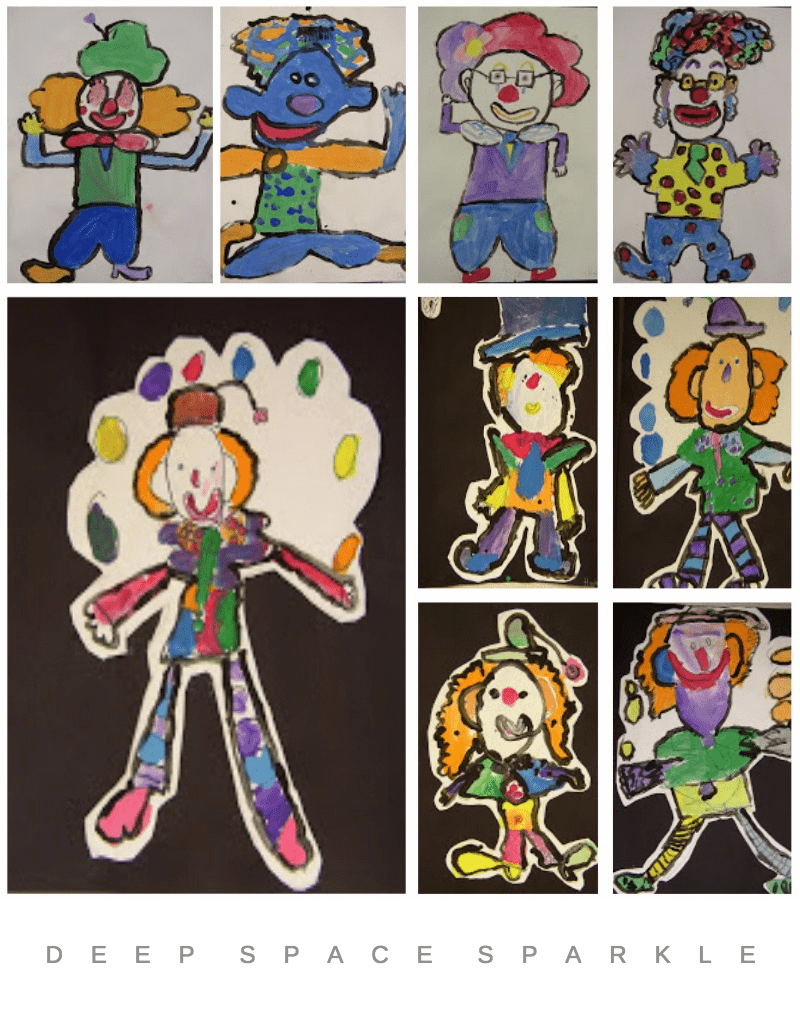
These clowns are a perennial favorite in the art room. They add color to the art room walls, bring smiles to the faces of your budding artist and teaches a plethora of art techniques. You can either cut out the clown and paste onto a black piece of paper or leave as is. I have done both but my preference is pasting onto black.
Supplies:
– 18″ x 24″ white paper (yes, I know! It’s big!)
– Small and large bristle brushes
– Tempera Paint in a variety of colors
– Black Tempera Paint (watered down slightly)
– Pencils
– Scissors and glue
Step One: Drawing the Clown
I chose a large sheet of paper because it’s almost impossible to draw a small clown! Demonstrate the different ways you can identify clowns (red nose, fuzzy hair, patterned clothes, etc.). Now draw examples of these. As many types of faces as you can. If you have photos of clowns, great!
Using pencils, give the children 10 or 15 minutes to draw a clown. I don’t do a directed line drawing here. This project should really come from the child’s imagination, so let them explore. The only interference I’d give is to encourage them to draw large. If they are having trouble, put out a round plastic container so they can trace a round face. This at least will get them off to the right size.
Step Two: Painting the Clown
Using any color but black (at least for now!) paint in the clown. This is a good time to teach how to layer paint. For example, to add polka dots to the pants, fill in the background of the pants with one color, then wait until the paint dries a bit. Then, use a small brush to add dots. The trick here is to have the children start thinking in layers.
Step Three: Adding Details
Now that the paint has dried a bit, add facial features, flowers to their hair, balls for juggling, etc.
Then, using a small brush dipped into watered-down black tempera paint, trace over all the pencil lines. This step will really make the clown pop!
Step Four: Cutting out the Clown
After the clown has dried completely, cut it out and paste onto a large sheet of black paper.
FIND MORE COLORFUL LESSONS BY CLICKING BELOW TO JOIN THE MEMBERS CLUB…


Hi! i saw you on crafty Crow and wanted to stop by and say hi! wow! I love your site and the work you are creating with children. I am a bit new to the game, but am having A LOT of fun so far! I’ll bookmark you for sure!
:)Erin
Your ideas are so much fun! I am using several of your ideas for line drawings plus adapting a few and making them into line art. Thank you so much for sharing! It's appreciated.
THANK YOU for your website! I had my first appreciation for the vitality of art education when my kindergartener came home with an enormous painting of a clown. I was amazed at how brilliantly that assignment was able to draw out his creativity and make his “beginning” skills look AWESOME! That clown still hangs on our wall, three years later. We’ve since moved to a new school which, sadly, only has a tiny, under-funded art program. That’s when I went searching for ways to incorporate art in my kids’ lives, and I found you…AND the clown project! Your website gives me hope that I can help my kids to apply their creative juices to satisfying art projects. We’ll be returning here again and again! Thanks!