


I jumped right in this year…messy painting project on Day One. Actually, it was a lot of fun and the kids loved it. For my first graders, I wanted to begin the year with a color wheel lesson. Often I wait until a bit later in the year but it’s worth it to start the year with this fundamental project that teaches the mixing of primary colors into secondary colors.
SUPPLIES
Red, blue & yellow tempera paint
Palettes
Brushes
12″ x 6″ white paper
Pencil
SETUP
Because this color wheel lesson involves mixing, it’s important that each child has his/her own palette. In my case, it’s recycled styrofoam trays. Squirt a dime-sized amount of red, blue and yellow tempera paint onto each plate. Set water containers and brushes on the tables.
In addition, set small, round containers (like yogurt containers) on each table with a strip of white paper (12″ x 6″) and a pencil.
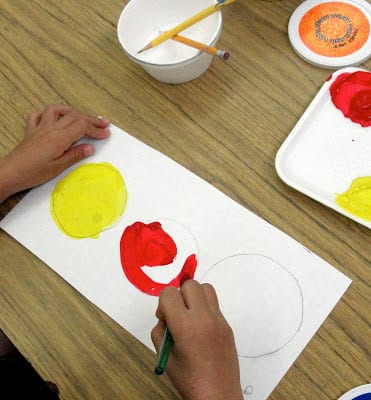
PAINTING CIRCLES
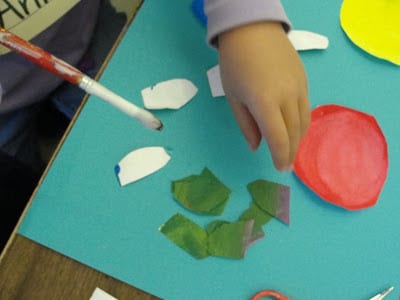
Trace three circles onto the strip of paper using the containers as templates.Paint one circle red, one blue and one yellow. Set aside.
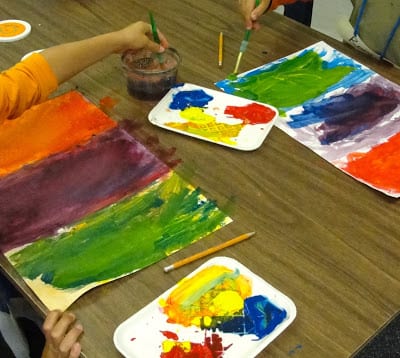
On a 12″ x 18″ white paper, draw two lines to divide the paper into 3 sections. This doesn’t have to be at all perfect. Just a rough divide. If you have a colorwheel chart, you can point to the red and yellow and ask what is between these two colors.
Then, instruct the kids to dip paintbrush into the red paint and paint an area on the white paper. Without cleaning brush, dip brush into yellow paint and paint right over the red. Some areas will mix light, some dark. Let the kids really get into this experiment. Repeat to make Green and Purple.
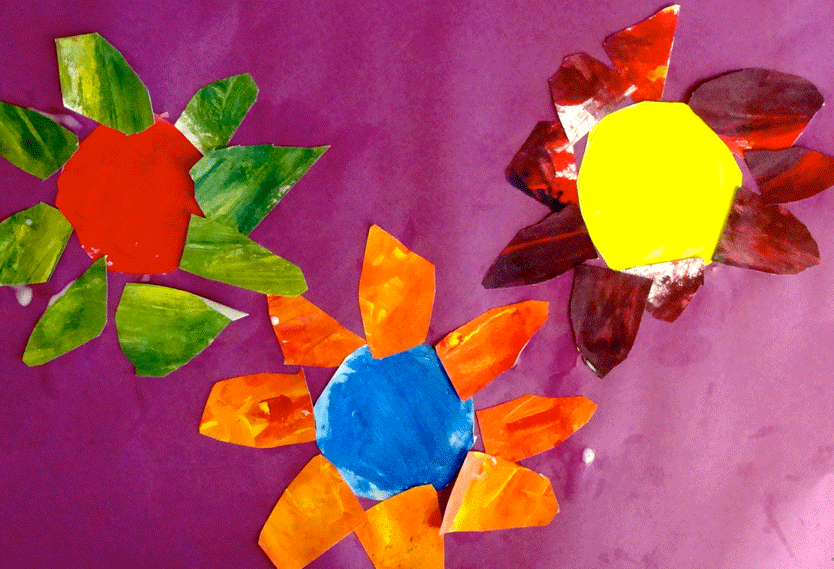
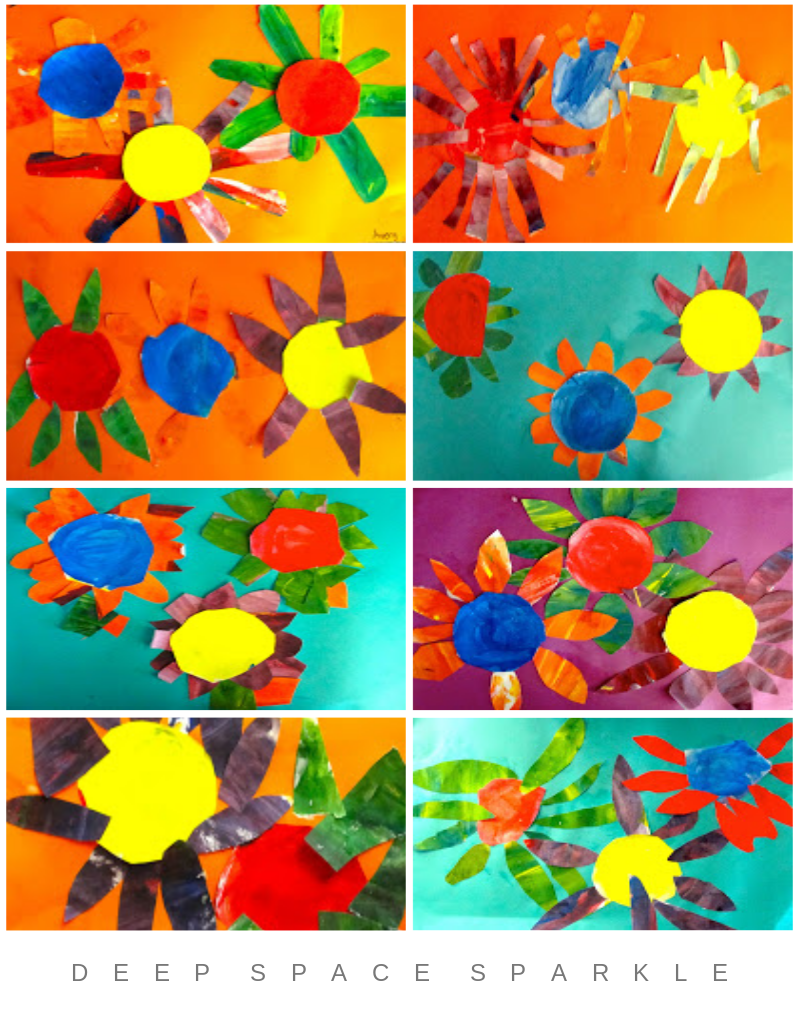
In the end, you should have orange, purple and green on the sheet of paper and one very messy palette.
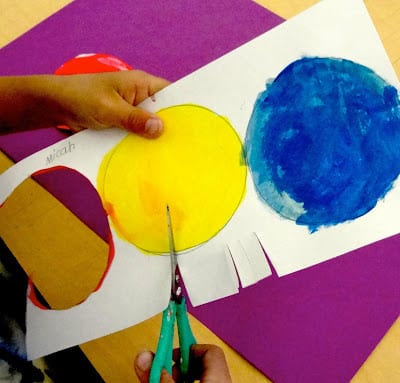
Place a colored piece of 12″ x 18″ paper at each child’s place. Hand back the strip of paper with the primary painted circles and secondary painted paper. Cut out circles and glue onto colored paper.
Cut the secondary painted paper into 3 sections: one orange, one purple, one green. Cut petals from these papers and glue onto flower centers.
Glue petals to colored background paper. Tuck the petals underneath the circle. For additional color wheel instruction, glue complementary petals to complimentary.
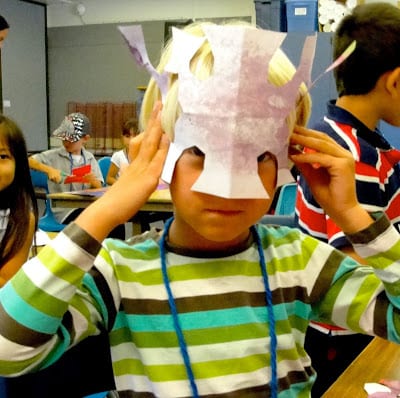
Cutting out petals transforms the paper! Castles, masks…what do you see? Circles.
FIRST GRADE FLOWERS!
TO ACCESS THIS LESSON, CHECK OUT THE COLOR THEORY BUNDLE INSIDE THE MEMBERS CLUB.


These are terrific! Love it!
I absolutely love this lesson. I love your Color Wheel Bouquet Lesson, too. I wanted to get my kids up and painting early this year, too. This will fit right in with where I'm going. Thanks for sharing.
Olá!
Amei seu blog! Você é muito criativa!
Adorei suas ideias!!
Parabéns!!
Sou brasileira, moro no paraná e já sou sua seguidora.
Beijos
Juce
Olá!
Amei seu blog! Você é muito criativa!
Adorei suas ideias!!
Parabéns!!
Sou brasileira, moro no paraná e já sou sua seguidora.
Beijos
Juce
Interesting spin on a classic lesson. jan
Patty,
Thank you for the time and effort you put into this blog. I appreciate the detailed instructions and ideas so much! I have taught school for 8 years but this is my first year as an official art specialist and it has been a learning curve. I find myself continually coming back to your blog for ideas and help. Keep up the great work and thanks again for sharing! You have been a lifesaver!
Ally
What stunning flowers!
I love the discovery and freedom of the first lesson, followed by the creativity and delicious contrast of the complementary-coloured flowers!
Thanks guys! This was almost a perfect lesson considering how much it covered: primary colors, secondary colors, tracing, cutting, composition, fun…it was certainly a success for all kids.
I'm so glad I found your blog! Today will be my first day as the volunteer art docent for my son's first grade class and I was thinking a color wheel lesson would be a great first project, but wondered if I was a little crazy in starting off with a messy paint project! Your students' flowers turned out wonderfully. I'm looking forward to trying some of your great project ideas this year…
Hi! I'm your newest follower- I'm a Kindergarten teacher in Kansas. LOVE your blog- if I wasn't a K teacher I would be an art teacher. Can't wait to get great ideas here.
Patty,
I actually have a question about glue. Since I'm new at this I noticed that you said to set out tubs of glue mixed with water. Do you keep the glue tubs for other projects or just throw it away and what is the clean up required for the brushes that you use with this glue? I used glue sticks the other day with my younger grades and they were gone and empty by the end of the day! I need a better solution and ideas for using glue with all of my classes. Do you have your upper grades use the glue "paint brushes" too?
Thanks for your help!
I buy small pint-sized plastic container and lids for my own special paint colors. I use them for glue/water combo's as well. You can stick a lid on the container and the glue will last. For this last project, I didn't have much glue left and what I did have was discolored with small bits of paper. Basically garbage.
Wash brushes with soapy water and they'll be fine.
I don't use this method with my older kids but I do use glue bottles. They seem to manage them well.
Good luck!
Oh wait! Maybe I should be doing this one instead! LOL! Hmm… I do like the fish look better but this is probably more developmentally appropriate… thanks for sharing, as always!
Hi! Just found you via Oneprettything.com. I teach k-12 art in a rural school district and your site is great! I have thought about doing a blog with my lessons for a long time! You have inspired me. I can not wait to see what you are up to with your students!
Hi Julie!
Blogging is a great way to share ideas and get inspired by what other teachers around the world are doing. Good luck with it!
hi patty-
doing a similar project this week with my kindergartners! it’ll be up on my blog next week http://www.ourartlately.blogspot.com
THANKS!!!
These are beautiful! Thanks for the lesson, I’ll be linking.
I love this blog. I am a volunteer parent with an art background. My daughter’s 1st grade teacher asked me to teach art twice a month to her class. This blog is full of such wonderful ideas and helpful tips that will help me. I am having so much fun sharing what I love with the kids.
Hey Patty,
Awesome idea! I would love to do this, I’m just wondering how long this lesson took?
Thanks,
Missy
Hi Missy,
I planned to teach this lesson in two class periods, and while 75% of the students completed the lesson, there were some who took longer. My classes are 40 minutes long.
Thank you for sharing your idea! This is what we did and we had so much fun!!
http://homeschooladventurers.wordpress.com/2012/09/15/art-adventures-in-primary-and-secondary-colours-with-pastels/
How long did the project take to do with kids?
Hi Hema….generally my Kinder and first grade classes were 40-minutes long. This lesson used two 40-min classes.