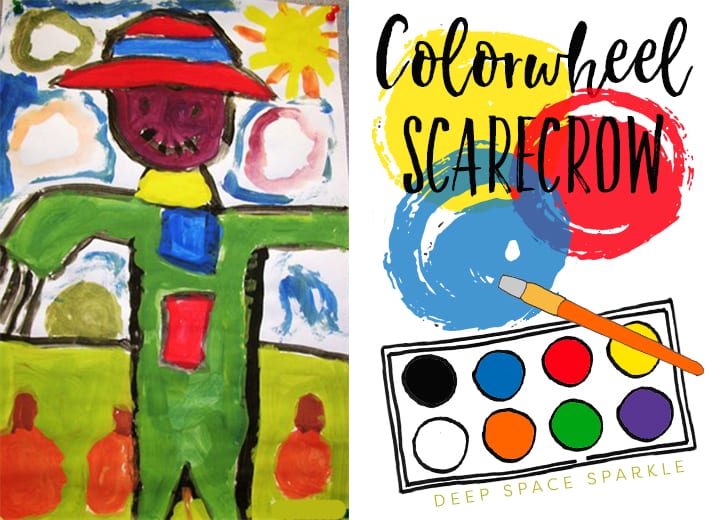


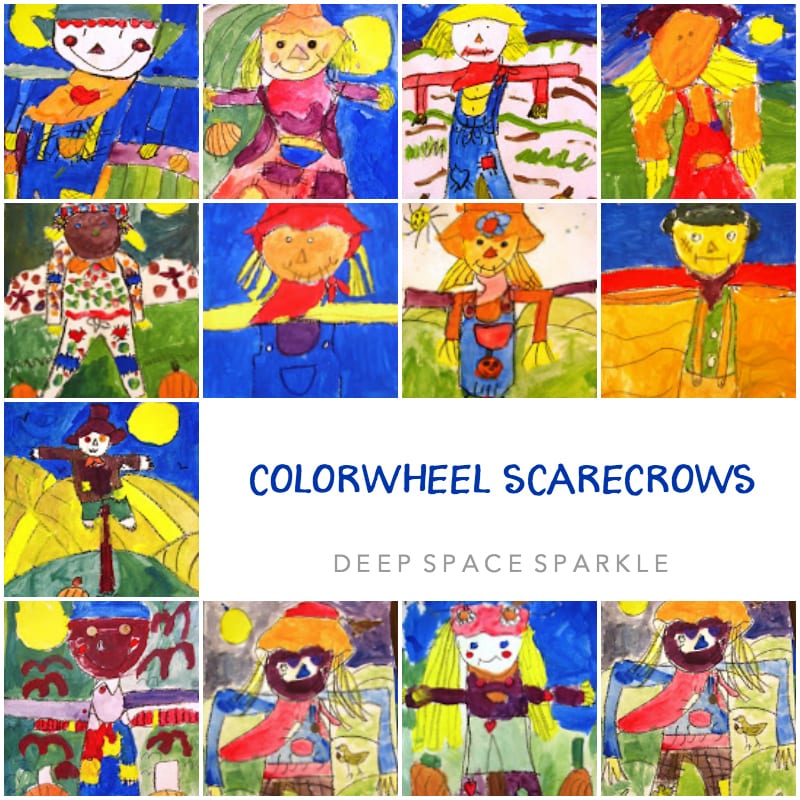
Scarecrows can be a bit tricky. Like clowns, scarecrows can sometimes frighten kids more than we realize. This lesson, however, mixes just the right amount of scary with happy.
SUPPLIES:
– Paper ( I like Tru-Ray 12″ x 18″ sulphite/drawing paper)
– Red, yellow & blue tempera paint
– Black oil pastel
– Paintbrush
HOW TO DRAW A SCARECROW:
- Using a black crayon or oil pastel, draw a letter “U” near the top of your paper (make sure to leave enough room for the hat).
- Add a triangle nose, two circles for the eyes and a curved line for the mouth.
- To add a hat, draw a straight line across the top of the letter “U” or face. Draw two “angle” lines to form the brim. Add either a curved line or a box to create the top part of the hat. Make it fancy or keep it plain. You decide!
- After drawing the face and hat, you can start drawing the body. Draw a straight horizontal line starting near the chin and extending to the side of the paper. Do the same for the other side. Don’t worry about drawing a neck. Make a cuff by drawing a straight but short vertical line.
- Finish the sleeve by drawing a straight line back towards the body.
- Draw the pants by drawing a straight line down from the “arm pit”. Do the same on the other side. When you reach the length of the pant leg, draw a short horizontal line for the pant hem. Draw an inverted letter V to make the pant legs.
- Add a stick or a post between the pant legs and extending below the pant legs. Add pockets, buttons, patches and some straw for the hair.
HOW TO MAKE SECONDARY COLORS USING PRIMARY COLORS
The next class we paint color wheel style. Here’s what we do:
- Dip paintbrush in yellow paint and paint something on the drawing “yellow”. It could be a pocket, a sun, a stalk of corn, hair or even the pants. Children can paint more than one thing or just one…let them decide.
- Clean brush in water after every step.
- Dip clean paintbrush in the red paint and paint something on the drawing red. Again, it could be more than one thing.
- Now, here’s the fun part. Using your brush, lift a small amount of yellow paint and place it somewhere on the plate. Then, lift a small amount of red paint and place it on top of the yellow paint. Mix together to create orange. Paint orange somewhere on the drawing.
- Dip brush in blue paint and…you know the drill…paint something blue. This is a popular color so you might need to squeeze a bit more paint onto the plates. Then, lift a small amount of yellow paint and place onto an empty area of the plate.
- Lift up some blue and place it on the yellow. Ask the kids what color the spot will make. Green! Blend together and paint green somewhere on the drawing.
TIP > By now, the drawing should be filling up with paint. No doubt that a few kids will have mixed their whole blob of yellow or red paint and will need more. It’s important not to be punitive with this error. It’s just too hard to resist poking a brush in a fresh puddle of paint. Some kids will have a hard time following the exact instructions, but their art will look wonderful, so don’t worry.
- Okay…now lift up a bit of blue paint and place somewhere on the plate. Lift up some red and mix the two colors together…PURPLE! Paint this beautiful color somewhere on the drawing.
The final touch?
Outline all hidden pastel lines with a tracing of black oil pastel. Look closely at the eyes or on the overalls. Kids love adding buttons to their scarecrows.


Love your site! I’ll be using some of your wonderful ideas in my classes!
Just wondering what type of paint this is?
Tempera?
Also do you have to have watercolour paper in order to make watercolour work well?
I’m new at all of this.
The art wanna-be.
Yes, it’s tempera. I set out red, yellow and blue and the kids blend them together to create the other colors.
Watercolor paper is best but I’ve used classroom grade sulfite paper for watercolor paints before(see Drawing barns and Farms 6th grade lesson).
I make sure to use watercolor paper when I want to teach proper watercolor techniques such as blending, wet-on-wet, etc.
Regular paper won’t allow you to do that.
Thank you so much for tried and truly successful lessons. I love creating my own but with barely any prep and planning time, this site is a valuable resource. This year my district doubled my responsibilities including kindergarten (which I never taught!) so again, thank you so much! Sue B.
Hi, Patty!
Great fall lesson- I love it’s focus on mixing colors, and drawing with basic shapes!
I am a first year teacher, (with some experience subbing, student teaching, and teaching at a large visual arts summer program for 5 years).
I am art on a cart in a grades k-2 school. I love painting with children so I plan to use a lot of your lessons and my own despite being on a cart.
My question for you is what size paper did you use for this lesson? I’m guessing 12″ x 18″ ?
Since I am on a cart, and most of the 2nd grade classes have desks put together in groups- what paper size would you recommend?
I feel 9 x 12 might be too small and make them focus on detail too much instead of drawing large and filling a page. I feel 12″ x 18″ might be to big since this lesson calls for painting the whole paper, and the paper won’t fit on there desks. I’m doing an oil pastel lesson right now with them on 12″ x 18″ and their artwork overlaps each other while they work.
Maybe I could cut paper to 11″ x 14″ or 12″ x 16″?
I know this seems like too much thought about paper size, but I think it makes a difference in student’s artwork and I have being on a cart to think about- Hence i’m looking for your expertise advice!
Thanks!
You’re instincts are right. Go with the bigger size paper and try to make it fir on their desks.
Here are some tips for working on a cart:
https://www.deepspacesparkle.com/2014/10/02/teaching-art-on-a-cart/
so exciting ….just what I needed after a primary review with first grade last week! Thank you
These are great ideas! So happy I found you.
This project looks fun and colorful. I will try it in the next couple of weeks with my first graders. A parent volunteer is making a fall board in the core of our building and I’d like to add the students’ work!