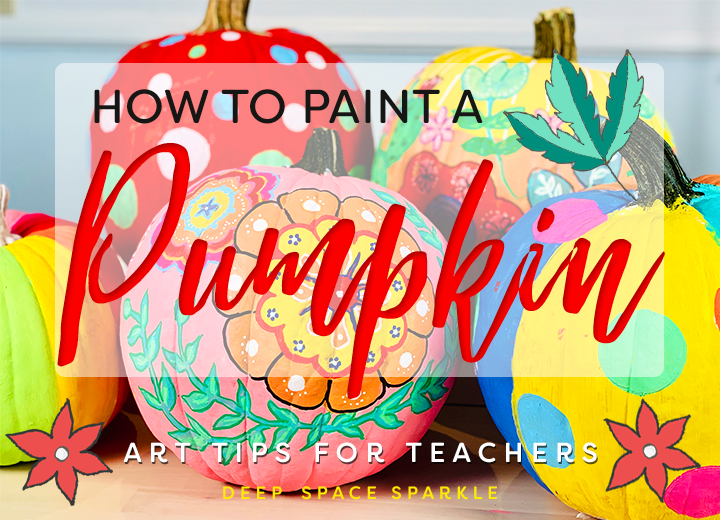


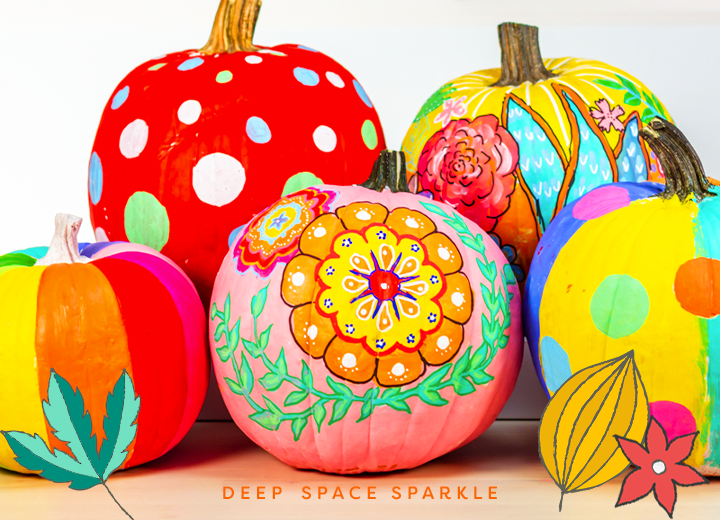
Team Sparkle and I did a little project testing in the DSS headquarters yesterday and created our own painted pumpkins. These festive gourds looked pretty and relatively easy to make, so we gave the project the green light.
I have to confess that I don’t love carving pumpkins–the mess, slimy inners and slippery seeds are enough to steer me away from most pumpkin activities.
But these painted pumpkins are definitely more ✨sparkly✨ than a traditional Jack-O-Lanter.
We hit a few roadblocks on the way (that’s why we test these things out, right?) so here are my tips for creating these in your art room:
Clean Your Pumpkins
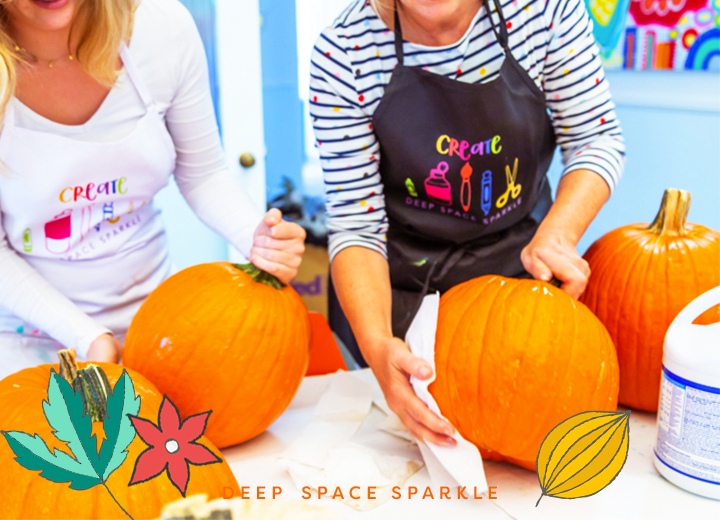
We are using real pumpkins here which require some cleaning. If you’re using pumpkins fresh from the pumpkin patch, no doubt they’ll have some dirt on them. A quick wipe with some bleach cleans the pumpkin well enough to apply the acrylic paint easily.
If you’re using fake pumpkins, this steps isn’t necessary but I would do it anyway.
Apply a Base Coat
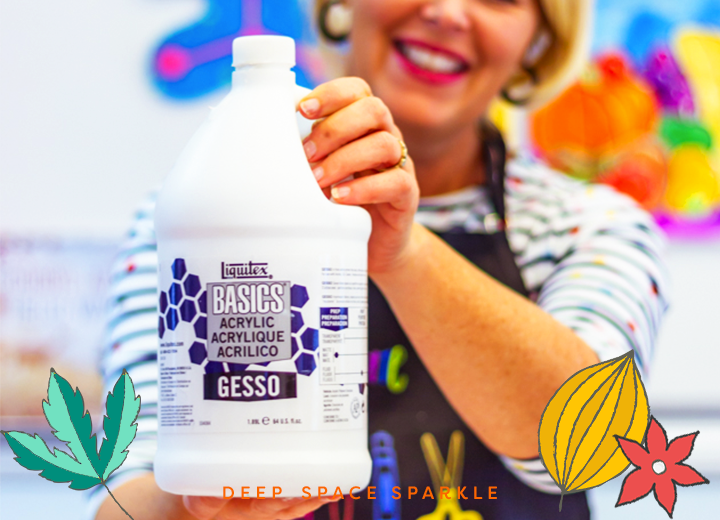
This is Gesso.
It’s a white acrylic paint that is meant as a bonding agent so that acrylic paints cover a slick, shiny or flimsy surface with ease.
It’s a step you can do with your students but just make sure they are wearing smocks. Acrylic paint does not come out of clothing. Although if the paint does come in contact with fabric, a little acetone (fingernail polish) does a good job of removing it.

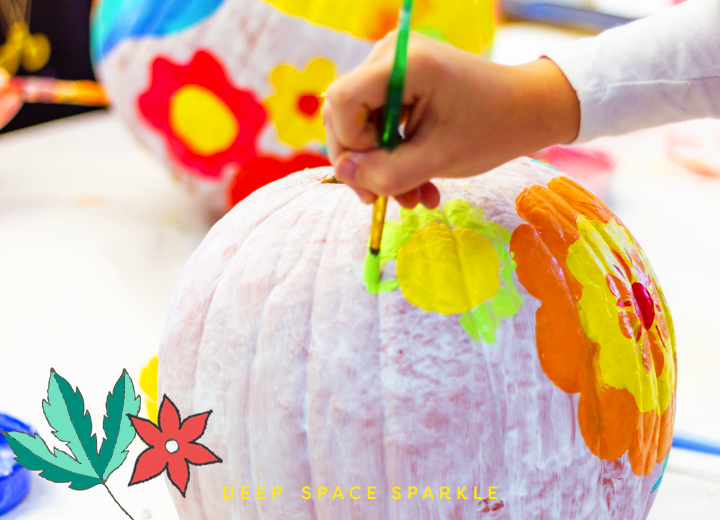
After the Gesso dries, pencil in a very light and basic design.
It REALLY helps to limit a child’s choice. It’s not stifling child’s imagination. Instead, think of it as being able to get to the fun part (painting) a bit faster.
I selected Frida Flowers or Kusama Dots. For either design, it helps to outline some shapes, with the intention of adding details later on.
Adding a Base Color
There are two schools of thought here:
- Add color to the basic shapes and then paint the background color OR
- Add the background color first.
I would opt for the 2nd one as it is easy to get carried away with painting your basic shapes that you often paint onto the white gesso with smaller details. Then, you have to paint around the details for the base coat.
This is harder to do, especially for kids.
Adding the background Color & Details
Once the solid shapes have been painted and the background color has been painted, you can go in and add details OVER the background paint.
Note: For the Kusama Pumpkin, Team Sparkle painted the segments of the pumpkin various colors, allowed to fully dry and then painted dots over the dry paint.
Adding Details with Posca Pens
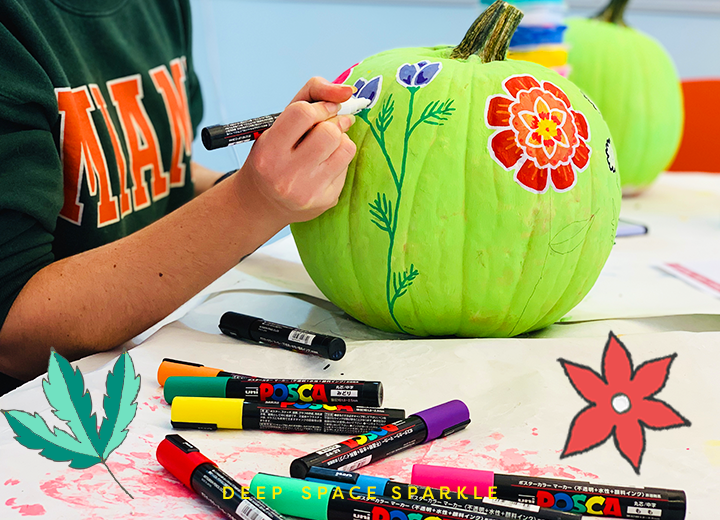
If you aren’t familiar with Posca Pens, they are just really amazing paint markers.
They can be very pricey for an art room but a few boxes can really make the difference with finishing work with projects.
We used them to add all of the small details that went into our flowers: outlining the shapes, adding dots or emphasis lines and even drawing stems. In my opinion, they made the difference from messy to magnificent!
Have you tried painting pumpkins? I’d love to see your comments below!


I have a 9 year old student coming for private, one to one art lessons, starting next week. This project will be a great fun start for him. Learning outcomes: use of organic material, colour & design, introduction to artists, Frida and Kusama.
LOVE THIS!!!! Then again, It is Deep Space Sparkle so of course I love it!!! Thank you!
Amy from MA
I still need to get the stuff but it seems fun
This looks so cool and Halloween is almost here!!!
Will have to plant pumpkins this summer. Want to try this next year.
Love this with great tips. Thanks 😊👍
These are amazing! I’ve done decopage on pumpkins before, but never painted them with a class
I’m planning a pumpkin party at my house with friends, this will be a great option!
Love this- about how long do you have to wait for the paint to dry before you can start the designs??
Allowing the paint to dry completely will yield the best results
Love these! Are you using fine tip or medium tip Posca Pens?
Medium 🙂
How long would you expect each layer (gesso, background colors) to dry? Could this be a one day activity or beat over several days?
You could choose the process depending on your timing. For example, you could paint the pumpkins ahead of time and give enough time to dry before the children paint. Or, you can include the Gesso painting as part of a 2-part process.
Depending on your age group, I’d wrangle some help and paint pre-kids!
Hi Patty, I love this project but, not being an Art teacher (I’m a teacher who teaches Art) I don’t know how to gauge the amounts. I’ve got 50 kids. What would be your best guess as to how much paint I would need? Thanks so much for the help and all the great ideas!
Hi Cathy! This is Bethany from Team Sparkle! It would definitely depend on the size of your pumpkins; if you’re using a large size like in the post, you will need a lot more to cover the pumpkins than smaller pumpkins. You will need more gesso than paint; I would suggest the gallon size if you have 50 large pumpkins. As for paint, I would put out paint for tables/groups (rather than individual students) to save supplies. 16 oz. bottles in 5-6 colors should probably be enough to cover the pumpkins for that many students. Crayola Portfolio Series is a good, budget-friendly student grade acrylic paint that comes in 16 oz. bottles. I hope that helps!
It does. Thanks so much, Bethany!
Thanks a million for sharing! I’m intrigued to use Posca pens sometime 🙂
Trying for the first time this Halloween