


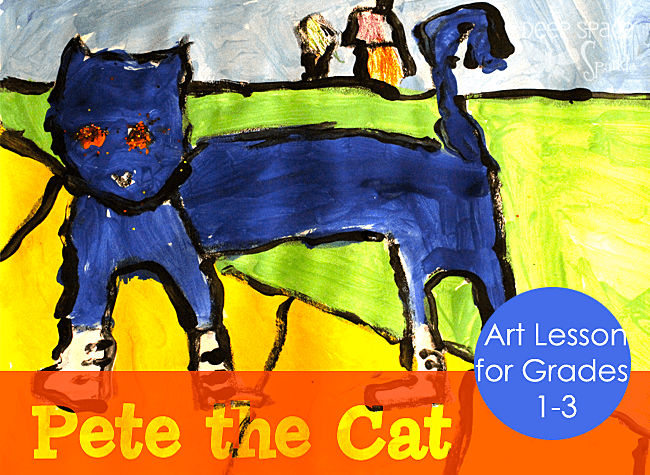
Pete the Cat: I Love My White Shoes by James Dean and Eric Litwin is a popular children’s book title in first grade classrooms across the country. I took a stab at creating an art lesson based on the book, which wasn’t as easy as I had anticipated. My first graders were ready for a tempera paint project, so I tried to stay away from the plethora of adorable Pete the Cat paper craft projects that I saw on other sites.
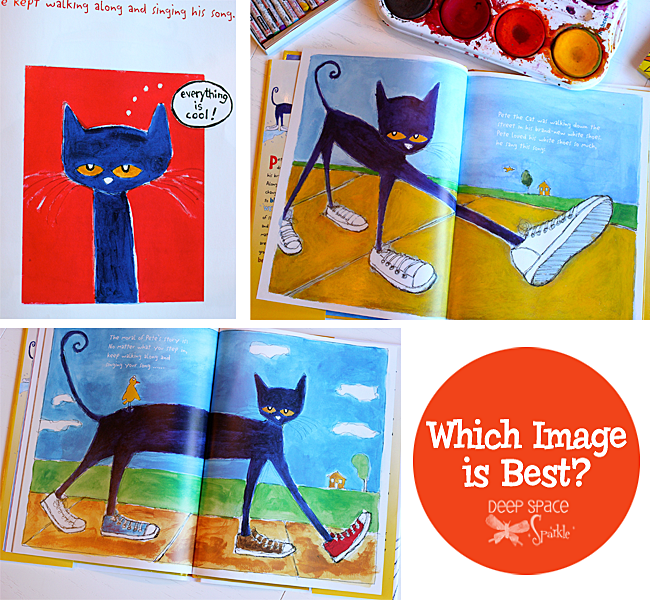
You have a few options when creating a “Pete the Cat” art lesson. You can pull his cute little face from the pages and create a head and shoulders Pete project. I’ve seen a few projects that use templates and paper for this approach but I was more drawn to the full size image of Pete as there is opportunity for a lesson on perspective. Even then, there are a couple of options: straight on side view and a perspective view that shows one foot larger than the others.
I opted for the straight on side view as it seemed easier for my first graders. The twist for me was to angle the sidewalk so the kids could illustrate perspective in their background.
So that was my strategy. Want to see how it worked?
Here’s what you’ll need:
- 1 sheet of 12″ x 18″ white sulphite paper
- Black or light colored oil pastel (light is best)
- Tubs of yellow, green, blue, white, light blue and black liquid tempera paint or puck/cake tempera (more on this option later)
- Medium and small round brush
How to Draw Pete the Cat
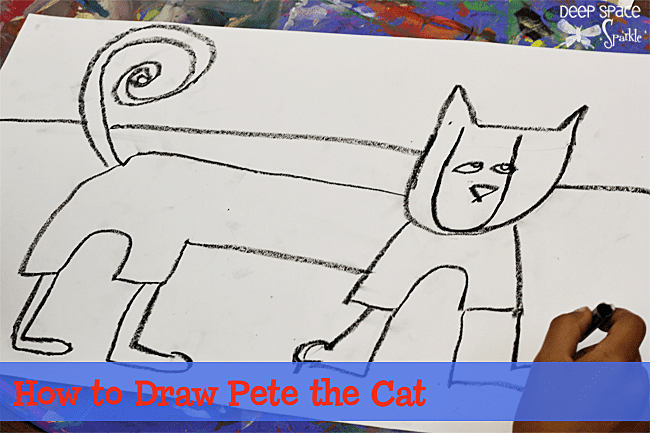
Using a black or any light colored oil pastel (light blue is a good choice), start by drawing a letter “U” on the far right side f the paper. If a child makes his letter “U” too small for his liking, encourage him to draw right over the mistake. If you use a light colored oil pastel, the paint will cover the lines pretty darn well. I used black out of habit but it may not be the best choice for this project. Actually, as I’m writing this, the best drawing tool for this project might be a yellow or light blue chalk pastel. That way, if a child makes a mistake, the lines are so much easier to cover or even wipe away.
Back to the directed line drawing….
- Draw a letter “U” for the face
- Add two ears on either side of the letter “U” and a straight line to connect them.
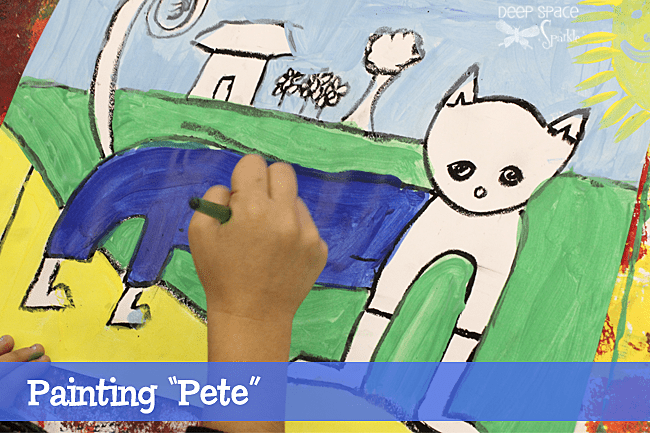
- Starting at the bottom of the face, place pastel on the left side and draw a straight line on an angle. Draw it about as long as your finger. Do the same for the other side. To connect the two, draw an upside down letter “U” and draw a horizontal line on the bottom of each leg. The child’s sample (above) looks like Pete is wearing shorts but that’s because when the child drew the feet (sneakers), he forgot to line up the legs…
- Add two front feet. Keep the feet big and simple at this stage. No shoes yet.
- To draw the body, place pastel on side of head and draw a straight line towards the opposite end of the paper. Be careful not to go too far.
- Swing down to make the bum and draw another pair of legs the same way as the front.
- Add a curling tail.
- To draw the eyes, draw two large almond shapes with a half circle on the top half of the eye. Add a triangle for the nose. Keep the nose towards the bottom of the face.
Tip: If I did this project again, I would skip drawing the face entirely and use paper to cut out eyes & nose shapes. Not only could you control the size of the eyes by using a template, but you could have some fun by adding glitter etc. to the eyes.
To draw the background:
- Draw a horizon line (the line that separates the sky from the ground) about ⅓ of the way down the paper.
- Place oil pastel halfway up the left hand side of the paper and draw a line on an angle towards the bottom of the page. This gives the illusion that Pete is walking towards you even though we didn’t draw Pete in the same perspective.
- Add lines to separate the sidewalk.
- At this point a child can draw houses along the horizon line, but again, you could leave this part and add paper-cut houses after the paint.
Painting the Background
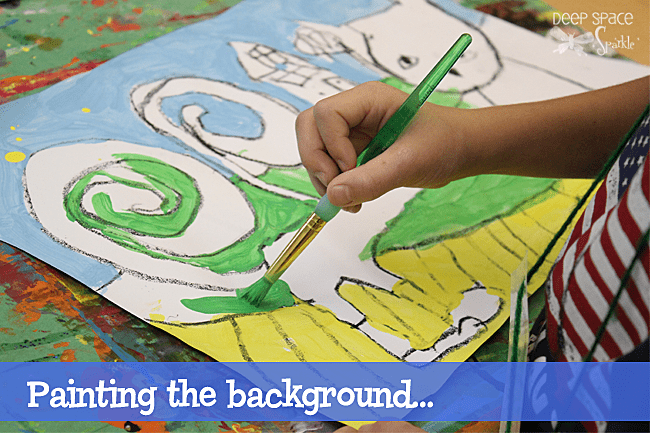
I use pre-mixed tubs of liquid tempera paint. This means that I mixed the colors for the kids and created some light green for the grass, light blue for the sky and yellow for the sidewalk. You don’t have to do this of course, but I had the paints already mixed, so I did. Another option would be to use puck tempera. The paint is a bit easier to paint with and it would allow the little hands to control the paint better. Try a sample on your own to see which one you like.
If you get this far on your first day (40-minutes) well done. It was my goal to have children finish the drawing and the background so I could start fresh on Pete the next week. But a better strategy would be to do the drawing and paint Pete on day one and then do the background on day two.
This is a good time to paint Pete’s sneakers, but again, if I had to do it again,I would leave the paper white.
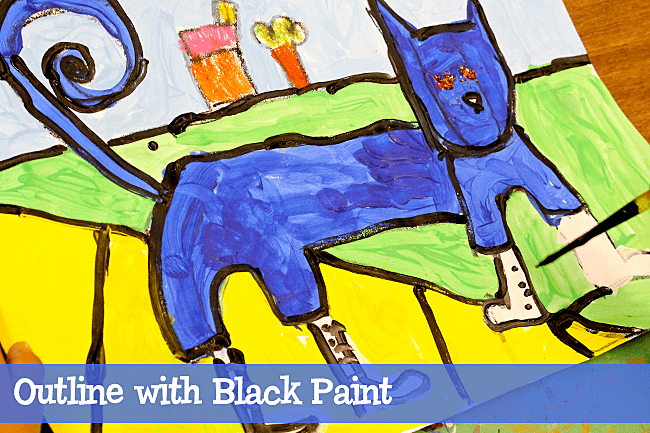
After painting Pete the Cat dark blue, use a very small brush and a tub of black paint to outline Pete. Using the black paint, draw laces and a bow on the shoes. This step can easily be done using oil pastel (perhaps a better choice).
For children who drew houses, I set a tray of colored oil pastels on the table and they used these to color in their homes.
For a final flourish, the kids dabbed some white glue onto Pete’s eyes and we sprinkled a bit of red/orange glitter on top. I know, but I couldn’t resist.
Final thoughts….
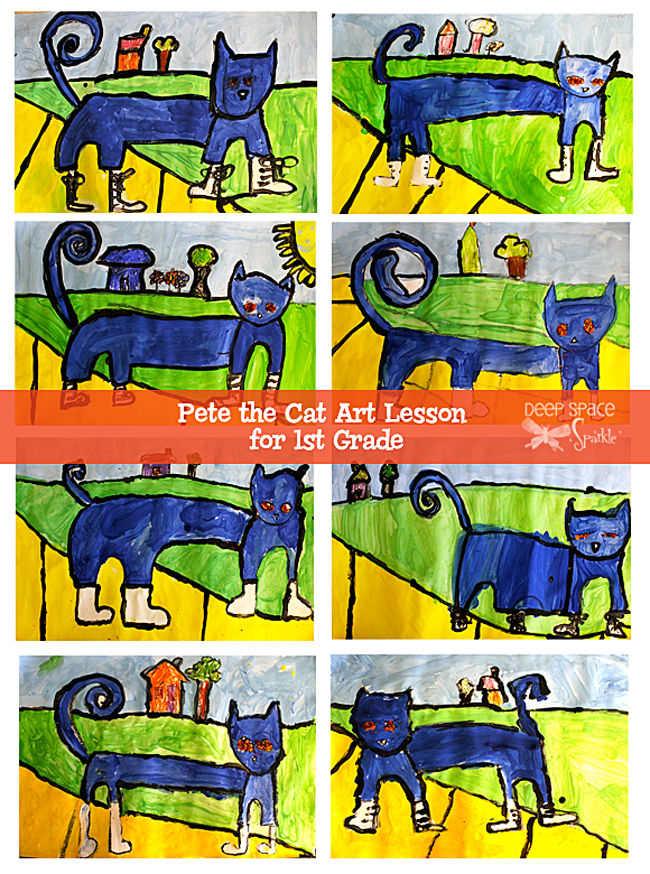
Like I said before, there are a few things I would do differently if I were to do this project again (chalk pastel for drawing, cut out eyes and nose, etc) but overall, the kids really enjoyed the book and this project and they learned how to follow a directed line instruction, draw a horizon line, add persecutive in a drawing and figure out how to cover mistakes with paint.
Pretty cute, huh?
Affiliate links were used in this post


Yay!! I love these. I too did a Pete lesson this year…..it was difficult for my kinders in September….I bet they would do better in January or February. Love the perspective and the pre-mixed colors. I used tempera cakes, and was underwhelmed at the result. Also, drawing with chalk is great! http://thislittleclassofmine.weebly.com/1/post/2013/10/pete-the-cat.html
Thanks for the tip on a new book to use with my first graders. This is one I hadn’t seen before, so I’ll have to see if our school or public library has it. I do like cake tempera for ease of use, but I agree with Nellie that the depth of color can be underwhelming. When I use it, I tell the students that they have to “wake up the paint” by getting it very wet and stirring it 20 times, then wetting it once more and stirring it again. They get better color that way most of the time.
My Kindergarten and First Graders did a Pete the Cat lesson last year with cut paper collage. It was a hit! I was turned on to Pete by our school librarian. it’s a very popular book series, so it should be easy to find.
Here’s a bonus tip for my fellow teachers- the Harper Collins website has a free download of the author reading the book and singing Pete’s song! You can play it while you show the book and the kids can sing along. It’s so catchy, you won’t be able to get Pete and his white shoes out of your head for days, though…
I’m wondering why the color pallette was so limited. Maybe they could have had a wider range of colors to choose from? Might have helped make them a little more individual, thay kind of all look the same.
I agree with you. I limited the paint color palette because I thought that the drawing was challenging enough for the kids. In the end, it made the project too similar when it needn’t be. Like I said in the post, I would have change the paint choice if I were to do it again. I think puck temperas would have been better.
This was one of those lessons where many things could have been better for the student experience, but it’s always fun figuring what those experiences should be.
I would encourage a full range of colors as well. Cut paper sounds great as long as the children have cutting skills which may take a separate preliminary lesson. I think using familiar letters or shapes is a good way to start as is chalk for defining the drawing although it can lead to staying in the lines if using a paint brush. Scissors might allow for a variety of shapes and sizes to be assembled as the young artist uses his/her own eye to determine what works best. As far a talking about a horizon line, I think that’s optional for first graders. Having been an art specialist, I would be more interested in individual creativity rather than teaching first graders about perspective. Again, that could be a different lesson/skill for another day.
I love this! We have started home-schooling this year. It was a lot to take on, but we’ve really enjoyed it. Our children are ages 6 & 8, so this would work great for them!
We started out doing the core subjects first and have been building upon that as we get used to the system. First, we added science, then social studies, and now art. We’ve been doing art randomly, as I’ve always done various art projects with the kids since they could start holding stuff, but nothing consistent. Now it’s time to get consistent with it! YAY!
When we first started, it all seemed so overwhelming to get to it all. By taking it step by step, adding another subject as we get comfortable, we are all finding it much more enjoyable!
Thank you for your wonderful and useful site. I will be referring to it often.
Happy Thanksgiving! 🙂
What are puck termperas?
Hi LIza,
Puck tempera paints are the same as tempera cakes or dry tempera that come in round shapes. They are sold individually or in packs.
I love Pete the Cat! I have used him in a few different grades. I just finished a collage project with my kinders about him. You can see it here: http://onepointsperspective.blogspot.com/2013/12/pete-cat-and-his-four-groovy-buttons.html
I love the idea of painting him though. Perhaps I’ll try this with my second grade and add in some more color mixing to go along with the color mixing that happens to Pete’s shoes in one of his books. That way every Pete will have different colored shoes! Thanks for sharing this idea.
Teaching art is fun. Teaching art with your help, Patty, is amazing! Thank you so very much.
Love this. I just finished a Pete the Cat project with my 1st graders. We used your general set up of painting Pete walking along the sidewalk. We read “Pete the Cat Too Cool for School”, and then the real fun began!
I showed the students how to use tracing paper to draw out patterns for clothes for their Pete. They cut out their patterns and traced around them onto construction and then cut out the construction paper to make the clothes. In this way, they were able to make clothing that fit their Pete perfectly. Just like in the book, each artist was able to dress Pete in their favorite outfit. There were boy Pete’s, and girl Pete’s, and Mrs. Pete’s made. Each project turned out great and the students LOVED it! One thing that they liked learning (and doing) was how to use the tracing paper to make patterns for their clothing. They were so excited to come into class to work on their Pete, this took us several classes as the students really got into making detailed clothes, some even collaged things in the background (houses, trees, etc).
This project was an organized chaos with tons of supplies and paper everywhere, luckily there are lots of short Pete the Cat videos and songs. Knowing they had a short video to watch if they cleaned up in time really helped my students put all their supplies away and pick up all the paper scraps. One fun thing about this is that every single project looks different. Students were so excited for me to hang these projects up and spent a lot of time looking at how their classmates artwork.
I used cake tempera paint. We use them quite a bit so my artists are good about swirling to get lots of color on their brushes. I’m in my first year teaching and I started a month after school began, replacing a teacher who had to leave suddenly. I was left with lots of supplies, but no lessons! Blogs like yours have been really helpful and I have been learning and planning as I go.
Becky! This lesson sounds amazing! Do you have any pictures of the kid’s finished art? I’d love to see it. send it here: patty.palmer@deepspacesparkle.com Thanks!
They look great. Looking forward to trying this one out with my class Y1/2.
I love Pete the Cat! This is so cute (:
Thanks for this lesson, Patti. One of my students dressed like Pete the Cat for Trick or Treat, so I thought the kids would enjoy this. They DID! I teach K-6 so emphasized the perspective teaching with the older ones. I printed the eyes and nose, and the sneakers on sticker paper. I’m going to try to put a photo on here somehow cuz I was really pleased with how they looked.