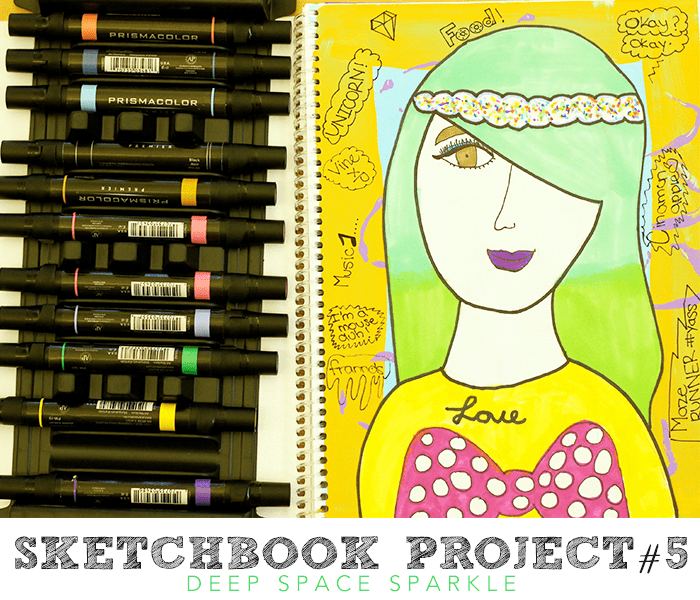
The Sketchbook Project is a record of how my sixth grade students used sketchbooks during their art class to record art information and create projects. Learn how I used sketchbooks instead of individual sheets of paper to teach art & creativity.
Week One: The Beginning
Week Two: Creating Value
Week Three: Atmospheric Perspective
Week Four: Tree Line Drawings
Week Five: Sonia Delaunay Abstract Art
This Week: Self-Portraits
I once asked my daughter what her least favorite art project was and she said making portraits, especially self-portraits. Are you surprised? Truth is, as parents (and teachers) we adore seeing kids create pictures of themselves. I mean, they are just so cute, right?
But for kids, creating a self-portrait can be downright awkward.
Try it yourself. Sit and draw a picture of yourself, capturing all of the details that make you unique. You may or may not have a mirror. You do your best. Your friend next to you tells you that your nose is much smaller--but not that small. You fix it then hesitate before drawing your mouth.
You get the idea. It's very hard for older children to be comfortable enough with themselves to actually enjoy the process of painting a self-portraits. Kinder and first grade kids don't care because they don't have a particularly strong sense of how they look.
Over the years, I found the best way to teach kids how to draw a face is to not draw their own. Draw their neighbors, a face from a book, a famous artist...anything but their own. This has worked very well. So much better.
For the Sketchbook Project, my group of 6th graders did something just a bit different. The idea was to create a self-portrait collage that represents the artist. Kids used their choice of coloring tools to create a portrait, created a painted background and finally, wrote autobiographical statement around their art.
Here's What You'll Need:
For the Face...
- 8" x 12" white paper for drawing portrait
- Pencil & eraser
- Black marker
- Coloring tools like markers, colored pencils, paint, etc. (use whatever you have)
- Scissors
- Glue stick
For the Background...
- Tempera Paint (any type)
- Texture tools
- Markers
THE PROCESSS
The instructions were kept very simple. For most of the projects in this series, the idea was to give the kids a starting point, some reference materials, and a small amount of instruction.
This project was no different. I showed the kids a few ways to transform a white sketchbook page into a texture background. We spent about 25-minutes talking about ideas and then actually implementing the process.
Because most kids used paint for their sketchbook background, the sketchbook page had to dry before we proceeded. That's why we used a separate piece of paper to draw the face. You can tear a page from the sketchbook if it's easier, which I suspect it is.
The next few minutes were used to discuss options for drawing a face. I went VERY quickly here. By sixth grade, my students know how to draw a simplified face. The trick was to make sure they knew they could draw a face in any art style they wanted. Some kids drew animated faces, a few created abstract faces, but most created basic line drawings.
The next class, kids worked on their face drawings first drawing in pencil (or not), outlining with marker (or not) and then using color to express their personalities. Much like my Emotion Portrait lesson, I wanted kids to know that there wasn't a right or wrong way to color their portraits. Th kids really had some fun with this.
Using color to reflect personalities is so much easier than drawing a realistic portrait.
For the last step of the project, the students used color markers to write statements, quotes, letters and expressive thoughts on their portrait backgrounds. The kids really got into this part of the project and had no trouble expressing who they were through words. Isn't that great?
SIXTH GRADE STUDENT GALLERY
Missed the last installments of the Sketchbook Project?
Intro #1: The Sketchbook Project: The Beginning
Week #2: The Sketchbook Project: Creating Value + Free Worksheet
Week #3: Atmospheric Perspective + Free Worksheet
Week #4: Tree Line Drawings
Week #5 Sonia Delaunay Abstract Art & Free Printable
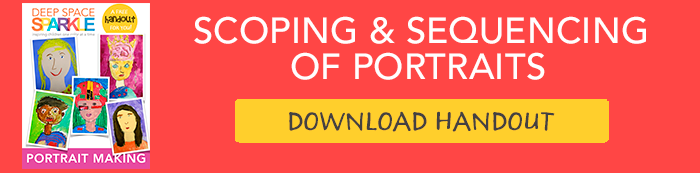
Want a free handout? Download by clicking the yellow button below and we'll send you a free lesson guide on portrait making!
Love your blog! So helpful. Thank you for all the fabulous creative inspiration!
Hi Patty,
Love these portraits and the sketchbook project. Thanks for sharing. Also, how do you afford to buy Prismacolor markers? Do your students respect them?
Hi Dana,
I bought them last year on sale from Blick. And yes, the students totally respected them. I don’t have an issue with students not treating the art supplies well. I’m not sure I have high standards but I showed them how to color with them and how to snap the cap on.
Hi Patty,
We have been following the sketchbook thread at home. My kids are loving using their sketchbooks. Will you be doing the line design, farm animal and the eye to eye lessons in the future or am I missing them somewhere?
-Joanne
ps. I am loving your podcast. Thinking that when I am done being a stay a home mom that I might just go teach art!
Hi Joanne,
Can I just say how sorry I am that my project posts have fallen off my wagon? I got so busy with the podcasts that I let thing slip. Hopefully, I’ll get the lessons on the blog this weekend. Thanks so much for listening too the podcast! Really appreciate it!
I have had my art students create self portraits on paper and then Ina digital format later in the semester. I think this project will add a new dimension to the paper project. Thanks for sharing!
Love your idea!
Love this group of lessons! I see in the pics above a handout with facial features / hair to help students when drawing portraits. I didn’t see it in the download nor at emotions portraits link – is it available for download somewhere? thanks 🙂