


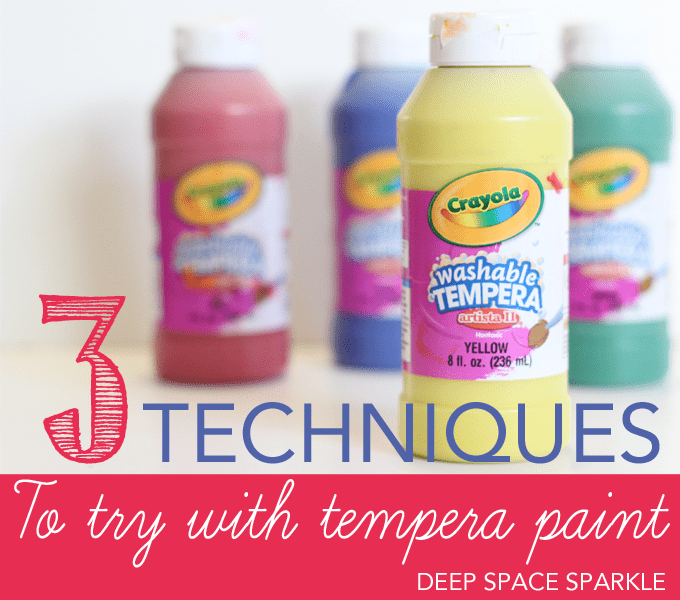
When it comes to painting techniques, most of us think about using watercolor paints. There is just so much you can do with these watery paints: resist, wet-on-wet, salting, etc. But if you use liquid tempera paint for most of your art projects, you may not know that these paints can transform into extraordinary textures.
Here are my 3 favorite techniques to use with liquid tempera paint:
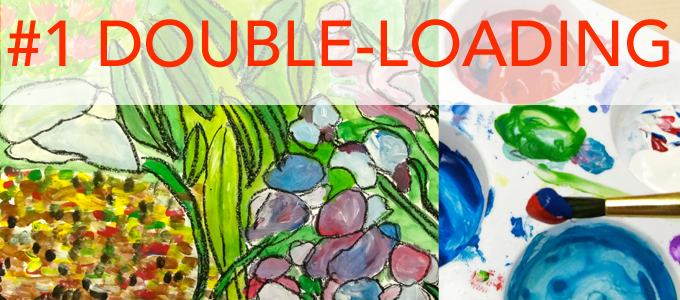
DOUBLE-LOADING
This is my absolute favorite tempera paint technique. The name comes from the simple description of adding more than one color of paint to a brush. Most lessons ask that a child dip their brush into a single color then paint onto a piece of art paper. Or instructions ask the student to mix paint onto a palette to create a color. Double-loading is a bit of a hybrid.
The idea is to not only create beautiful, interesting colors but the benefit is that it saves a whole lot of time. Mixing paint on a palette is a rewarding experience but it can take a while to complete a painting. When time is not on your side and you have 30 kids to move through the painting process, the double-loading technique is your best friend.
Here’s what to do:
- Start with 3-5 colors of paint. I like to include white into this mix.
- Dip paint brush into one color (say red) then scoop up a tiny amount of another color (say white). You will see two colors on the brush.
- Brush paint onto a paper surface noticing how the colors appear on the paper. The more times you brush the paint onto the paper, the more it will blend. Sometimes it’s nice to leave the application alone so you can see the striped effect of the two colors.
- Try loading the brush with three colors.
- The tip for making this technique work really well is not to use too much water in between paint colors. The idea is to have remnants of color already on your brush so that after dipping into a paint color, a new color appears.
Ready to try it? Here’s a video to watch to get a sense of what double-loading can do.
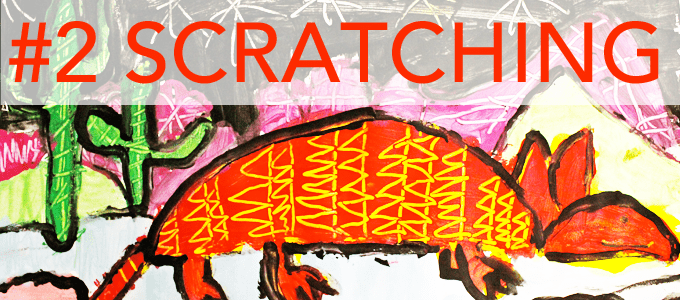
SCRATCHING
Whenever you want to jazz up a painting project, try scratching to create texture, design and patterns. The trick to this technique is to layer two colors of paint on top of one another. Kids really get into this technique so it can take a while to complete.
Here’s what to do:
- On a piece of paper, apply one layer of any color paint.
- Wait about 5 minutes for the first layer to dry then dip paintbrush into another color of paint and brush OVER the surface of the first paint.
- Using the back end of the brush, scratch or etch designs into the wet paint.
- You need to work relatively quickly as the technique only works with dry paint for the bottom layer and wet paint for the top layer.
- You may think it unnecessary to add the first layer of paint. Scratching works best if the under layer is paint and not just paper. Not sure why!
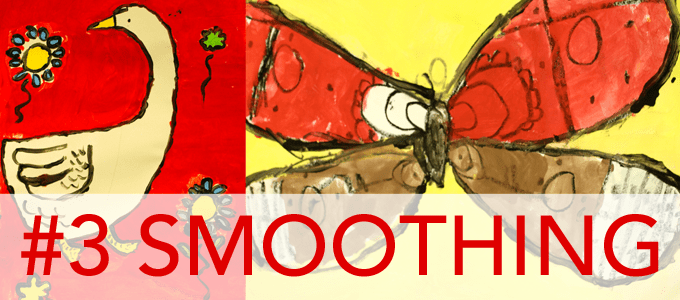
SMOOTHING
This is the most underused technique in the art room. The result from using this technique is subtle but very effective. I call it smoothing because it’s a technique that I created to help my students achieve a smoother paint finish. Most kids have areas of their artwork feature globs of paint and then no paint at all. By bringing attention to this technique, I found that children will take a moment to consider how the paint looks on the paper. I use this technique mostly of backgrounds or large areas of paint.
Here’s what to do:
- Dip brush into paint and paint an area on the art paper (usually the background).
- Notice how there are some spots that have globs of paint and others that look thin? We’ll fix that.
- After the paint dries a bit (about 3-4 minutes), go back to the same area and paint or smooth with a dry brush. I love using a flat edge brush for this part.
- What happens is that the brush smooths the globs into a thin layer which creates a beautiful smooth surface.
- Make sure to use a dry, flat brush. Wet brushes don’t work as well.
Your Turn
Grab a piece of 12″ x 18″ paper and divide the paper into 3 sections. Draw a simple shape (like a flower or fish) in each section. Practice painting the three shapes with each of the three techniques. Which one do you love? Which one do you think your kids will like?
In the comments below, share what works for you….
LISTEN TO THE PODCAST! AME 052


Loved it!!
Thank you for information! I truly hope I can get my niece painting! She is a dreamer.😇
Cool 😎 info!👍🏻
Patty do you have a printable version of the techniques please?
No, I don’t. You can print out this post though. Click the print icon in the upper corner of the post 🙂
Would acrylic paint work for these?
I need help with teaching art in a private school. I love what I see.
Steve
Hi Steve…we have a free training coming up soon. It will help you get a grounding on what’s possible for your art program :
https://event.webinarjam.com/register/38/67y2xt52
I teach After School Middle School kids-love the quick, easy & fun ideas !!
Awesome thanks