


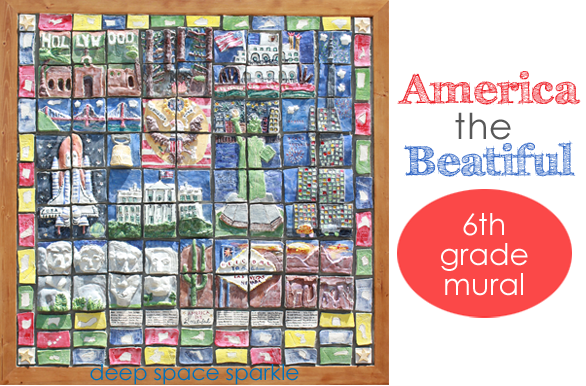
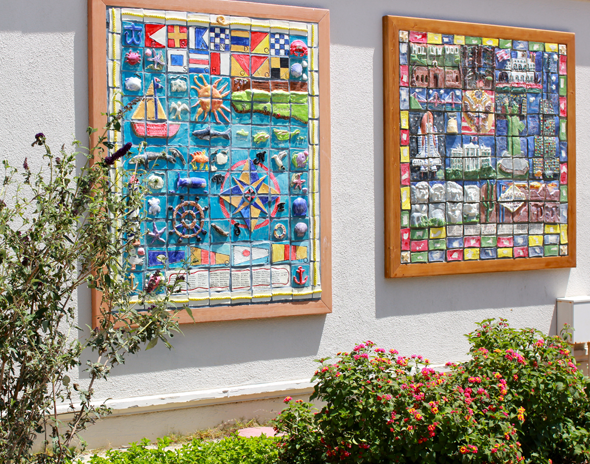
Another year has passed and with it another ceramic tile mural graces our school’s inner courtyard. I can’t think of a better way for our graduating students to celebrate their years at elementary school than by creating their own personal art legacy. I have documented the process of creating these beautiful murals in my Ceramic Mural Project Booklet.
I think about the Oklahoma elementary schools that were affected by the recent tornado. I can only imagine how devastating it would be to lose precious installations such as these. Even last week, Goleta experienced a 5.0 earthquake and although no damage was done (amazing!) it’s a reminder that we must enjoy the process of creating as one never knows how long something will last.
This year’s project had it’s challenges: our kiln wasn’t reaching high enough temperatures to fire the glaze properly and as a result, most of the tiles are a bit cloudy. But I imagined that a lovely “fog” settled over our beautiful tiles creating a soft lustre.
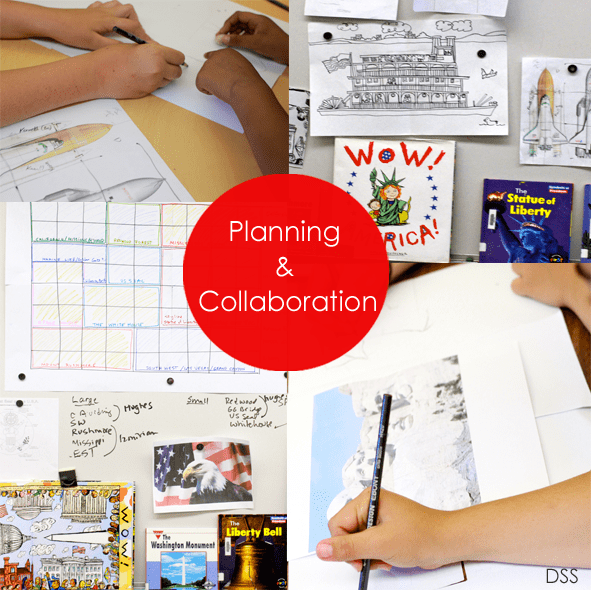
Collaboration is vital to the success of a mural like this one. All kids joined into groups. They were friendship based at first but I moved a few kids around as some themes needed “specialists”. Kids who were good with details, or creating straight edges or who were considered “precise” or “detailed” were asked to consider joining a different group as were the kids who were creative and imaginative as some tiles were a bit hard to create. The kids had fun re-arranging their groups and welcomed their “specialists”.
The idea behind this mural is American Landmarks. As a class, we brainstormed some of the most popular landmarks in a previous class and set to work finding good books and pictures to help with the drawings. The drawings were grouped together with pieces of paper tiles ( I explain this process in my Ceramic Mural PDF).
I created a large grid for the kids to refer to. The number of paper tiles correspond to the number of clay tiles. When creating this type of collaborative mural, allow enough time for the children to really understand how the paper tiles will turn into clay tiles. I only had 45 minutes for this session, but I could have used another drawing class to really work out some of the confusion the kids had about joining their tiles/drawings together.
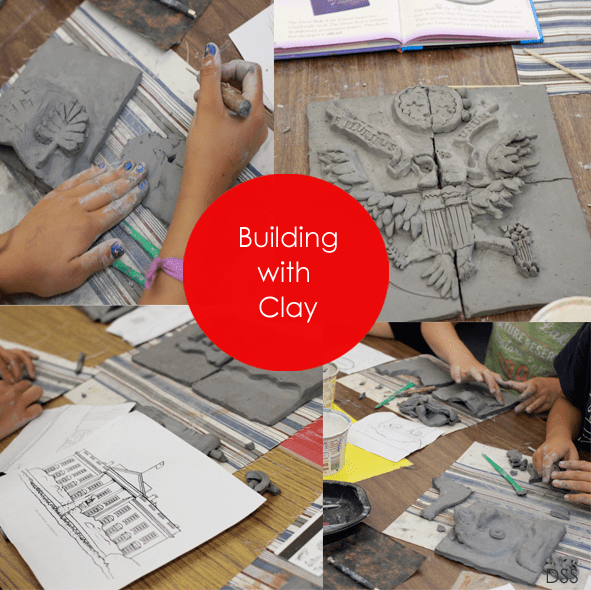
The second session involved taking their drawings (paper tiles) and turning them into clay tiles. Essentially the kids get two tiles to work with: one as a base, another as the building clay. Not only do the kids build their tiles in this session, they paint the tiles as well. Allow at least 2 hours if not 2 1/2 hours for this process.
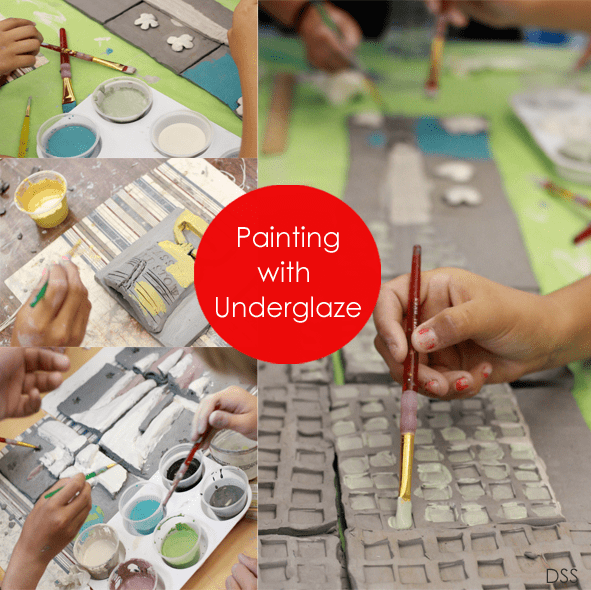
Most of the mural was painted as wet clay. I did not have enough time for all kids to finish, so I allowed the tiles to dry, then I fired them and asked the children who did not finish painting to come back after the tiles were fired. As the tiles dry (about 10 days), it’s helpful to allow them to dry on a ventilated rack. Air flowing all around the tile prevents warping and cracking.
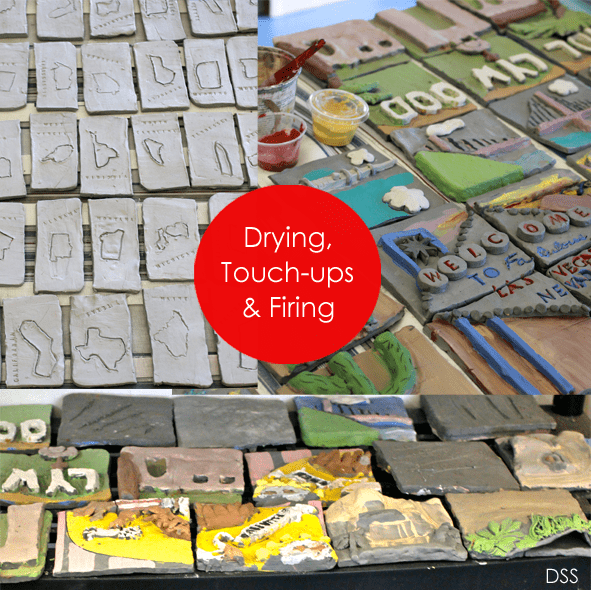
After all the pieces are fired, it’s sometimes necessary to do touch-ups: a little paint here, a little there. Often, kids would poke their head into the art room to see if there were any touch-ups needed, so I always kept a palette of underglaze ready for them. A parent helped me dip the tiles into dipping glaze.
It always takes a little bit more time than what you expect to pull off a mural like this, but plan on some set-backs and start the process early.
Enjoy!!!!
ARE YOU A SPARKLER? These lessons and over 300 art lessons are available inside the Members Club. Access to videos, resources & trainings for one low monthly fee.
CLICK THE IMAGE TO SIGN UP FOR NOTIFICATION OF OUR NEXT ENROLLMENT


Beautiful, as usual. You have created a wonderful and lasting legacy for all of Brandon to enjoy. You’re the best Miss Patty.
Hi Patty,
I just began teaching art to children in my home about a year ago. I have always loved art. I took it in High School but that is as far as my formal education went. I’ve never been able to take it further. Everything I know is from reading on my own and through the internet. I have loved your website for a few months now. All of the lessons are beautiful and I have tried a few. The children love it! I am so excited about you online teaching course. I can’t wait to sign up for it. Thank you for people like you who can help others!
I would like to know how to get a copy of Patty Palmer’s Ceramic Mural Project Booklet.
Thank you!
Here you go: https://www.deepspacesparkle.com/shop/ceramic-mural-project/
Hi Patty! I have been following your website and doing a number of your art projects with my students. It always turned out wonderful! Thank you for utilizing your gift so beautifully. I am wanting to do a mural but I do not have a way to fire the pieces, what would you recommend?
There really is no material substitute for this type of mural. You must fire the pieces but there are other types of murals: painting, ceramic piece mosaics, etc. I haven’t done any but it would be fun to search the web for other types.
What kind of kiln do you use? What cone do you fire at to get bright colors?
Hi Deborah,
I don’t provide kiln recommendations as there are a few to choose from. You should probably check with your school to see what kiln is in their budget, etc. they could probably help you narrow down your choices. I buy Laguna underglaze and fire to Cone 06.
I see that you left this questions in other areas of my blog, but I’ll just answer here as it seems the most applicable to the topic.
Good luck!
I’ve never used underglazes… I think I’d like to try though. So in the same session as creating the tile, you have the students paint the underglaze on… onto wet clay? Then it all dries together, and you fire at cone 06 (as I see in the comment above). When it comes out of the kiln it’s all good? You said a parent helped you dip into the dipping glaze – is that just a clear glaze? Is this before or after you have fired them the first time? And when you say “touching up the paint”, is that before or after you’ve fired the first time?
Thanks so much for your knowledge and advice!
Great 🙂
I am wondering how large your frames are and where you got them?
The frames are custom made by the school districts to fit the murals 🙂