


I use one of three techniques for drawing portraits in Kindergarten. They are: using templates, drawing the face with the letter “U” approach and free-style.
This year, I used the letter “U” technique. This is a slightly more advanced drawing strategy compared with the template option. And because this year’s group of Kinders collectively had a greater skill set than other years, it felt appropriate.
Skill level is hard to gauge but after 5 or 6 projects you can usually tell how independent the children like to work. Some years, my sweet kinders need a bit more help. If this is the case, I use an oval template to help the children get started with their portraits.
When the group as a whole is slightly more capable, I like to use the letter “U” approach. This means using a basic line and shape method of drawing.
This is what you need:
- 12″ x 18″ sulphite drawing paper
- Oil pastel for drawing
- Chalk pastels
- Liquid tempera paint
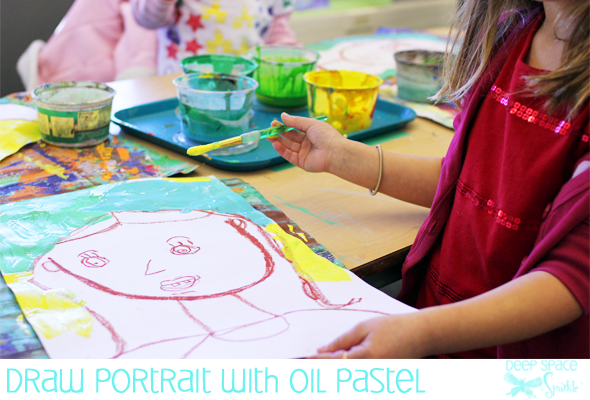
Use an oil pastel on white 12″ x 18″ sulphite paper to draw the letter “U. Add a neck, shoulders, ears, hair and finally the features.
Take a look at my Primary Portrait experiment for more details on instruction. My big objective for Kinders is to recognize that the shoulders extend from the neck and not their head.
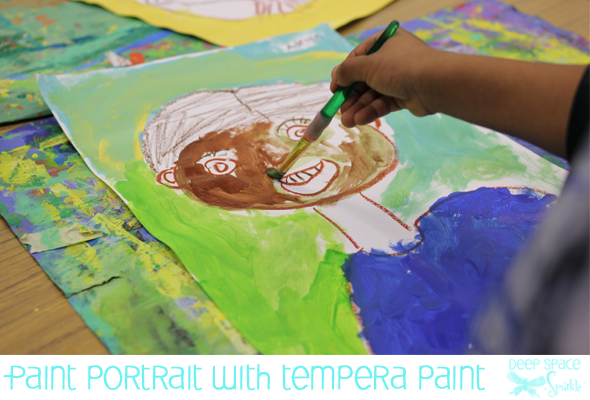
Use a palette of liquid tempera paint to paint the shirt, background and skin color (in that order). This marks the end of day one. When the background dries, paint hair.
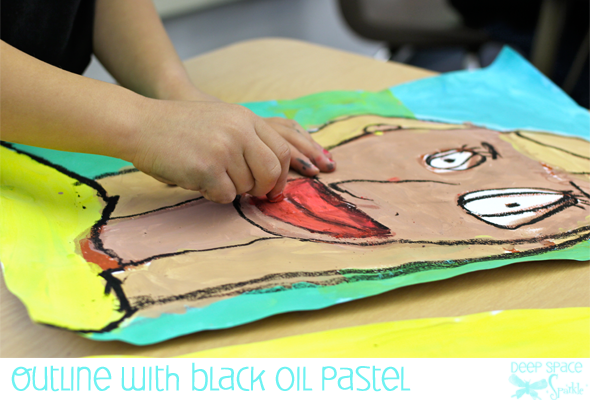
As always, I love to outline with a black oil pastel. Gives everything a bit more definition and helps minimize unwanted lines by allowing them to recede under the paint.
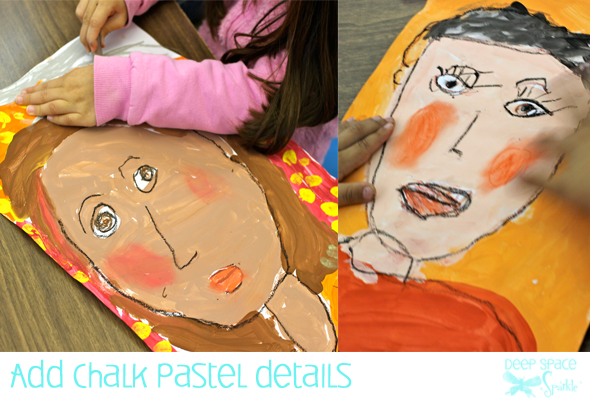
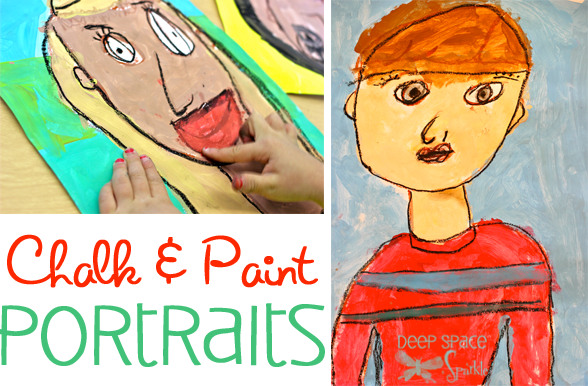
Use chalk pastel to color in eyes, mouth and cheeks. I decided to use chalk to color in the features as the chalk is much easier to control. The kids loved the smudging of the chalk and had lots of fun painting with their fingers. Some children used the chalk to add details on their shirts and backgrounds.
About Portrait Making with Kinders
Portrait making in Kindergarten should have reasonable expectations. I do not expect children to draw their exact likeness. In fact, I don’t use mirrors or talk too much about how to draw their shape of eyes and mouth. If I can get the children to draw two eyes, some type of nose and a mouth, I consider the lesson a success. If the children draw a neck and extend the shoulders from the neck and not the head, I consider the lesson a super success!
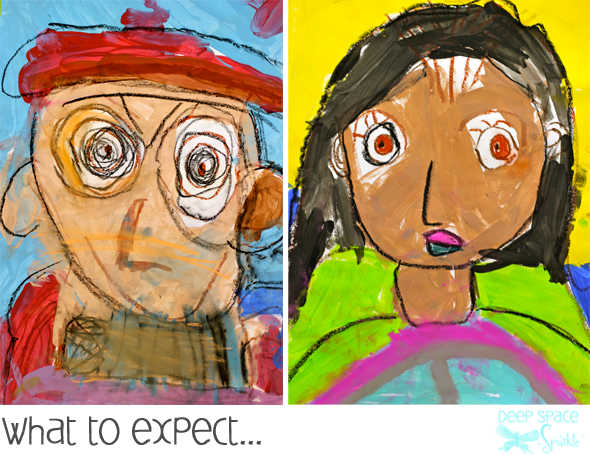
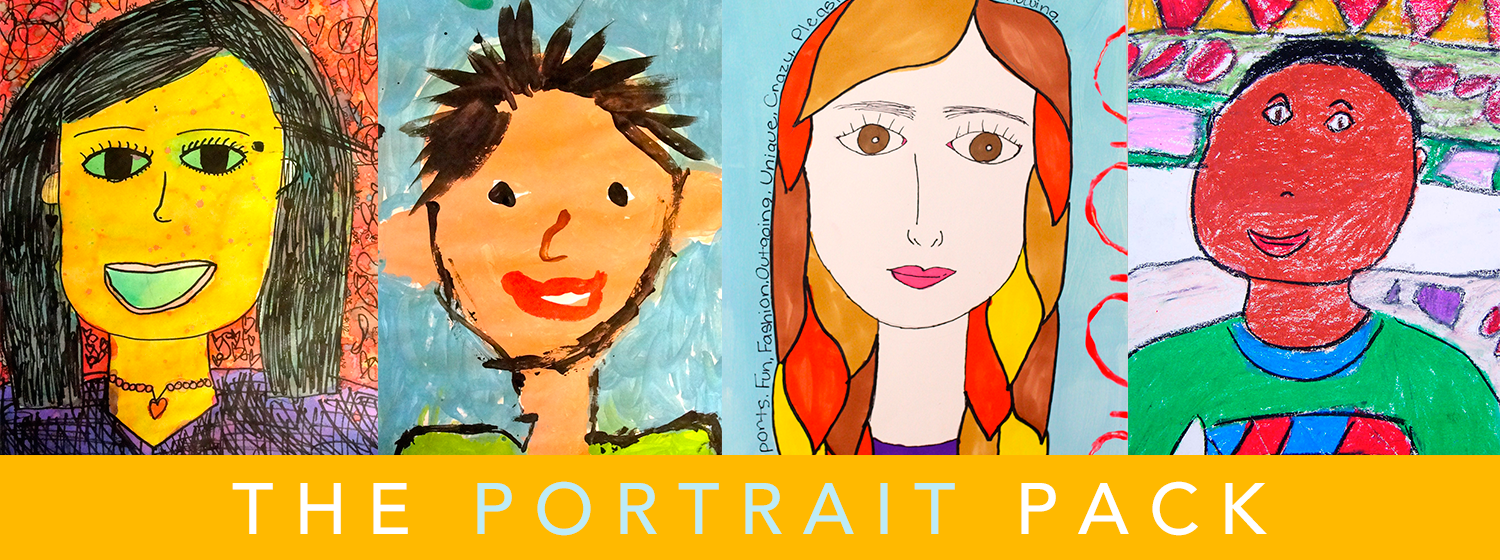
Some children will obsess over a certain feature, like this little guy on the left. He was really into the eyes and kept going round and round. Who’s to stop him? The little girl’s portrait on the right started off with her shoulders protruding from the head. You can see how she added more lines and then painted her “mistake” away. We do a lot of this in my art class.
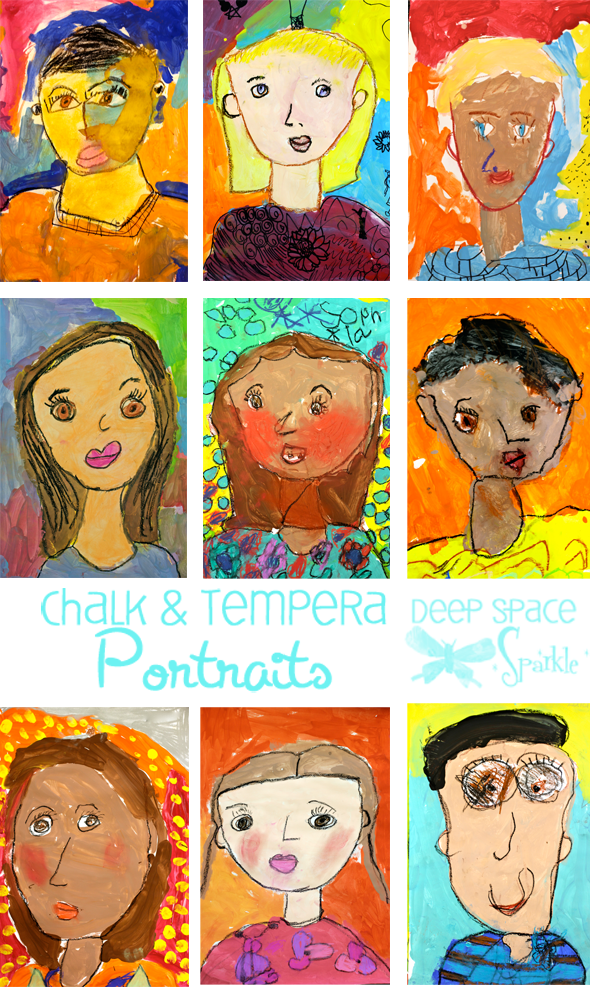
This portrait project was a true joy to instruct. The kids loved the entire process and the results were so lovely and individual. I know many parents will be in tears when they receive these precious gems in their child’s end-of-the-year portfolio.
What about you? What is your favorite medium for portrait making?
DOWNLOAD A FREE ART RESOURCE: THE SCOPING & SEQUENCING OF PORTRAIT MAKING
These Portrait Lessons are included in the Portrait Pack inside The Members Club.


Love the results of this lesson! Wonderful, colorful portraits full of character!
What a great lesson Patty! Thanks for all your step by step instructions.
When you use chalk pastel with the younger students, how do you keep them from getting chalk dust all over?
Please add this to your portrait package! I love, love, love this and will try it with my kinder and first grade students in April. I appreciate the pdf versions, you are amazing.
How do you discuss skin tone? Do you just have a bunch of various of tan, peach, light brown and let them choose? Do you talk about it at all? I work in a primarily white school, with a small amount of ethnicity variation….I’m never sure if I should talk about skin color or not…because its an all kindergarten building, and sometimes I feel like I should suggest that they find a color that sort of matches their skin (Or else ONE kid will get on a green monster kick and the rest of the class wil join in).
Great question. I don’t make a big deal of skin color and usually tell the kids to find a shade similar to their skin. But this time, I suggested that if the kids were having trouble finding a match, they could take a bit of paint and brush it carefully on the back of their hand. As soon as I said this, I immediately felt that I may have started a massive body-painting session. But actually, the kids did what I said and applied (very carefully!) the paint to their skin to see what color was best for them. It really was the cutest thing.
My school has every color of skin so kids realize that colors are different.
HA! I actually like the idea of LETTING them put one stripe on the back of their hand. Its getting close to the end of the year and I usually do a self-portrait project in April. We’ve done two back-to-back tempera painting projects, so this lesson would round everything out so nicely, using their prior knowledge and incorporating a variety of materials that we have used this year. I was dreading doing a self-portrait project with crayons after teaching them so much about painting, this actually has me looking forward to it. Thanks for the great lesson!
I was wondering how you organize and distribute paints. Do you teach the kids how to clean their brush in water and dry it? Or do you have all the paints at each table with one brush per color , or maybe skin colors at one table and shirt colors at another table and background colors at another? When I teach the kinder kids about cleaning with water and drying the brush before going to the next color, they tend to not dry the brushes and their paints get all watery.
For this lesson, I placed a 6-well palette of skin tone colors (3) plus a few tubs of specially mixed tempera mixed paints on each table group to share. Children painted their faces from the paint in the palette and the shirt and background from the tubs. I placed 4-5 paintbrushes in water containers on each table as well. I don’t use sponges to dry the brushes, just tell the kids to swipe their brushes on the placemat to dry. This works well enough.
I don’t do this with every single painting lesson. It just depends on how much I need to control the order of the paint, etc.
Here is a piece of Kinder art that a 5 year old did in private art lessons.
http://artistecommon.blogspot.com/2013/04/new-student.html
Had a go at it with my daughter, and had great results, thanks for sharing!
http://a-little-crafty.blogspot.com.au/2013/06/paint-and-pastel-self-portrait.html
I really enjoyed reading how you get your students started with their faces in your portrait projects. I am glad to see I am not the only one that has tried many different techniques to help my students with their faces started. Your U idea is a good one; I like to use kind of a pizza idea. I demonstrate this as my students are drawing on their paper line for line. I have my students draw a long line two inches from the top of their paper. Then at the bottom of the paper I have them draw a much shorter line maybe three inches long. I then have them connect the lines with light lines that will be erased latter. This gives them kind of a strange looking piece of pizza, and we know kids love pizza. We then draw darker lines outside of the original lines that are now rounded and I inform them this is the beginnings of their face. I look forward to reading more of your blogs.
Do you outline with black oil pastel yourself after the children have worked on the portraits? These turned out great. I am getting ready to start my first year teaching art at a small private school. Will be visiting your blog a lot!
No. I never alter or touch a child’s artwork unless I damaged it somehow! Allow the children to outline. It’s what makes all the portraits unique.
I love your lessons! We’ve done the lesson on Kandinsky and Pete the cat / perspective. Side note: Until a few weeks ago when we did your Pete the Cat art lesson, we’d never read about Pete. Now my six and eight year old are HOOKED on Pete!! Right now, that’s all our six year old has been reading for school. Thank you for that wonderful introduction. 🙂
The kids have loved the lessons for our home-school. Each Friday our ‘extra’ lesson is art. The kids always look forward to Friday’s, let me tell you! I remember art when I went to school and it was always, always my favorite subject (still is).
I just bought your portrait package II and am looking forward to introducing new concepts to our girls.
Thank you so much for your work! We value it and you greatly!!
Sincerely,
Anne 🙂
Hi
Great approach to art lessons really helpful. I wonder if the names of types of paper are different in America compared to U.K e.g sulphite paper? What are the Americal equivalent to e.g cartridge paper, sugar paper?
I’m a brand new art teacher. Might seem like a silly question, but what art elements and principles of design does this project hit? And any idea how to tell which CA standard it covers? Thanks
Totally not a silly question. I love it actually. We take all of our lessons and adapt them to 4 standards: I Can statements, Common Core for grade levels, National Core Art Standards plus, we have assessments and Elements of Art tie-ins.
We offer these standards for all of our lessons in the Sparklers Club. So its done-for-you. BUT, for portraits, children are learning proportion (Principle of Art), color, shape, line and in some cases for portraits, texture. That’s a whole lot pf learning!
If you help with standards, I would highly recommend considering checking out our membership. Heres some info:https://deepspacesparkle.lpages.co/the-sparklers-club-waitlist/
Wonderful resource for new kinder art teachers. Thanks for mentioning expectations and the free handout download. I’m very excited to start this project!
Yes! Check out our latest blog post…
I LOVE this idea! Could I share two photos and link back to this blog post in a blog post that I am creating about multicultural art materials/projects?
Hi Laura,
Thank you for asking!
You can share images as long as the Deep Space Sparkle watermark/logo is visible on you blog and they can easily find this post 🙂
(Just a reminder our images are copyright and can *not* be used for advertisements of any kind)
-Hannah
I can’t access the PDF
Hi Tracey! This is Bethany from Team Sparkle. Thanks so much for letting us know that there is an issue with the link. We are working on getting that taken care of, so please try again shortly. Thanks!
LOVE THIS!
LOVE THIS!
I love all your efforts to children projects and art lessons . Keep doing it.