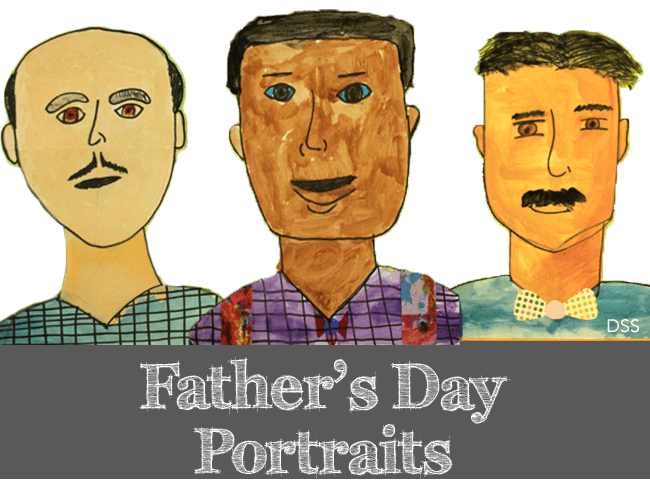


For the last art project for my third/fourth combo class, I asked the teacher if she had any requests. She didn’t hesitate to say that she has no idea what to do for Father’s Day. Could I create some type of art project to celebrate Father’s Day? We brainstormed for a few moments and then decided that a portrait would be fun. Drawing a grown-up male face isn’t something I’ve done since my Gunslinger and Outlaw Art Project, so it was high-time that another male-focused project made its appearance in the art room.
Here’s what you’ll need:
- 12″ x 9″ white sulphite paper for the drawing
- 14″ x 12″ colored sulphite paper for background
- paper strips (I used my painted paper placemats cut into strips)
- Paper scraps for bow tie
- Liquid tempera paint: skin, shirt, hair and background colors
- Waterproof black marker (I like Sharpie Brand)
- Chalk pastels and markers or color pencils
- Scissors & glue
You’ll need two 45-minute classes for this lesson.
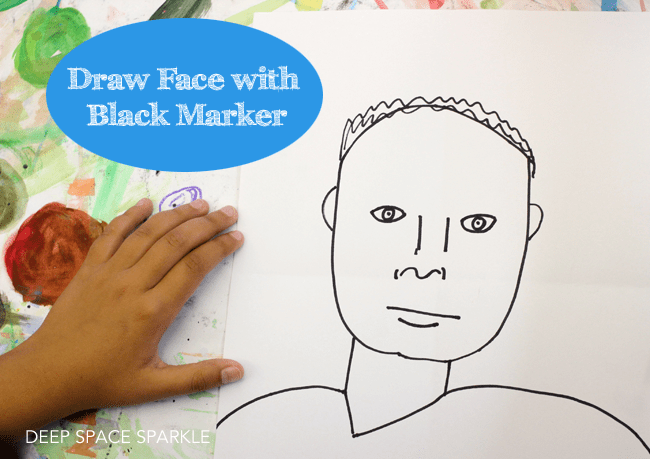
DRAWING DAD
The classroom teacher asked the students to bring in a photo of their Dad (or Uncle or Grandpa) in which to use as inspiration for their portraits. A few kids forgot their pictures but they were fine drawing from memory. On the whiteboard, we talked about basic shapes for faces (long, square, oval and heart-shaped). The kids drew the shape of their dad’s face with a black marker by focusing on the bottom half of their face (a letter “U”).
Eyes are a bit harder to draw as a distinctive feature, so we thought about whether the eyes were close together, were big or small, far apart, etc. The eyebrows were so much more fun to draw and we all had a good laugh talking about some of our dad’s eyebrows.
I showed the kids a few different ways in which to draw a nose. The upside down number 7 works well for smaller kids, but these kids knew that grown-up dad’s noses are all different.
The mouth was the easiest for most kids as we just focused on a middle line and maybe a line for the bottom lip. I told the kids to just get the mouth line on the paper and the color would come later.
We drew a simple neck, keeping in mind that dads are strong and therefore no chicken necks allowed.
Hair often is the most distinguishing feature (even the lack of) of children’s portraits. We talk about how to draw hair that went on top of the highest point on the head and to the side as well. Facial hair was added as needed!
The shirt was kept simple so that the kids could add decorations on day two.
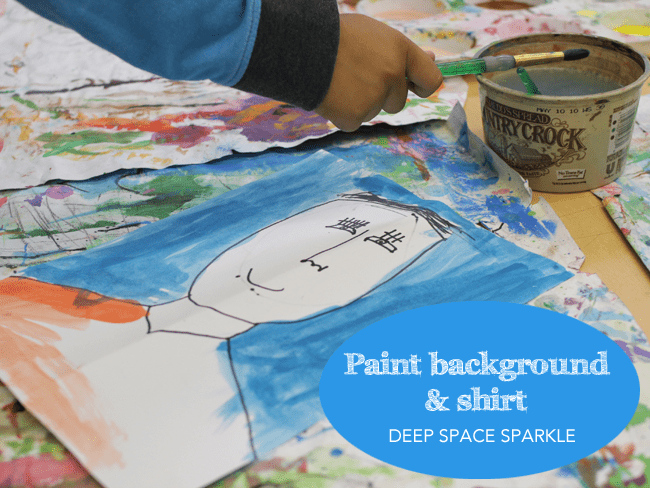
PAINTING THE BACKGROUND
I find it easier to paint the background before the face and hair. It’s certainly fine to paint the face first but since the hair often has small strands extending into the background, having the background painted first makes the process much easier. It’s hard painting around strands of hair.
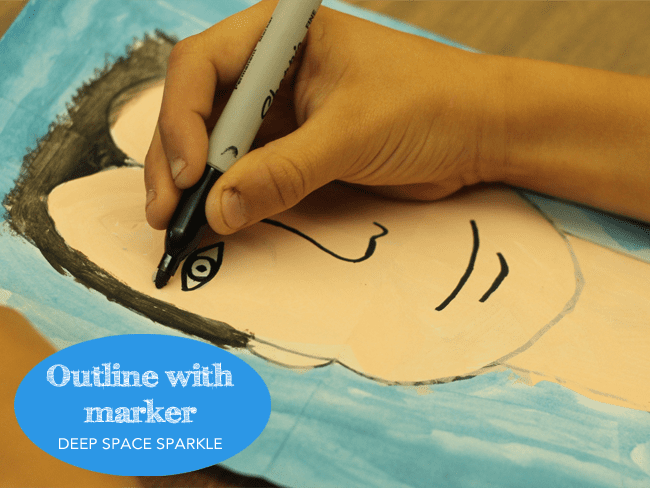
When painting the face, make sure not to paint over the eyes. This allows for the white part of the eye to remain white. Once the paint dries, trace over all lines with a Sharpie or waterproof black marker. Color in the irises. This step may not be clear for every child, so explain and demonstrate. Use either a colored pencil or marker as chalk is too light. The chalk is great for adding some color to the mouth as well as shading under the chin and around the outside of the face.
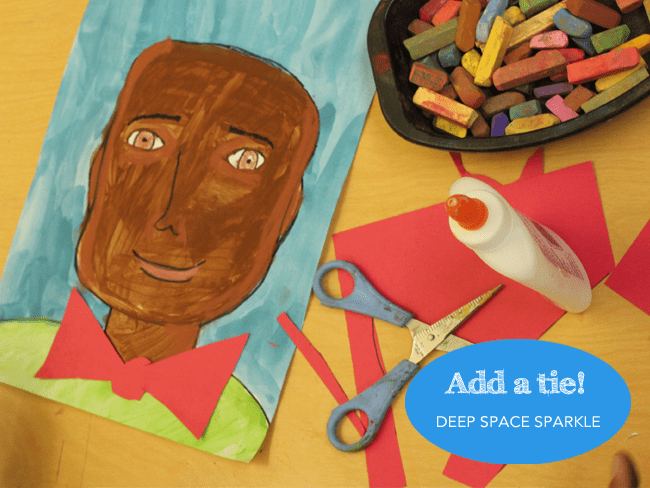
MAKING A BOW TIE
Give the students access to some paper scraps. I left a box of paper scraps in the back of the art room and the kids selected their own. Some made bow ties while others didn’t quite understand what they even were! We live in California, and specifically Santa Barbara, where life is pretty casual. I love the portrait below of the dad wearing suspenders.
The final part of the project was to mount the drawing onto a piece of colored paper. The kids used paper strips as borders. The teacher will take the project back to their class and the kids will write about their dads and attach their writings to the back of the art work.
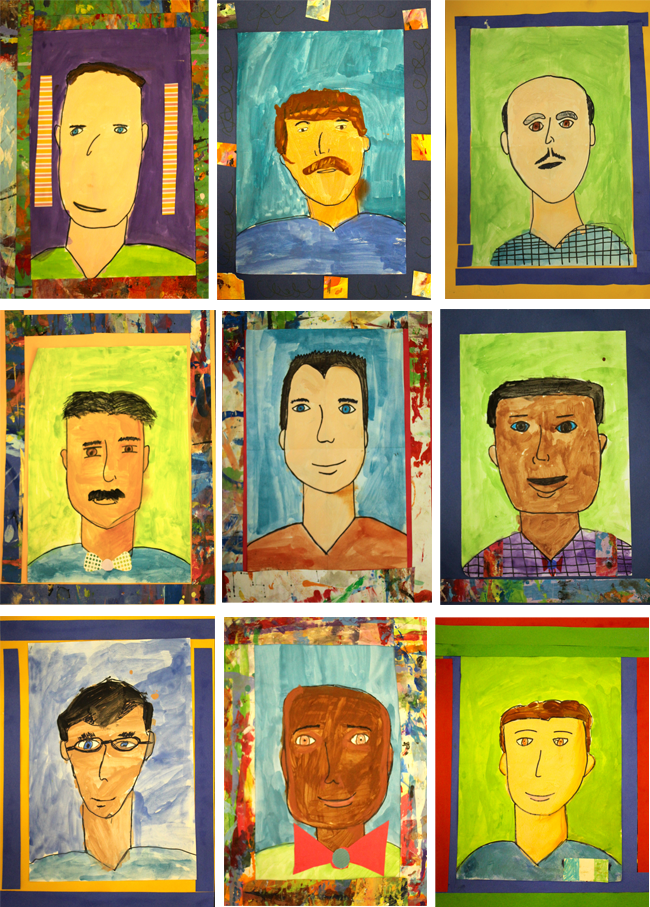
I was thrilled with the results of this project even though I try to hold back my reactions to “results”. The kids loved painting their dad and were very particular about some of the details. I wish I could see the stories the children create as I know they will be wonderful.
Happy Father’s Day to all the dads out there!
DOWNLOAD THE PORTRAIT FREEBIE (We recommend using Chrome or Safari for this download!)


So adorable! What a great memento for their dads! Did any of the kids not have a dad? I would imagine they would either do mom, grandpa, or some other person important to them? Awesome project!
I think most had a Dad, but sometimes you can’t be sure. I don’t like to make assumptions!
These came out great! I love how they each have their own personality it is amazing how with a little direction and creativity what kids create.
Inspired by your portrait booklet or tutorial (I can’trecall which) I got my preps (kinders) to do a portrait of their mum for Mothers Day. I raced around getting a comment from each child about their mum eg. what does mum do when you are at school; what is mum good at etc and printed these out and pasted onto the artwork when dry. These were laminated for posterity. I rarely get feedback from parents at our school but I got a couple of nice comments from mums on these.
I have never done specific Mother or Father’s Day Art projects with students. The hurt I have seen on the faces of kids whose parent is gone, is agonizing…..so I just do Art and let students talk and share that they are taking it home. It works and kind of smooths the edges of a possibly painful day.
Yes, it’s a bit of a risk, but the children’s classroom teacher asked me to do it. She knows the children’s lives very well, so we knew it wouldn’t be a moment of stress for the kids. It’s always good to communicate with the classroom teacher first.
I love this project. I voluteer and teach art to 10 wonderful 3rd and 4th graders every other week for 2 hours. I used all chalk pastels and outlined in a hard darker pastel. We made a scalloped black frame and colored the scallops with metallic gel sticks. Frame was 12X 18. Portrait was about 9X15. They did a fantastic job. I used hair spray as fixative. So much fun. Thanks.
I’m doing Chikdrens Worshio for 4th5th graders and wonders about using this idea for a portrait of Jesus. I recently retired from traching, but always loved your projects…as did my kiddos.
how do you get the instructions
Hi Miranda!
You can download the Portrait Freebie by clicking the photo below and inputting your name and email address.
-Team Sparkle
Nice
Download link does not work no matter which browser I use. Please send the pdf. Thank you!
Hi Jodi! Everything is working on our end. If you click the download button and add your email address we will send the lesson directly to your inbox. Be sure to check your Spam or Junk folders to make sure it didn’t end up there. We have found that the Firefox browser doesn’t work as well on our site but both Chrome & Safari browsers work so be sure to try using one of those. If you continue to have trouble you can reach out to support@deepspacesparkle.com for help.