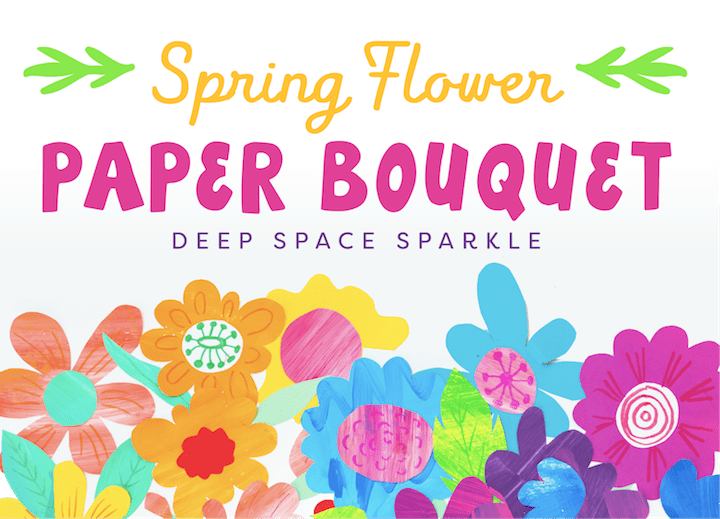


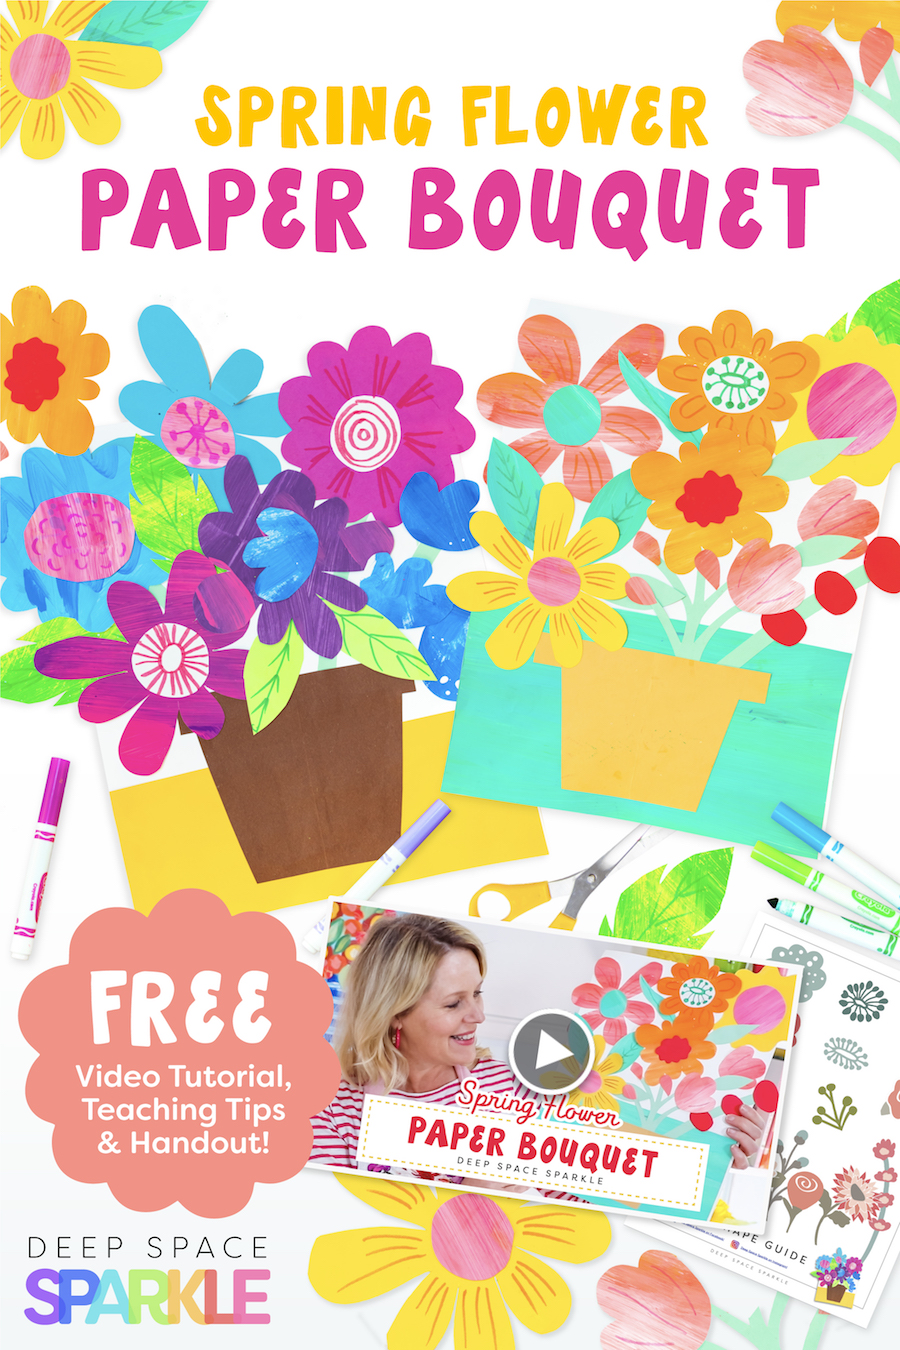
When I think about springtime, I immediately think of beautifully blooming flowers sprinkling color everywhere after winter thaws. These paper flower bouquets are just what you need to brighten up your classroom for springtime and use up some scrap paper in the process!
This lesson features several different ways to create organic flower shapes beginning with a simple, traced circle, which makes it perfect for middle elementary students. All of the bright, punchy flowers are then overlapped and arranged to create a beautiful, layered bouquet that you can enjoy all year long!
Watch a quick video tutorial here…
Click the yellow button below to DOWNLOAD the free drawing handout for the flower drawing guide, as well as the other March Freebie Pack drawing guides. Just add your name and email and we’ll send it straight to you!
WHAT YOU’LL NEED:
– 12″ x 18″ piece of white sulphite paper
– 4″ x 12″ piece of paper (solid, patterned or scrapbook)
– 6″ x 6″ square of colored paper
– Green paper for stems
– Painted paper scraps
– Flower shape guide handout
– Markers
– Scissors & glue
– Circle tracer
INSTRUCTIONS:
Glue a piece of solid, patterned or scrapbook paper to the bottom of a 12″ x 18″ piece of white sulphite paper to make the tablecloth. Mine was approximately 4″ x 12″, but yours could be larger or smaller, depending on what you have available.
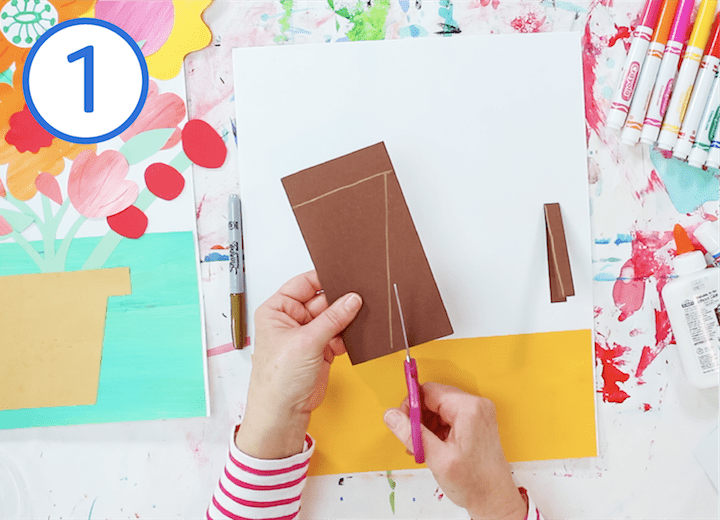
Fold a 6″ x 16″ paper in half for the flower pot. Use a marker to draw the flower pot: two horizontal lines on top and a diagonal line that reaches the bottom of the paper. Cut along the outside of your lines to create a symmetrical clay flower pot. Unfold and set aside.
FLOWER #1:
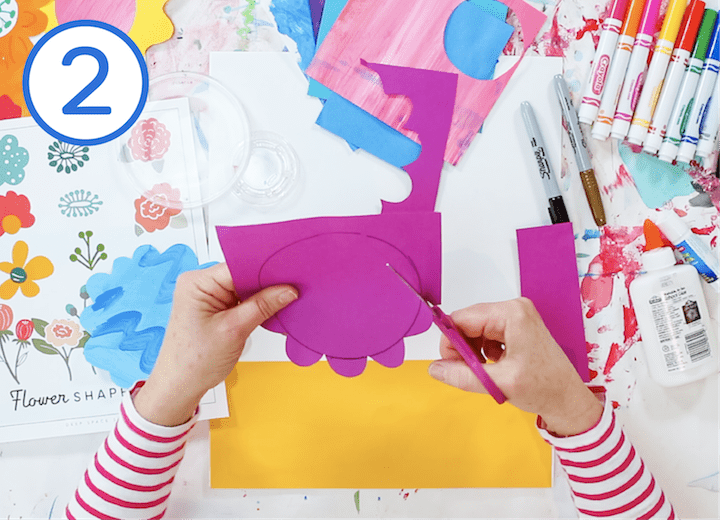
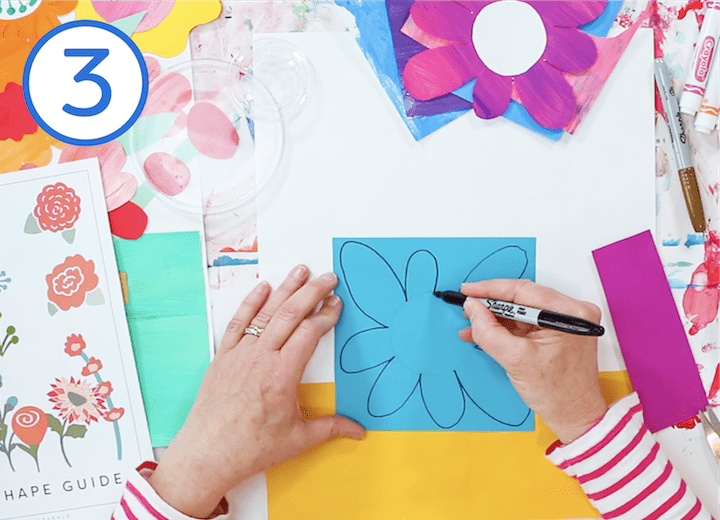
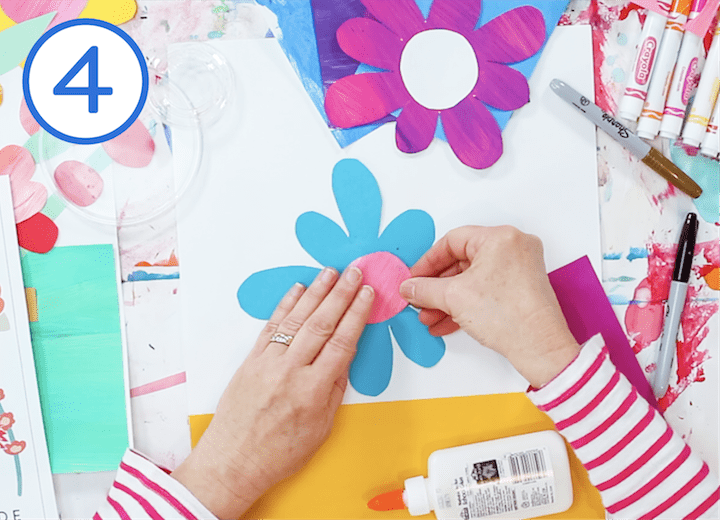
Use a medium-sized circle tracer to make a circle in the center of a piece of painted paper. Use scissors to cut a short, bumpy line around the circle to create your first flower shape. Cut a circle from another color for the center of the flower. Glue the center on and set your flower aside.
FLOWER #2:
Trace a smaller circle on another piece of painted or colored paper. Use a marker to draw a tall, bumpy line around the circle. The petals of this flower are much longer than the first and will reach almost to the edge of the paper. Cut along the lines. Cut a smaller circle from a contrasting color of paper and glue to the flower. Set your flower aside.
FLOWER #3:
Fold a piece of painted or colored paper in half. Draw smaller flowers in the center of the paper and cut out to create two identical flowers. Cut out a long, green stem and place several smaller flowers along the same stem. Set your flower aside.
Continue creating flowers using the previous methods or look at the Flower Shape Guide and create your own! Five flowers is a good number for a full bouquet.
CREATING STEMS & LEAVES
Use green paper to cut long, thin stems for all of your flowers. Don’t be afraid to add in some curved stems; they will help make your bouquet look more realistic than stick straight stems.
Your flowers will overlap quite a bit, so you don’t necessarily need a stem for every flower.
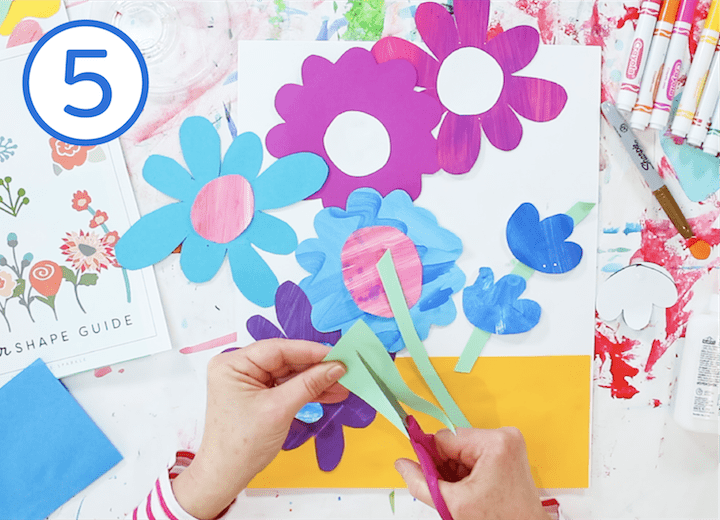
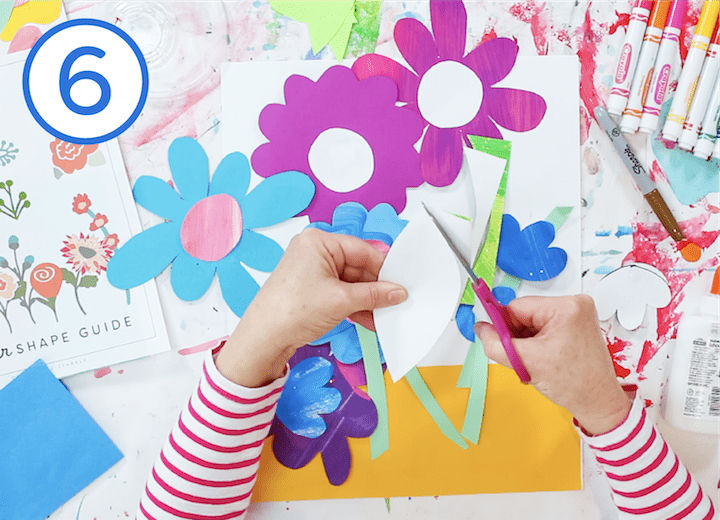
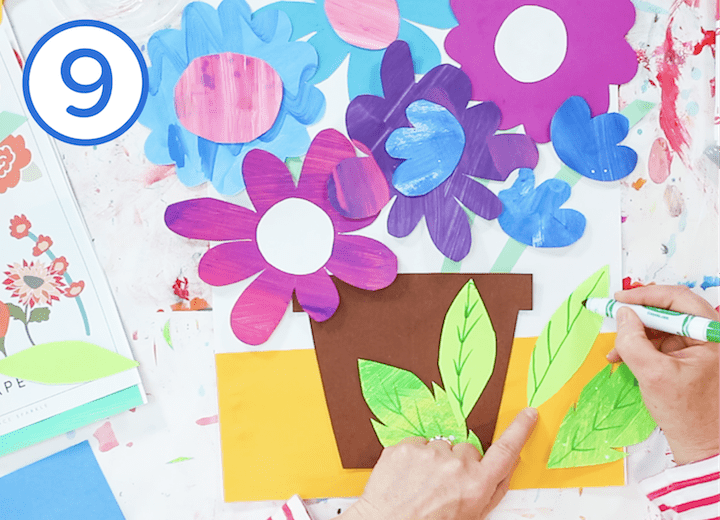
To save time, fold a piece of green paper in half and cut out a leaf shape to make two identical leaves. Use a marker to add veins to your leaves.
ARRANGE THE FLOWERS AND GLUE IT ALL TOGETHER
Set your pot down on the tablecloth, then add some stems that extend out from the bottom of the pot. Place your flowers on top.
Arrange the flowers until your have a balanced composition that looks good to you. Don’t be afraid to re-arrange a few times until you are really happy with what you have.
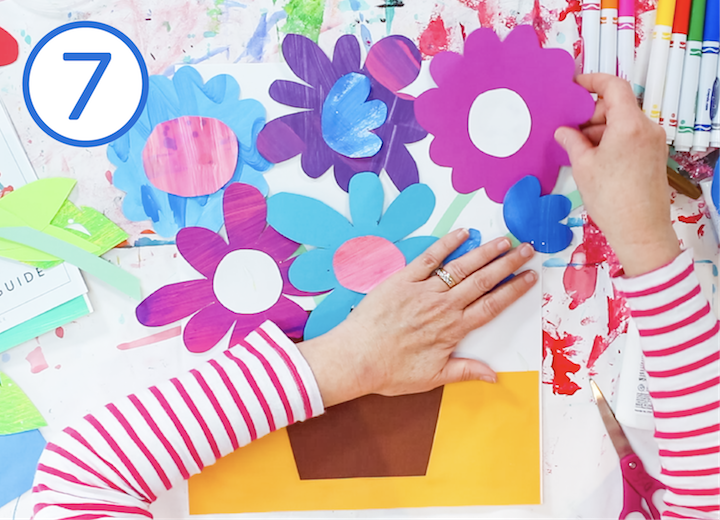
Glue the stems and the pot down first, then add the flowers. Tuck leaves into open spaces to fill up the space. If you have extra flowers, you can add them if there are any bare spots in your bouquet.
Turn your whole paper over and gently rub the back to ensure that all of your flowers are glued on securely.
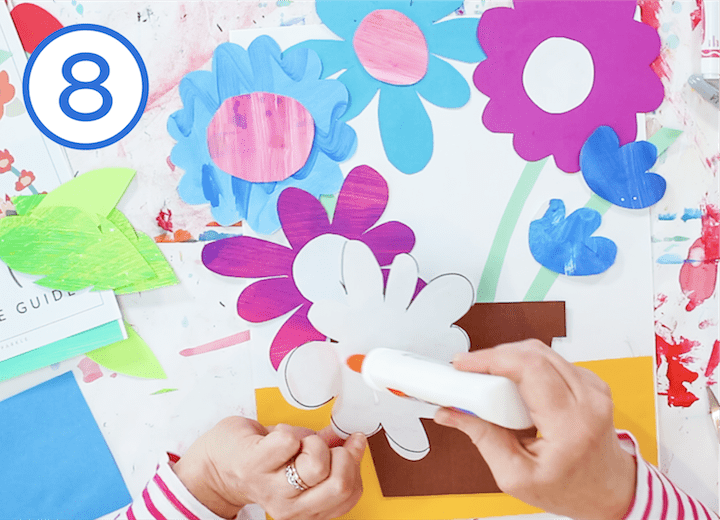
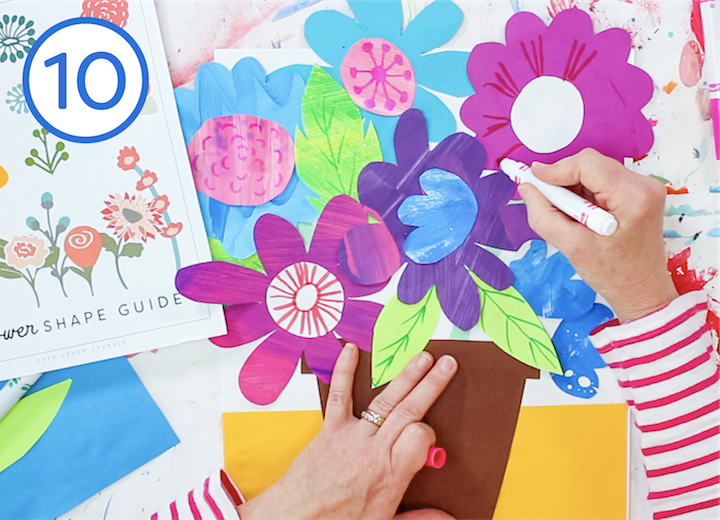
Use markers to add additional lines and shapes to the center of your flowers to really finish them off beautifully. You can refer to the Flower Shape Guide if you need some inspiration.
You can also add some designs to your flower pot and the tablecloth if you’d like.
Now your flowers are ready to brighten up your classroom, hallways or your home!
For more information on joining, sign up to our waitlist HERE.
Click the button below to DOWNLOAD the March Freebie Pack for more fun art lesson you can use this month!
PIN ME!


Thank You for sharing 😍
very useful for a hands on type of activity
This is so awesome! Thank you!
Great resource and easy to follow directions. I can’t wait to share this with my fifth grade students in their school packets while we are schooling at home during this national crisis. Thank you for making it available.
May I please get the March Freebie Pack. My grandson is making this for his Mother’s Day gift and we are adding his picture to the pot! Thanks!
Hi Cheryl!! Of course you can click the image above that says “click to download,” and it will send the PDF to your email 🙂
-Hannah (Team Sparkle)
Is it too late to get the March handout? Wanted to do the paper bouquet with my kids this week.
Not at all!!
https://www.deepspacesparkle.com/monthly-freebie-pack/
you can see them all here 💓
-Hannah
I’m going to try these!
The flower shape handout for this project isn’t in the freebie pack. Is it still possible to get this one?
Hi Danielle! Thank you so much for bringing this to our attention. You are right! We are in the process of fixing this so please check back in 24 hours and it should be there! Thanks again!
I am not seeing it there either.
Hi Mike! It’s there. I just checked and the Flower Shape Guide that Patty mentioned in the video is on page 7 of the March Freebie pack. Just click on the Download button and when you add your email we will send you the March Freebie pack! Enjoy.
Great LOVE IT !!!!!
So cute!
Lovely- colourful idea – a good simple, follow up lesson to have on hand after tackling a previously tricky project – thank you!
Love this!!
Very creative ideas! Thank you!
Yellow box link doesn’t work to download on Chrome & Safari. Is there another link you could post for the flower freebie download? Thanks!