
ONE LESSON @ 1 HOUR
WHAT YOU’LL NEED:
Liquid watercolor or tempera paint
Foam sheets or foam lunch trays/meat trays
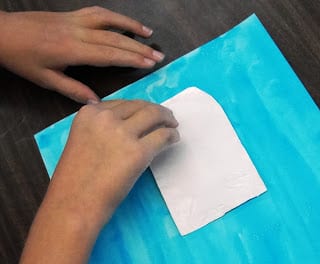
Step One: Painting the Background
I used glitter liquid watercolors for this project but any paint would do, even a nice even coat of tempera. In any case, set out one color and a few large wash brushes and ask the students to lay a wash over the entire sheet of watercolor paper (size is up to you). If you use tempera paints, water them down significantly and use just one color. Set aside to dry (about ten minutes for watercolor).
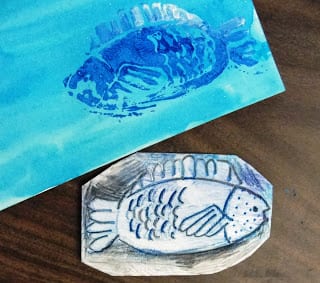
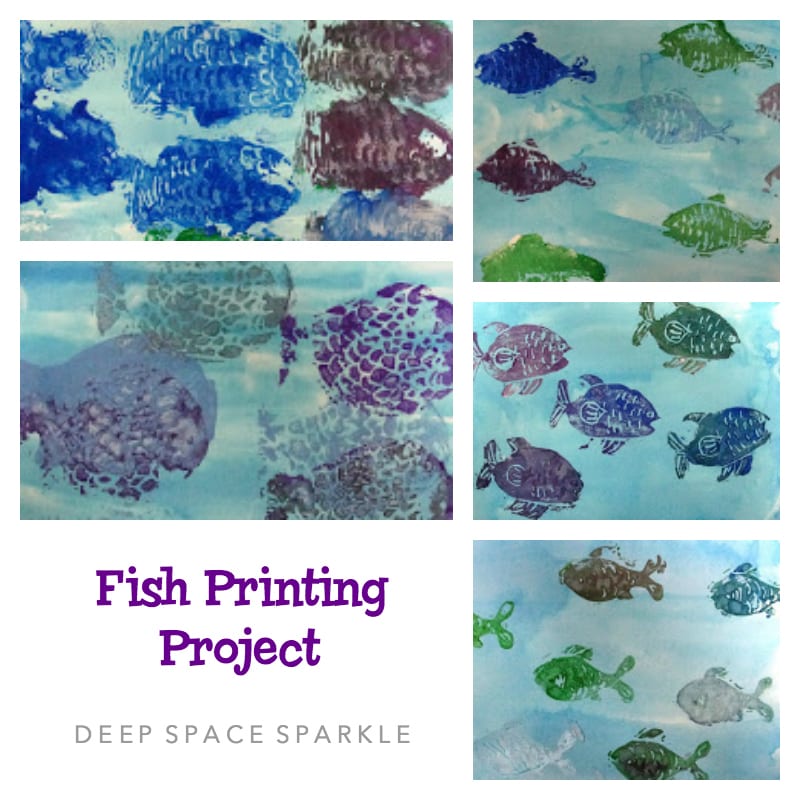
Step Two: Etching the Fish Design
Hand a small piece of foam to each child (approx 2″ x 4″). Draw a fish along the entire length or foam. Add scales, eye, designs, etc. Then, with a dull pencil, push down all of the foam surrounding the fish. This takes a bit of time.
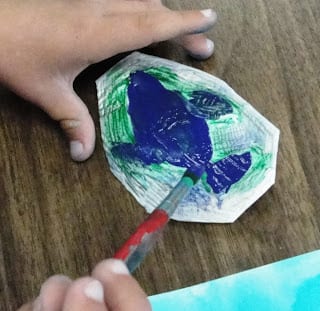
Step Three: Printing the Fish
Place a palette of blue tempera paints of the table. I selected greens, blues, whites and purples.
With a dry brush, apply paint to foam fish and gently press the fish onto the watercolor paper. if your foam is thin like mine, encourage the kids to tap gently instead of rubbing so the fish won’t move or smear.
Step Four: Repeat Fish Print
Encourage the kids to overlap their fish and point them in the same direction so they look like a school of fish.
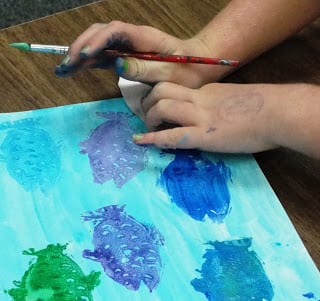
Third Grade Results!
ARE YOU A SPARKLER? Over 300 art lessons are available inside the Members Club. Access to videos, resources & trainings for one low monthly fee.
CLICK THE IMAGE TO SIGN UP FOR NOTIFICATION OF OUR NEXT ENROLLMENT

Follow Us
I did an art project similar to this with my two year old about a month ago. You can see it here.
http://theadventuresofbear.blogspot.com/2009/10/start-swimmy.html
Just in time for my Letter F week! Thanks!
hi I'm an art teacher in Houston and I just started a blog if you want to check it out! I am sure I have used some of your ideas in the past and I love reading your blog! Thanks,Natalie http://www.elementaryartfun.blogspot.com
great! I'm doing printmaking and need a young kid project..
Wow, the prints look great! You are such an awesome teacher!
They turned out great, and I'm sure the kids had a lot of fun making them!
Very nice! you made a very unique arts I really love it,I think you have a future as a catalog designer try to study about this.=)
I love this project BUT we have done this project with kinders using REAL FISH!! they had a blast and it was fun trying to get 5 year olds to touch a raw fish. The key is to not use too much paint so you can get a good print of the scales.
thanks for the site. I needed an idea for my printmaking lesson with 1st grade and I think i found it.
I will tie this in with the japanese fish printing art form. Also, if you did not do this, a piece of folded tape on the back of the fish, like an upside down “t” makes a great handle to both put the block down, and when finished, to pick it up. Keeps the prints sharper as the kids do not have to pry the block up with their fingers.
That’s a good tip. Thanks, James!
October 16th, 2013
Wow, who knew foam trays could do more then be pallets? Got a HUGE box of foam trays different sizes in my class room, can’t wait to do this activity with my students.
Aloha,
Elizabeth
Oh yeah, those trays are golden! I used to forage the dirty ones from the cafeteria garbage cans and wash them off until the janitor told me he couldn’t stand by and let me do that anymore. So on his breaks, he secretly washed them for me and brought them to my art room. His name was Bill and he died two years ago. I’ll always remember him for doing that.
Patty – have you ever used real fish? I would like to do this same idea, but printing a real fish. Any thoughts? Virginia
No. Just not worth it for the amount of kids I have!