WATERCOLOR TECHNIQUES: A 6th GRADE EXPERIMENT

Building up to my sixth grade student’s big unit on watercolors, I wanted to remind them of the various ways in which they can use watercolor paint. Even though I use watercolor techniques in every grade level and I have taught these children since first grade, it never hurts to remind the children, through their own experiments, of the unique qualities of watercolors.
To begin, each student received a 12″ x 18″ sheet of 90-lb watercolor paper, a tray of 16-color Prang watercolor paints, a waterproof marker, and a pencil and eraser. On the tables, I set a tray of oil pastels, some liquid watercolors (3 colors), a cup of rubbing alcohol and some Q-tips.
On the white board I illustrated where the title of the project should go and where to put the 6 experiment boxes. I encouraged the kids to use decorative writing and to create frames around their “experiment” boxes. Under each box, I asked them to write out the different techniques that we were going to try.
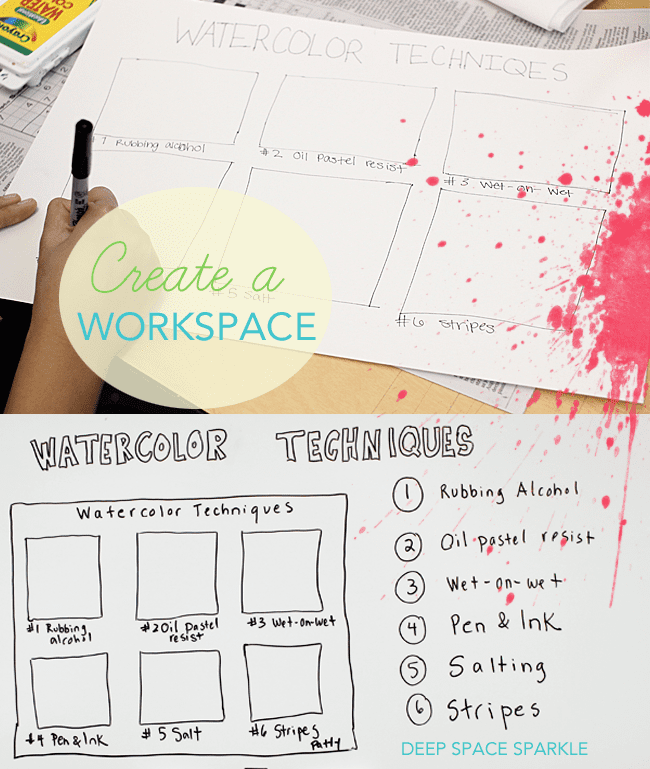
The first day, we managed to get our papers laid out with a title, the boxes and began 3 out of the 6 watercolor techniques.
The idea and hope behind this type of project is to focus on the process and not the result, although many children really turned this into a beautiful piece. For some kids, drawing rectangles placed evenly around the paper proved difficult while other students designed fancy frames and borders. You’ll really notice how well children listen and also how creative they are during this process. I didn’t fuss over how little or how much a student excelled at drawing the boxes or laying down text as it just wasn’t the point. But I do have to say that it was interesting to see.

Wet-on-Wet
This is one of the most important watercolor techniques and effects in elementary art. It’s important for children to understand the properties of watercolors and if they want a clean edge to their watercolor painting, then painting on wet paper is not the route to go. So often children can’t understand why the paint blends together so much and doing this technique helps them learn this.
To start, the children painted their box with water then dropped some liquid watercolor on top of the wet surface. Some of my students took a painfully long time applying the water so this just shows how important understanding this technique really is. I encouraged the kids to apply two colors over the wet surface to see how the paint mingled.
Rubbing Alcohol
This technique is purely for fun. I don’t use rubbing alcohol in my art room very often but it’s fun to show how the alcohol expands and created a rubbery texture on the paper.
To start, paint a box with a dark color of paint from the paint tray. Then using a Q-tip dipped in rubbing alcohol, dab the paper. This creates rubbery dots that looks vaguely reptilian.
Salt
Most art rooms are familiar with salt as it creates such a beautiful effect. Many teachers use salting for underwater paintings.
To start, paint a box with any color of watercolor paint from the tray. Pinch some salt between your fingers and sprinkle a small amount over the paint. The salt will pull the water from the surrounding area creating a star burst effect. Brush salt away when the paint dries.
Thick and Thin
Although not exactly a technique, learning how to vary the thickness of a line with a paintbrush is pretty important. I instructed the children to use their fingers to gently squeeze the bristles into a fine point and then to dip just the point into some paint. With a very light touch, try drawing a straight line as thin as possible. Next, press a bit harder and see what happens to the line. The children can apply greater and greater pressure until they see the lines growing thicker.
Pen
As important as the wet-on-wet, painting right up to a pen or pencil line takes skill. This is a very hard technique to learn as children usually don’t have the control or patience to make the colors set without mingling.
To start, draw a simple shape with a waterproof marker. Then dip paint brush in paint and paint around the contour line of the shape. Now fill in the center. By painting the contour line first, the paint will be the first to dry. Now paint the contour lines of the box and move the color towards the shape. The goal is to make sure the colors don’t bleed together.
Oil Pastel Resist
Arguably the most common watercolor technique in the elementary art room yet this still results in ooh’s and ahh’s. Really.
To start, draw a pattern, lines, shapes, etc with an oil pastel then apply liquid watercolor over top.
I was so pleased with the enthusiasm level for this project. It also helped me see where my weaknesses are as a teacher; how well I explained one technique over the other. This is not necessary to grade, but this project can act as an assessment tool.
What do you think? Are there any techniques that you would cover in your elementary art room?

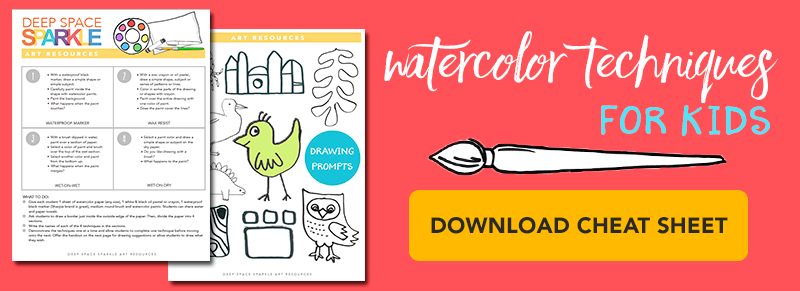
WATERCOLOR TECHNIQUES FOR KIDS
Click the image below to receive our free PDF lesson guide!
Follow Us
I love it! It seems most middle school students I have forget a technique as soon as the projects is done. How about a lesson on values and shading. I covered this in the beginning of the year, and the majority still color flat! Deep space Sparkle is still the best site!
I love this idea of creating a sampler! I think I would follow it up with an assignment where the kids would choose the watercolor technique(s) that they liked best and/or that they think will work best for their project. Cool way to let them try it all out first. Thanks!
I also do a sampler with my middle school students, but have a few different squares… flat wash, graded wash, wet in wet, dry brush, lifted wet, and salt effect. I love the idea of adding a resist square and stripes to practice brush control. The students then have their sampler to refer to when they do a landscape that must combine their choice of at least 3 techniques. (currently, a tape resist birch tree project.)
Rubbing Alchol is the only one we have not tried. Also, blowing through a straw onto wet watercolor was fun. I love how you made a sampler.. I’m considering having mine do a sampler page in a watercolor or mixed media journal, to keep those notes handy.
Have never tried the rubbing alcohol before and when I did, the best results I got were what looked like oil stains. Tried darker, lighter, wet, dry, more alcohol, sprinkling and touching the q-tip to the paper. Any helpful hints for me?
You described it pretty well. It’s not a huge effect so what you are getting is probably right. I find the strongest effects are derived from concentrated liquid watercolor.
Love everything I find here! Patty, you ooze bright light! Curious, could younger children learn from this lesson? say, 2nd or 3rd grade? thanks!
Oh yes. This could be applied to any grade. You may want to draw the boxes for really little kids K and 2nd grade but by the time the kids are 8 or so, the boxes should go OK. Some of my 6th graders had more trouble with the boxes than the watercolor.
I’m teaching my 7-year old granddaughter and she is loving water colors. She wants to be an artist! Did elders glue resist recently on a flower she sketched.
Truly marvellous!
Thank you
Sue
I love this. Would be great for almost any age before diving into watercolours. I think I will do it with my grade 9 students next time there is a watercolour unit.
You don’t just inspire children. I returned to art in my 40s, and blogs like yours are so wonderful. Thanks!
As a new art teacher I have a question. How do you handle pace during a lesson? By this I mean, students finish boxes at different times. Do you give instructions for each technique at once, wait for all the students to finish before proceeding to the next (eek!), or pace yourself (e.g. describe the second technique while some students are still finishing the prior?)? I understand we have to repeat ourselves, but how do you limit repetition (can there be too much?)?
There are times that I will say things like “I know you are not all done but all brushes down eyes on me- I want to explain the next step. If you are not done you may continue when I’m done.” That works better than waiting for everyone in my opinion:)
You have some great art projects on the website!!!
This is gorgeous. I am absolutely going to look
At this for my fifth graders. What clear and simple explanations and instructions you give for each technique. Thanks!!’n
I am really happy that I found you!
Your lessons and simple explanations give me other incredible ideas and how we can easily teach our students.
Thank you!
Hi! Found this and would love to use it. How long did this lesson take?
I am so excited to have come upon your site today.
I homeschool and so far we’ve done crafty things, but no real art lessons. I can not wait to start with weekly art lessons — and this looks like the perfect beginning of the year activity for my paint-loving daughter. In fact, we may need to start art lessons before the start of our new year.
This is wonderful! As a classroom teacher of kids without Art as an elective, I connect these techniques to cause and effect and scientific inquiry. They love the rubbing alcohol and salt and try to to figure out what exactly caused the effect.
Can liquid watercolors work for all watercolor projects or do you really need to graduate to pans?
Great lesson. I plan to do it Tuesday as a zoom lesson with my grandkids grades 4,5,6 and 7. They are currently being home schooled and I am their art teacher.
I also love doing a salt water wash and then dropping in color. It explodes on the paper. Also, paint wet-on-wet and then crinkle and twist a plastic wrap sheet over color and then pull off when dry. Watercolor is my preschoolers favorite art and we do all these techniques.
Nice a way to present water color technique in a succinct and time efficient manner