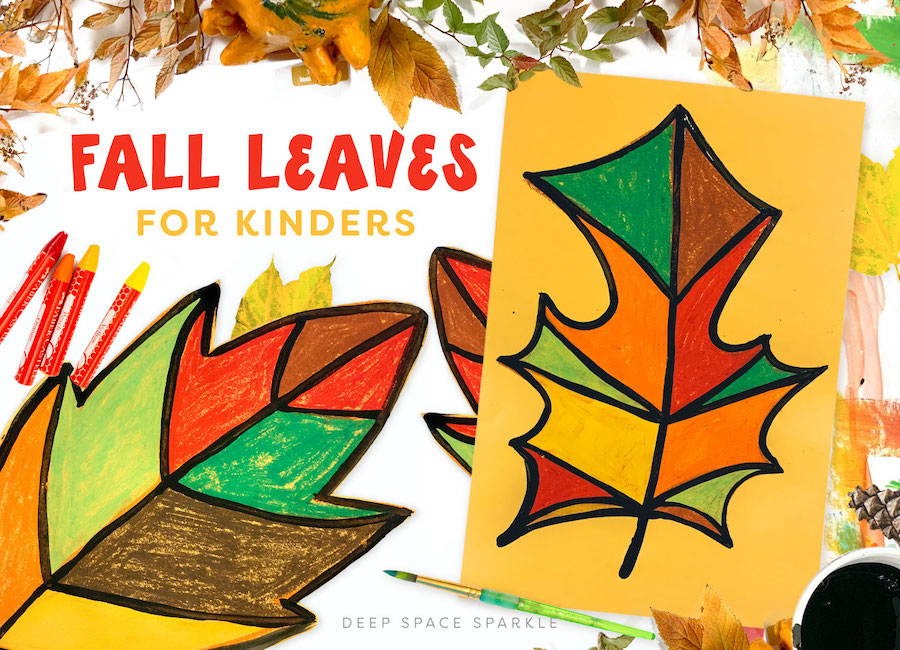


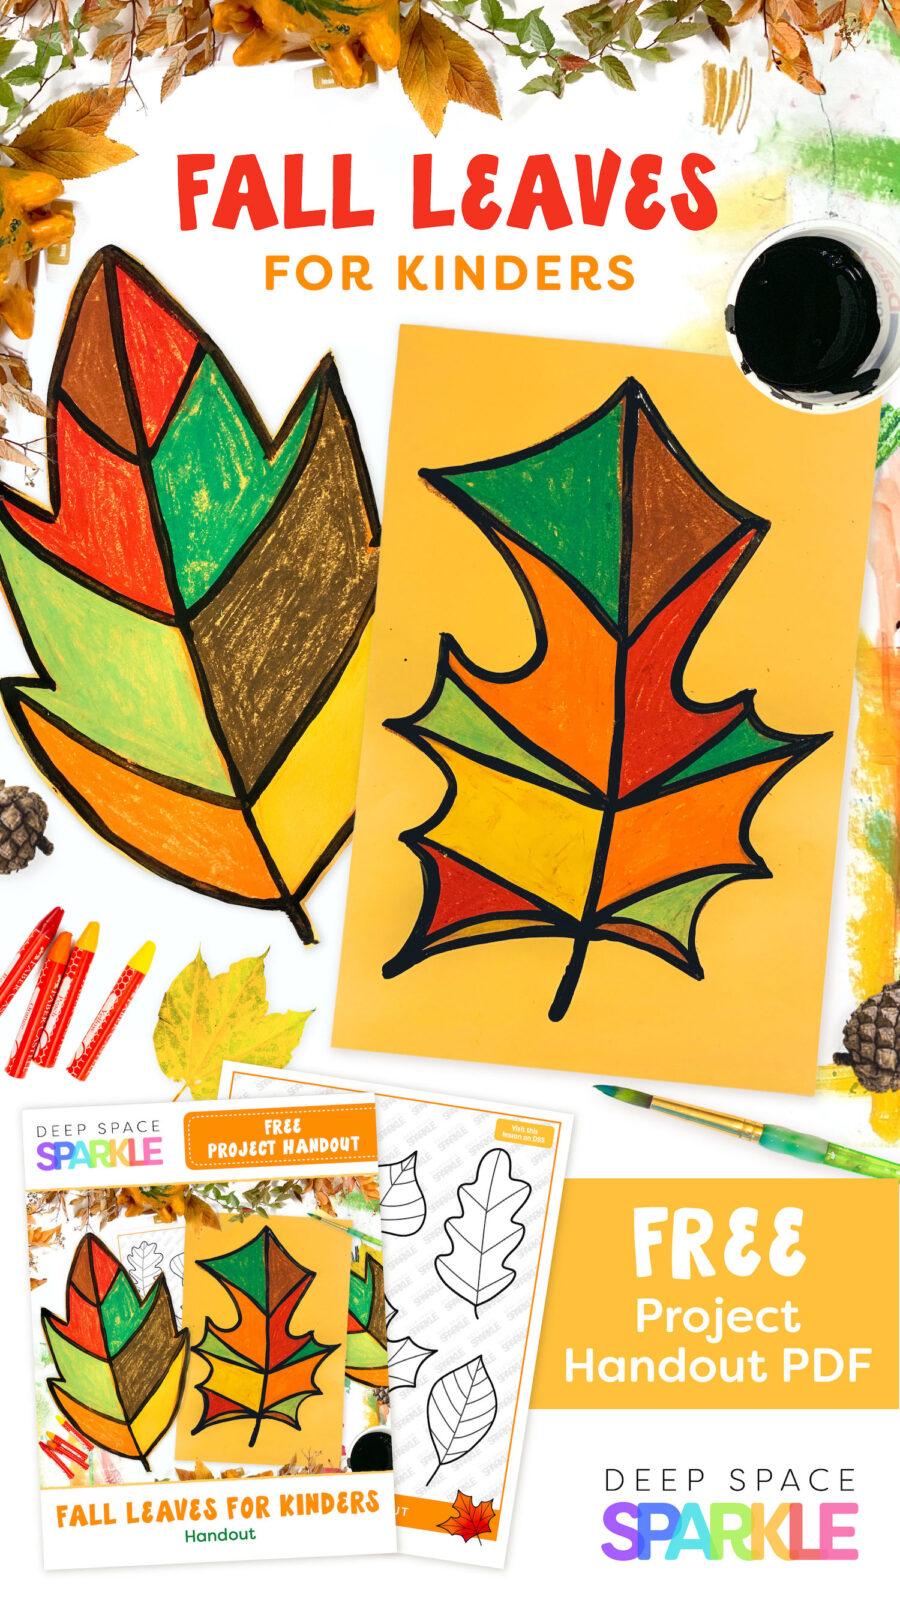
Looking for a quick Fall art project for your Kinders? In this one day lesson, students focus on line and shape as they draw, color and outline their beautiful Autumn leaves. This lesson was inspired by the amazing Laura at Painted Paper and her O’Keeffe Inspired Leaves.
First, my Kinder classes looked at images of leaves and discussed the common features. We took time to notice the stems and the veins. We discussed the various shapes of different kinds of leaves. After spending time observing, the students were prepared to draw their own leaves.
Here’s what you’ll need:
– 12″ x 18″ yellow sulphite paper
– Oil pastels
– Black liquid tempera paint (watered down a bit)
– Small round paintbrushes
– Real leaves or images of leaves
– Optional leaves handout (download below!)
The project:
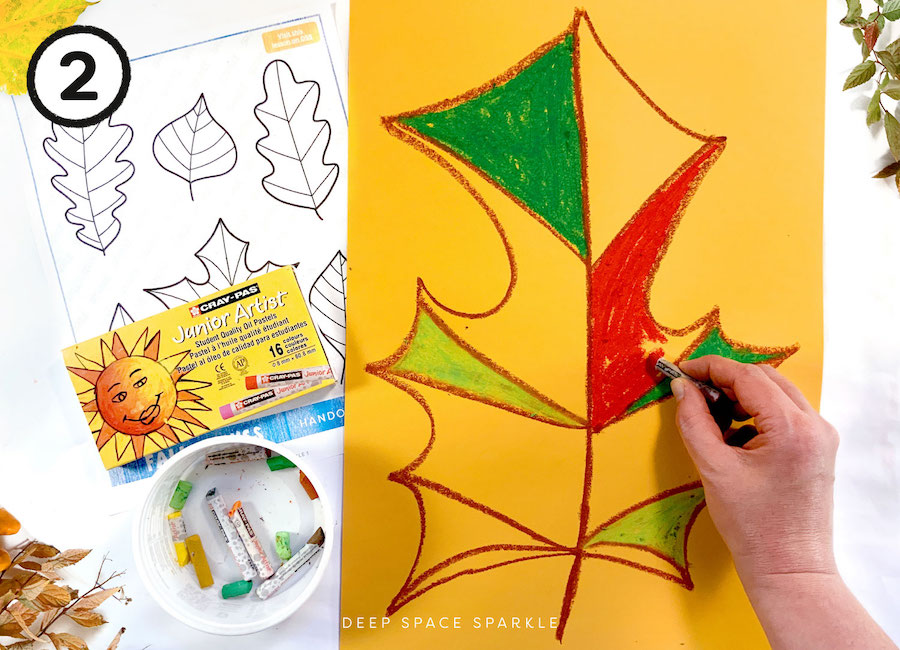
I handed out containers of oil pastels which I had prepped earlier to only include Fall-like colors. Students picked one color from the options of red, pink, orange, yellow, green, brown or grey for drawing their leaf.
To draw a leaf, the children drew their stem first and then decided what type of leaf they wanted.
Next came the wiggly or big arching lines that extended away from the base of the stem, which I demonstrated by drawing big and filling the paper in a few organic-shaped leaf examples. Some kids still drew their leaf lines close to the stem, but that’s okay.
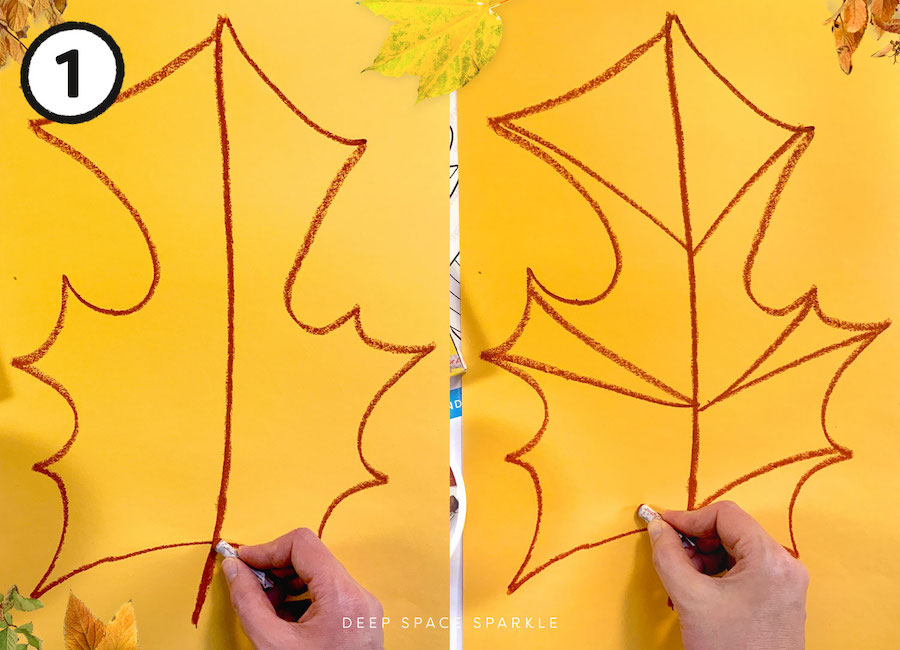
The students divided their leaf into smaller organic shapes next, mimicking the leaf veins.
Then, to build those little finger muscles, the students colored in the small shapes on their leaves with the colored oil pastels, using one color for each shapes created by the vein division. I was surprised at how quickly the children colored in their leaves!
Next, I set out the containers of black paint and small round paintbrushes for reach table.
It’s helpful to have these paints in containers with lids so they are always ready to open and pop paintbrushes in for quick distribution to students. I like to mix the paint with a little water so that it’s smooth for students to paint with.
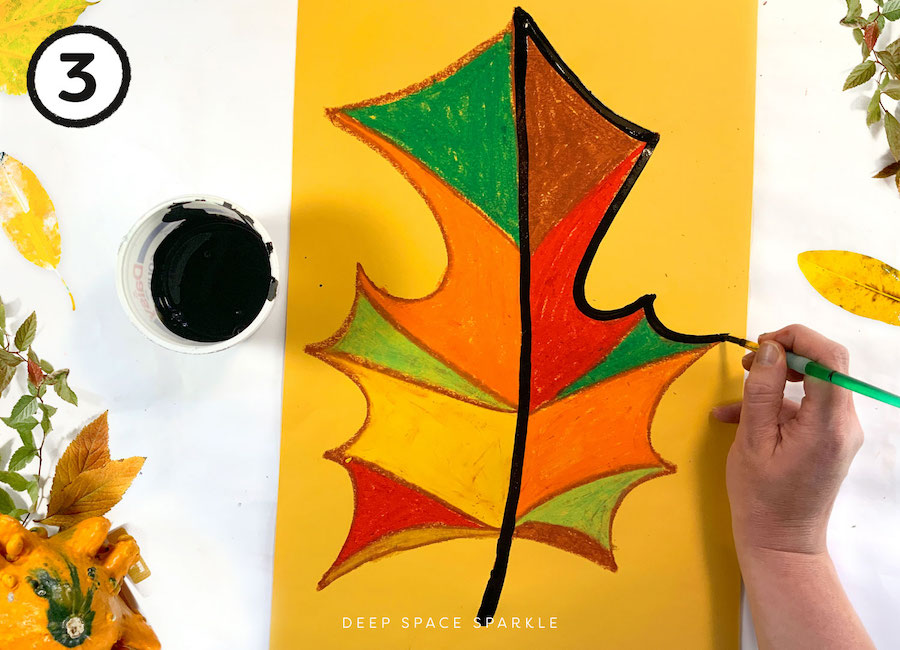
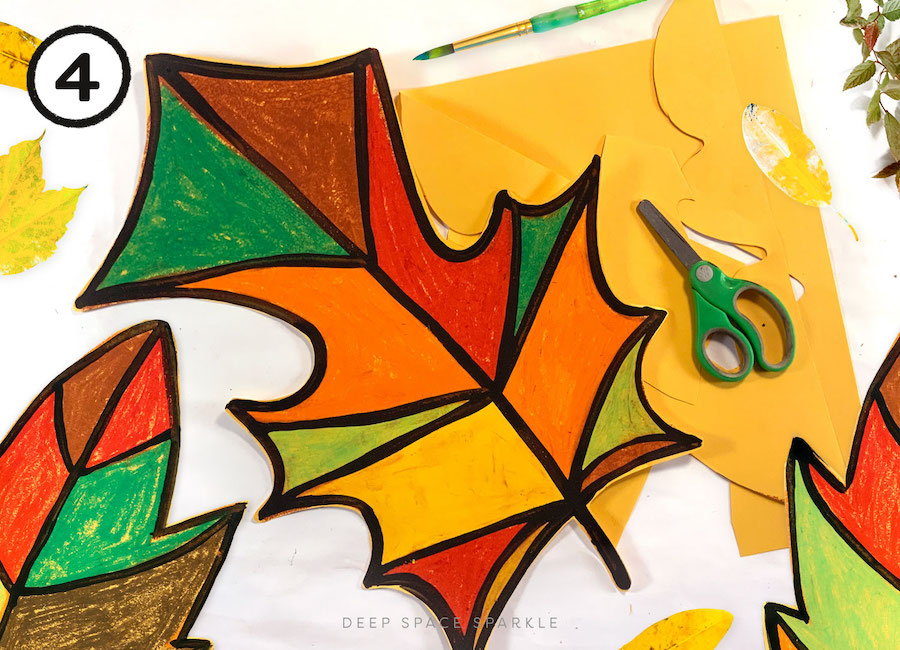
Use the black paint to go over the original drawing lines. Trace the outline, also called the contour line, of the leaf and each of the veins.
When the paint tracing is complete, allow the leaves to dry.
If desired, take an extra class period to cut the leaves out, making sure to leave the outline intact, or leave the leaves the way they are, as a beautiful, one-day Autumn lesson.
Download the free project handout below! Add your name and email and we’ll send it straight to you –


Wow! what wonderful ideas. Can’t wait to try these activities with my Pre K and K classes.
I’m going to look like a crazy lady on my way to work at 6:30, stopping to pick up leaves so I have a variation for my pre kinders! Thank you for your wonderful site, I’m a displaced librarian who landed up in Young-5’s. I often turn to your site for ideas, and they ALWAYS work!
These are great. FYI, laminate some leaves, and you’ll have them whenever you need them. The teacher before me laminated them, over 10 years ago, and they’re still going strong. I just realized this year, that they are older then most of my students!
We can not get fall leaves here In Phoenix until December, and then, not many. I had parents bring me some from up north, over ten years ago. I laminated them and they are just now starting to wear. Great idea!
Wow! This is such a helpful site. Thank you so much. Your school is lucky to have art classes and you. Keep up the good work
Patty,
Where did you purchase containers for paints with covers? They sound like a great investment.
Thanks,
Mary Lee
As you can see in the pictures, most can be found for free. The yellow and black ones are yoghurt containers. I like to buy clear plastic containers at a kitchen supply store. $4/100.
Beautiful project! Once the leaves are cut out, how do you display them? Just thinking that they would curl up when drying.
Thanks!
You can display on a bulletin board or around your classroom mixed with other Fall-based art or projects. I don’t experience much curling. Make sure to use Sulphite construction/drawing paper and liquid temper a paints. When hanging, use thumbtacks or putty.
Should work out fine. 🙂
I am a volunteer Catholic Religious Education First Grade teacher. I found your site a few years ago and I am so grateful to you for all of your lessons. You inspire me. I did the Santa Barbara Mission and the parents loved it. I am going to try the seal painting and incorporate the theme of God’s creation. Thank you so much for your sharing!
So happy you found us!
I love all these great ideas. Thank you!!!
Very nice!
Thank you for being a great help to those of us who are not trained art teachers!
thanks
I feel silly asking this but looking for insight as to why a colored (yellow) paper is used versus a white paper when the goal is for students to completely color in shapes…..is it because inevitably some areas may not be filled in by the coloring process and with a colored paper showing through (vs. white) it still looks colorful and the bare areas are not as noticeable?
If I am already a Sparkler why can’t I open these give aways?
Hi Denise! I’m not sure why you are having trouble accessing this lesson. I just tested the download link and all seems to be fine on my end. Are you clicking the box that “Click to Download”? When I tested the link, I added my name and email and received the email shortly after. I know the Chrome and Safari browser both work well so try one of those if needed. And be sure to check your spam folder in case our email ended up there! Enjoy
It’s always amazing how these projects turn out. The kids have a very distinct personality that show so much individuality even though its just the same painting.
Lovely idea
Please share free project handout. Thank you
cant wait to do this
Thank you so much for the amazing craft ideas ♥
This is so cute
Love it!!
Can’t wait to try all your ideas!
so excited!
This project is great! I can’t wait to use.
I can’t wait to try this project with my kindergarteners!!
Cannot wait to use this with my class! So autumnal 🙂
Can’t wait to try these!
I just found these! I am excited to get started. I been homeschooling for 7 years. 5 more to go! for my sped child. These will be great as he is not into paint.!
lovely