


There are no words more terrifying to hear for an art teacher than, “You will be teaching from a cart.” 😳
This is pretty much what happened to this reader:
“This is my first year teaching and was kind of thrown into teaching art…
Being a traveling art teaching with only 45 minutes with each class is making lessons very hard.
Especially when I actually want the students to learn about art, not just do some crafts once or twice a week. Can you please give me some suggestions on what I can do?
We’re working with lines and are about to start color, but using paint has me concerned with not having much time and not having my own room…
I don’t really have time to trade out supplies either so my cart space is very limited. PLEASE HELP ME!”
While I don’t teach art via a cart now, I do have a bit of experience from my early days of teaching. Basically, when you are a visitor or guest in a classroom, you don’t have a lot of control over your teaching environment – at least physically – so being organized with your supplies, knowing how much prep space and display area you have as well as working with the classroom teacher to plan for drying and storing space is pretty important.
First off, you are not alone. Many art teachers have to work within the confines of a cart and many do it very well. You can too! One of the first things I would do is to give yourself a chance to warm into your teaching logistics. Give yourself some time to get to know the teachers, the kids, how much space you have and how well your cart is working. Then take some time to analyze what you have.
Download our back to School Guide | Resources to help kickstart your art program.
It’s a 3-part strategy on how to use the Elements of Arts when planning your art curriculum including ordering supplies, a grade level checklist for the scope and sequence of K-7 Elements of Art and What I’ll Learn in Art Class posters
Here are a few things to consider and attempt to work out:
Does the classroom teacher have individual desks or shared tables?
This feels like one of the most important issues as sharing a palette of paing between 5 kids at a table is a whole lot easier than setting out 25 trays for individual desks. If at all possible, set-up tables or desks so that you can group 4-6 kids together for supply sharing.
Does the classroom teacher have a drying rack and art storage area?
If she does, give out a loud “whoop” as this will make your job infinitely easier. After a painting project, children can set their art on the rack and after it’s dry, the classroom teacher can place in a pre-made folder.
Is there any demonstration room on the whiteboard or a document camera in the room?
I don’t use a doc camera but it would make your job easier if you could use one in a teacher’s classroom as there will probably be very little room on the white board for artist samples and drawing techniques.
Perfect projects first.
Are you scared of painting projects? If so, one of the best solutions I know to feel confident about a painting project is to do the lesson yourself. If, at any time, you stumble over a step or feel like it might be too hard, then stop and reassess the lesson. If you don’t feel 100% comfortable with the project, you will struggle with teaching the steps. This is not just an “art on a cart” problem but if it is your desire to paint with your students, pick a lesson you are extremely comfortable with (at least at first). This ties in with my philosophy of controlling what you can as there will be so much you can’t control.
Secure a cupboard or closet for supply storage.
As a concession for having to teach art on a car, I truly hope that your school can afford you a place to keep at least a few art supplies. If you have a spot, then keep your supply cupboard well organized and clean. Perhaps take a few moments at the end of the day to organize so that by mid-year you won’t have a hot mess on your hands. Load your cart with the necessary supplies for the day.
Use technology to your advantage.
One of the great things about technology is that you can show your students visuals and even lesson steps online. That’s one of the reasons why I created The Sparklers Club. In our ATTA (Art through the Ages) Curriculum – all teachers have to do is press “play” to access art history slide decks and lesson videos. No more lugging around heavy posters or books.
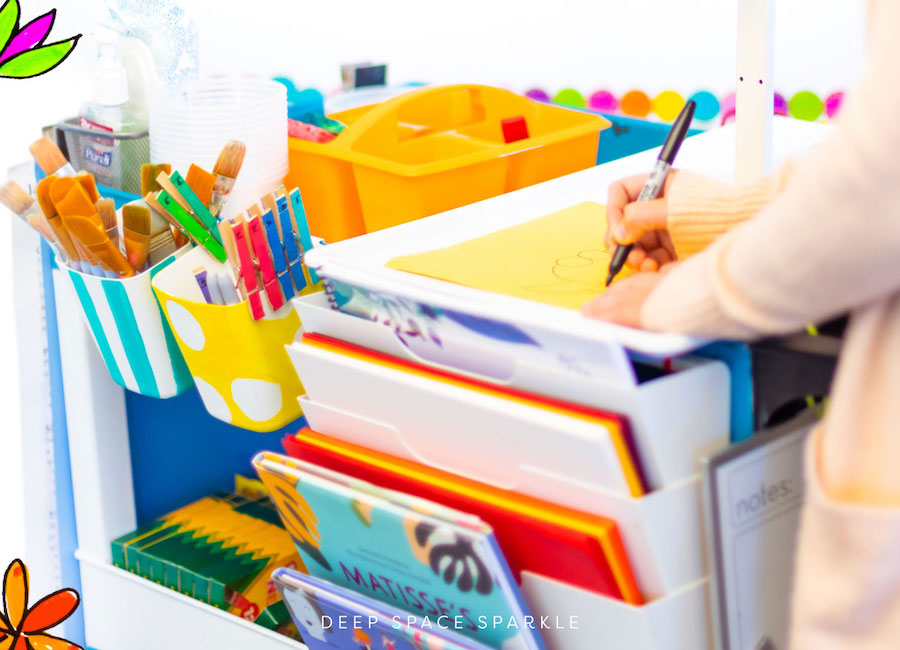
Teaching from a cart means you have to be organized with both your supplies and art lessons.
Here are a few projects and techniques that will help you deliver a great art program on a cart…
Markers & Line Drawings
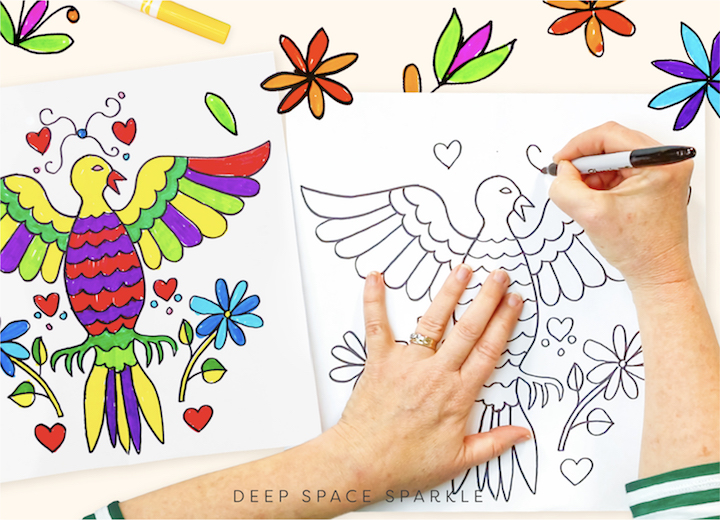
Line art is basically any project that requires paper and a marker.
I love line drawings and intersperse them throughout my curriculum when I need a project that doesn’t require much prep.
You can choose to leave a drawing black and white or add color with colored markers or even paint.
The Mexican Folk Art lesson (above) is great example on how you can offer great art projects with few supplies. Younger kids will enjoy drawing with a black waterproof marker like Sharpies.
You can choose to color with either markers or tempera paint.
If you use tempera paint, choose puck or cake tempera as the pans are easy to stack and requires no prep/clean-up from you.
The Skyscraper Line Drawings is a great lesson for older kids as it incorporates line, pattern and composition. My fifth graders loved this lesson and the best part is that it requires just a marker, 2 pieces of paper, scissors and glue.
Watercolors
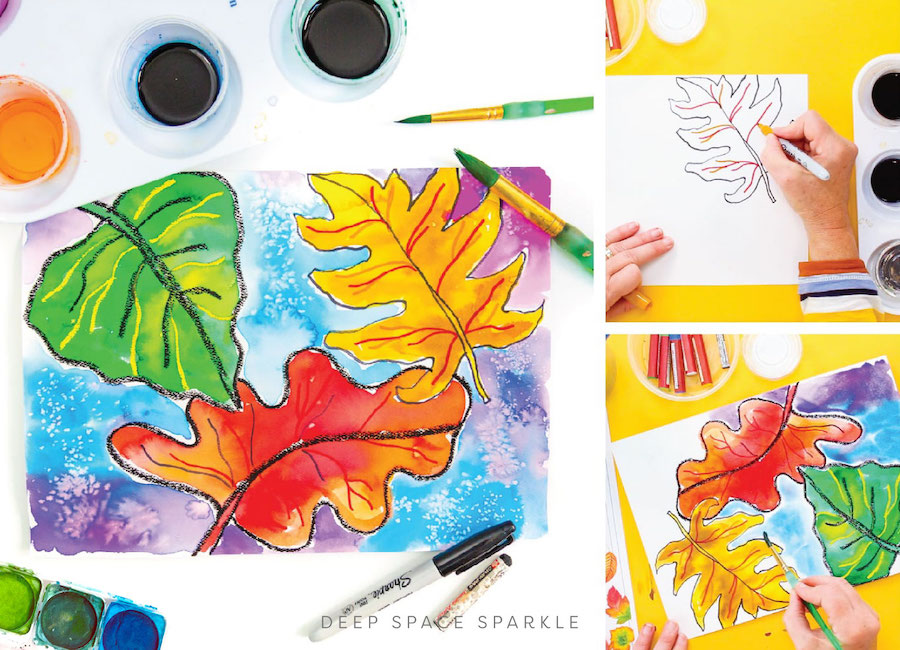
For painting projects, there might not be any paint easier than watercolor paints. You only need watercolor paper, some type of drawing tool and watercolor paints.
There are two types of watercolor paints that I use in my art room: liquid watercolors and pan or tray watercolor.
Liquid watercolors are fantastic for little ones, the colors are intense and they don’t have to mix. But they do require a bit of prep which is why they may not be the best projects for a cart teacher.
Pan watercolors are great in this case. They are easy to stack on your cart, easy to deliver to students and easy to put away. You can even prep the trays to include the brush to eliminate passing out brushes.
The next question you might have with watercolor projects is what product should you use to draw with. I have a basic rule of thumb: for fast/easy watercolor projects, use oil pastel. For longer/more difficult/advanced projects use a waterproof marker.
If you are new to teacher and are just getting a handle on watercolor, try the lessons that use oil pastel for drawing. I have a bunch of watercolor lessons HERE.
Projects that require more time & supplies…
You can create a wonderful art curriculum using just line drawings and watercolor paints, but sooner or later you are going to want to move into tempera paints, collages and chalk.
Puck Tempera Paint

Like I said earlier, puck tempera paint is far easier to manage than liquid tempera.
You have to compromise on the quality of finish when the piece dries (depending on brand) but I still like them and use them a lot.
One of the bigger benefits to puck tempera is that they dry a bit faster than liquid tempera.
Use a general sulphite/construction paper.
Chalk Pastels
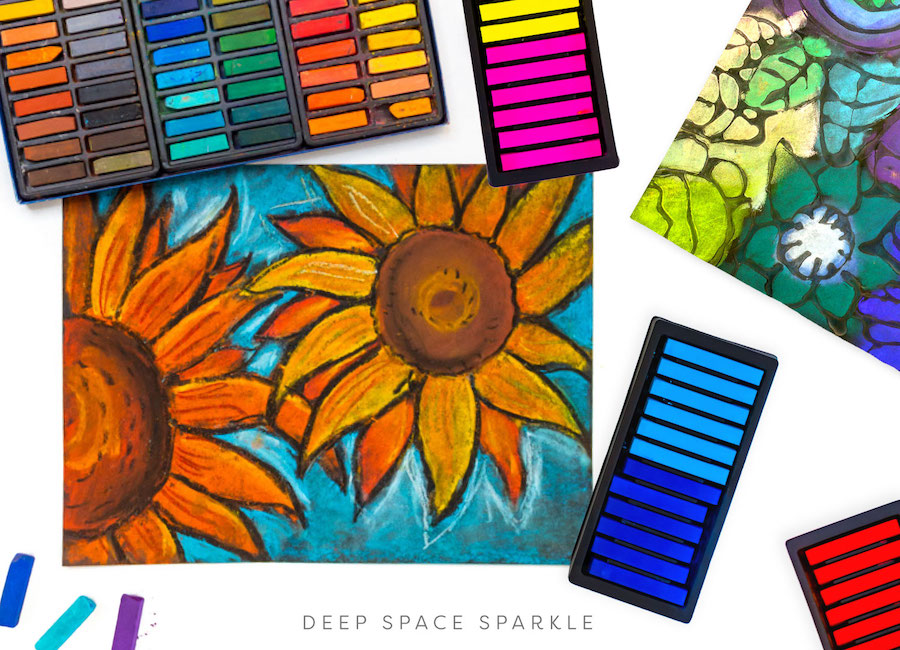
Chalk pastel is a product I use only once or twice with each grade level but less with Kinders.
Keep the chalk in the trays they come in because if you start dumping them into a larger container, they just get to messy and beat up. Spend some time during clean-up to show the kids how to place all the little chalk pieces back in their beds.
I always find that there are a few organizers in the group who love this job!
The best part about chalk is that they require little prep: just place the trays on each table. And if you have desks, they are relatively inexpensive so each child can have a pack.
The problem with chalk is that they are a bit messy. To contain this, bring in some newspapers and place under each piece of art.
Children can contain their chalk dusk on the newspaper, tap the collected dust into the trash and then use the newspaper to cover their art work to prevent smudging.
Click to see some great chalk projects HERE.
Painted Paper & Collage
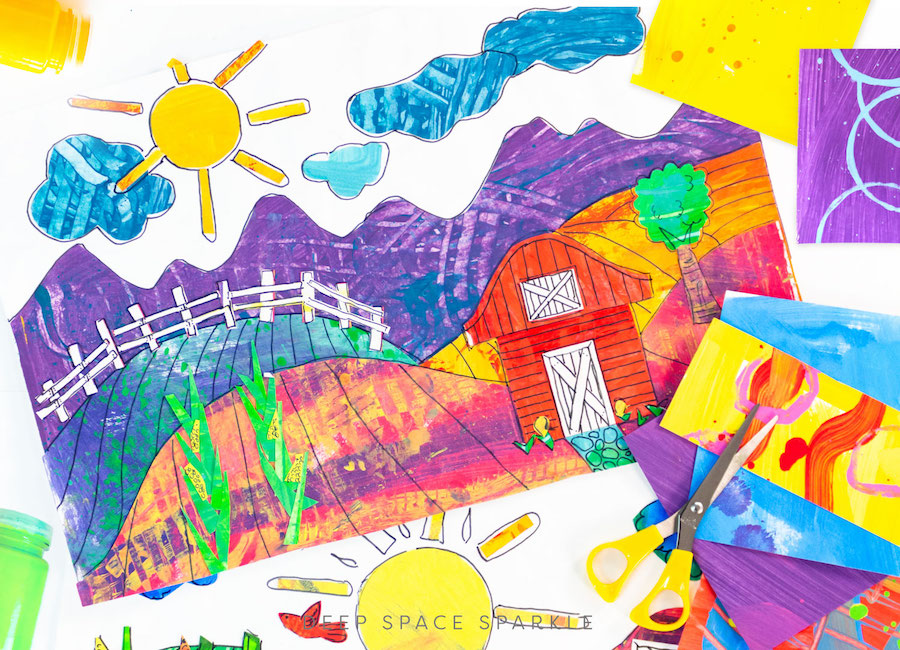
Using papers like painted paper and collage materials would certainly be a harder project to manage in someone else’s classroom.
There is a tremendous amount of prep involved in creating paint colors, cleaning massive amounts of brushes and storing the paper if you create painted paper the way I do it. It’s entirely possible to create the painted paper yourself and then use the product for projects but that would be up to you.
Collage projects that require lots of paper, scissors, glue, templates, paint, oil pastel, etc. are projects that require more breakdown and therefore more planning.
Don’t eliminate these projects, but give yourself permission to take it slow.
Don’t try to cram it all in at once. 45-minutes is plenty of time to do a great job of any project if you break down the steps for different days.
The following links give you excellent advice on organization, management and little tips from the people who actually teach from a cart.
Tales from the Traveling Art Teacher
The Life of a Traveling Art Teacher from The Art of Education
Rainbow Skies & Dragonflies: Surviving Art on a Cart (I love this list, especially #9!)
Art Cart Tips for Art Teachers
If you would like to learn more on effortless lessons and tips on teaching art from a cart, download my free PDF below:
I know there are a lot of you out there who teach from a cart, so let’s hear it: what’s the ONE THING you wish someone told you when you first started? Comment below!
Art on a Cart Mini-Curriculum
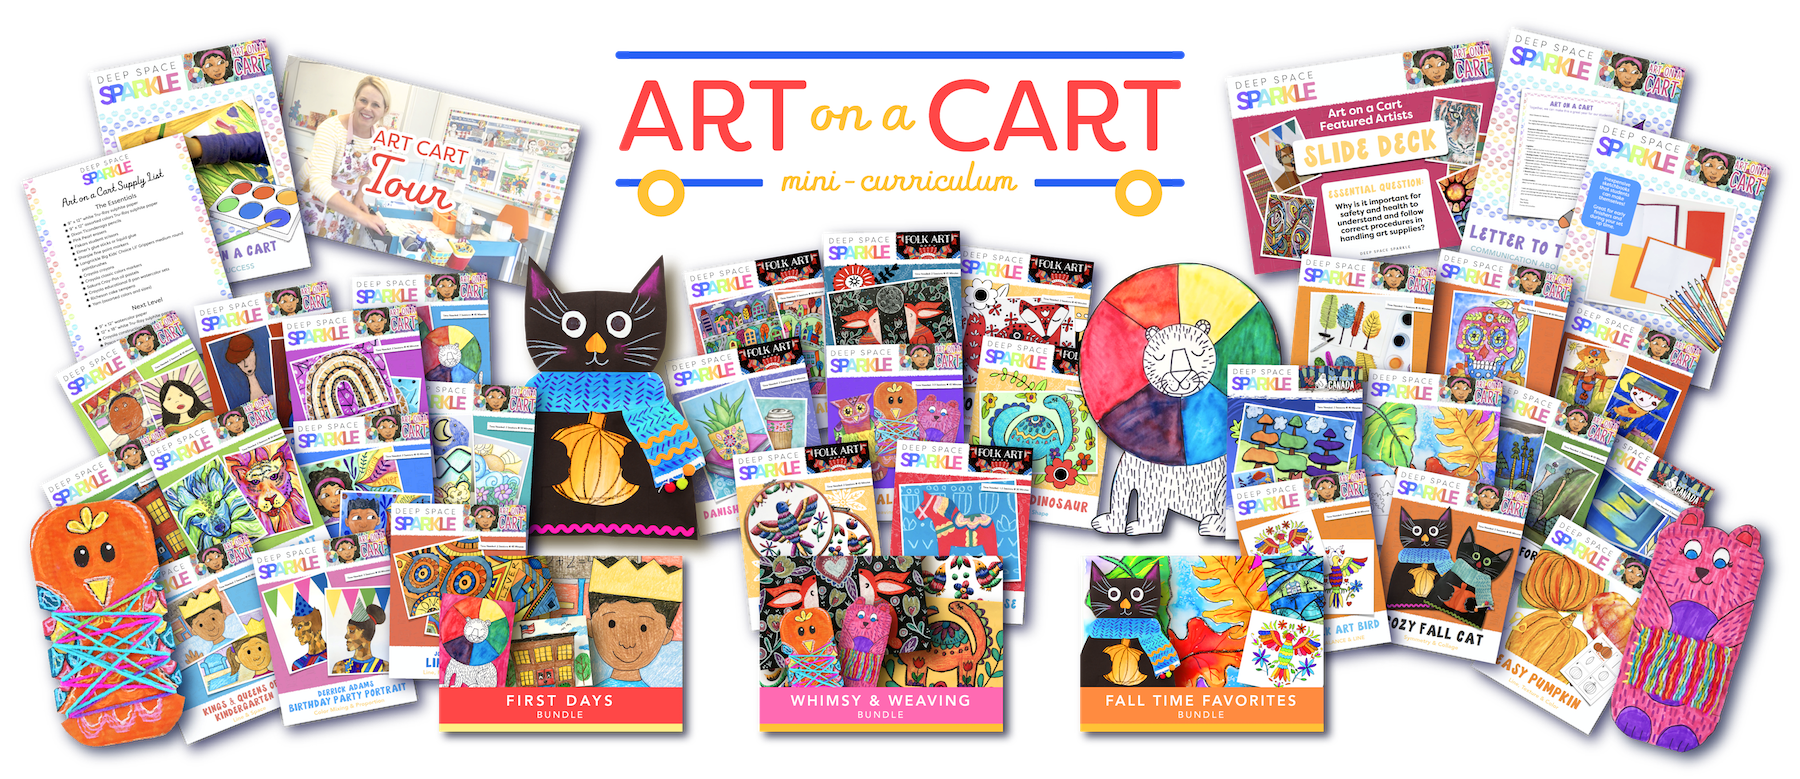

The Art on a Cart Curriculum is a done-for-you roadmap of fun and engaging lessons that use simple, low-prep supplies, located in The Sparklers Club; an affordable and flexible “pay as you go” monthly membership – perfect for anyone who teacher art to students aged K-6.
This 3 Bundle curriculum was created just for you as we enter into a school year where you may find yourself teaching remotely or “Art on a Cart.” And just because your supplies may be limited, doesn’t mean that your students’ art has to be!
Get kid-tested (and teacher-approved) step-by-step lesson plans, done-for-you assessments, and practical support – so you can unleash your students’ creativity in the classroom and become an Art Teacher Superstar – without the overwhelm.
MEMBERSHIP OPENS TWICE A YEAR: Get on the Waitlist HERE


Hi Patty!
Great article! Very helpful suggestions for anyone working off a cart! Thanks for the plug as a resource 🙂 That Prezi Art cart! WOW! That cart is/was amazing!!! It’s literally a room on wheels! 🙂
Patty, I am always amazed at your generosity! Wishing you all the best in all your new ventures. We don’t have to have carts but you pack so much into every article that once again I have picked up new information. Thanks again!
Those are great tips! I am an Art teacher that needs to buy a cart so this post is very useful. Any cart recommendation?
I do not teach from a cart currently… however a few years back my school bought me an industrial strength…. big (34 inches high 34 inches wide and 24 inches deep plus a little for the handles)hard plastic cart made by rubbermaid…it worked great… it had handles at both ends…. so I could pull it from either end… had a top shelf (also had a ledge so things didnt slide off )with a drawer beneath it for my pens and stuff like a desk on a cart…. another shelf below and another shelf below that closed with doors and could be locked… I used lots of caddies and baskets…. we have a ramp in our school so it travelled pretty easily with not much trouble that I remember…. I see it is still available on the rubbermaid site…. 4094Instrument cart with locking doors…($440.00 )also a wide selection of other carts there…
Thank you, Patty! I use your resources to teach two growing art classes of 30 students in a home school co-op. I never realized how difficult it would be to do so on a limited budget and in a space that is borrowed. I attempted to have my young art students make painted paper on the first go around so we could use them for future projects. Yikes. I had not thought about where we would store all of those finished pieces of paper while they dried. Live and learn. But I found the tips offered here to be extremely helpful. I’m definitely learning as I go but I’m hoping that with some research the learning curve won’t be quite as steep. 🙂
Thanks a million for the tips and ideas! I really appreciate them because I’m starting teaching arts this year too.
This is very inspirational and well explained. I’m sharing it!
Thanks again!
I just signed up for your courses, and am already impressed and excited! I was wondering, it says the course is only 6 months long, but in the info it said that we would have permanent access to the resources. Can you clarify please? 🙂
You have permanent access to both courses. Access used to run 6-months but we changed it a couple of months ago. There must be some old copy out there! Thanks for the heads up and enjoy the courses!
WONDERFUL! THANKS SO MUCH! Having fun so far 🙂
I use construction paper as my paint palette. That way, when it is time to clean up, supply managers can quickly make painted paper with the left-over paint and there are no dishes to clean. I also have students put all of the bushes in a big soapy container and clean them myself when I have time. I have short classes and only one sink so this leaves room at the sink for hand washing and makes sure the brushes don’t go down the drain. If left too long, the brushes will start to get ruined, but I find that the risk is worth saving the headache.
I do teach on a cart currently. I have created a large rolling drying rack that I wheel down the hall with me. It’s made of four smaller racks (25 shelves each) zip-tied together. Each section fits one class’ worth of projects. I don’t have to spend time emptying it until lunch, and then it’s set for the afternoon classes. Also, in the classrooms that have desks, I’ve taught students the procedure of getting into groups for art when they have to share supplies. It only took a few minutes on one day, and they know exactly how to turn their desks into groups of four. Good luck!
It is my first year teaching art on a cart. I have 730 students. It is nearly impossible to do any projects that are more than one session in duration. The school has asked that I not use paint of any kind. The restricting confines have really stretched my creativity. I’ve found most of the projects can be completed with markers or construction paper without too much concession in quality. My best suggestion for art on a cart is keeping it simple. If possible, only bring what you’ll need with you, find projects that appeal to multiple grade levels, and embrace the challenge.
Excellent article! I’m happy to see all the art teachers working together to provide resources for those who teach in alternate environments! I couldn’t find any a few years back, and now we’ve pooled together to build an amazing support system!
I was searching for some reading about art, when I came along with his subject matter. I am not an art educator, but I do paint artworks. This lockdown due to COVID19, made me plan to teach children while there is no school yet. I would like to make it free for them for a while or will look on how to support what I love to do. Thank you for this article. I
So glad I found this resource. This will be my first year teaching art k-5 AND due to covid it will be art on a cart so I will really be spending a lot of time here reading these great articles!
This was very helpful…however, maybe some current updates to this would help address hybrid schools with remote learning. I find it a little challenging to interact with the cohort of kids at home on zoom while at the same time teaching a class in front of me in a social distanced classroom for K thru 8th grade.
Art On A Cart plus having to keep everyone separated, while still interacting with the kids at home on zoom/meets/teams…maybe some help on what supplies are sharable, what has to be sanitized. How to organize the lesson for those at home on zoom…I am figuring it out, but any tips would be great!!
It has been great to find your site and become a Sparkler!!
Thank you!
Hi DPH!
Thank you for your suggestion, I hope this blog was able to give you resources for your class setting this year. We have a great range of blogs coming still! So stay tuned 🙂
As for sanitization – we always recommend checking with your administration and CDC guidelines for your specific area. It will vary based on the safety protocols in your district.
– Hannah
At my school, there can be no sharing of art supplies. So that eliminates use of many materials you are showing on your Art cart. I was considering painting with Q-tips and cardboard and printing/stamping with sponges or other inexpensive materials that can be used by one child and then discarded. I’m curious what other schools are doing or if there are more tips that consider this restriction. My students only have crayons, colored pencils and markers for art supplies, which families bought for each child.
Hi Sharon,
There’s many great ideas that I know you’ll love – we have lots of crayons, colored pencils and marker project ideas in other blogs and some of them are linked above 🙂
crayons:https://www.deepspacesparkle.com/?s=crayons
markers: https://www.deepspacesparkle.com/?s=markers
colored pencils: https://www.deepspacesparkle.com/?s=colored+pencils
I hope this helps!
Where did you get that amazing art cart in your photo with all the bells and whistles? Recs for art carts PLEASE! Mine is old, loud, and doesn’t roll great and everything keeps falling off as I travel from room to room and in old elevators.
Same! It’s COVID times, so every student sits at an individual desk, needs their own art kit, and only I can distribute supplies, basic, because there are virtual students at home who need to utilize what they have there. Suggestions on exciting curriculum for a hybrid covid learning environment MOST WELCOME!
Do you have the carts for sale?
I, too, would love, love, love to know where to purchase the amazing cart you have showcased in this article! I have looked high and low for something even close with no luck. Please let us know what brand and where! Love your art projects and info! Thanks for all the inspiration!
I don’t normally teach from a cart. I have a great room! However due to Covid I am traveling to each classroom and can only use the individual supplies that each student has in class. This is so that we are not passing germs around with shared supplies and students are only exposed to their individual classmates not the entire school. Any advice on elementary lessons to teach to keep the kids from getting bored with crayons and markers which is pretty much all they have access to?
Hi Jennifer. You are absolutely not alone. Are you a member of The Sparklers Club? We’ve been devoting the last 6 months to providing lessons for teachers on a art PLUS those with no materials at all. In fact we developed an Art Curriculum just for teachers on a cart due to Covid. Def check the membership out.
You asked what is the one lesson I wish I had been prepared for for Art on a Cart-how awkward, noisy, cumbersome and time consuming it would be to move the art in and out of each classroom during the pandemic. I had to increase my prep and clean-up time to accommodate the awkwardness. I am fortunate and have a good sized cart that holds 3 classes worth of supplies. I even have a drying rack on my cart but this means only one class a day can do painting.
Hi where did you buy your cart featured in the photo above? Thanks!
I don’t have the link but I ordered it from Amazon. It was about $100-$150 and it works great!
I have been art on a cart since 2020 and will be for the remaining 2 years of my career. This is mostly because of a sudden school building closure and disbursement of the elementary population. We are jam packed. That being said I started out my career on a cart – as well as so many other options – church basement, daily set up and breakdown in a library, on stage, for a while – 2 beautiful rooms with 3 sinks!! Oh an I also teach at 2 different buildings. So being on a cart has its challenges indeed as does the schedule—
I have found box tops from the copy paper boxes to be a life saver – It does take some creative stacking and cooperative teachers. The other thing I found was these great clear locking containers that I can put bulk supplies (sharpies, colored pencils, glue sticks…
When I roll in I have helpers take out needed supplies and box tops to “open” counters and when they clean up – they know where they are to be returned. It takes work but only an ART TEACHER can have the Flexibility to ROLL with this situation!! Off to get my carts ready now!!
Do you have any suggestions for the best art cart on wheels when having to teach in the classroom? I am looking for something that will hold 12″ x 18″ paper, caddies / bins, and all the art supplies for the art lesson.
Hi, I am a first year art teacher for a TK-6th grade school and I am interested in the Art on a Cart Curriculum. I would love to have access to these lessons and curriculum and want to know how/when I can get this. Please and Thank you!
Hi Marissa! Sparklers’ Club enrollment is currently closed, but our next enrollment period will be from August 7-13, 2025. To get on the Sparklers’ Club waitlist click here: https://deepspacesparkle.lpages.co/the-sparklers-club-waitlist/. We can’t wait to welcome you into The Sparkler’ Club.